Quick Trick: Cutting multiple pieces of identical sized leather. (Trick 1)


Here’s a quick tip that may appear complicated with the number of photos, but once you do this a few times, it will save you hours of time, literally. 

At the bottom of this posting I’ve added a list of the “tools” used in these steps.  I’ve made it a point to use items anyone can grab inexpensively, even off of Amazon.  None of the tools or items used in this process are exclusively leather tools.  They can be everyday items. 

By the length of this post, it may appear the process is complicated, but believe me, once you do all of these steps a few times, it will all click and you’ll be amazed at how quickly you can replicate identical cuts, over and over.

(A note to the lefties in the room –  If you happen to be left handed, remember to flip everything around to the other side, since all of the example photos are done with the right handed user in mind.)

The trick or tip:


Let’s say you need to cut out 3, 4, 5 or even 50 leather pieces and they all must be identical in size.  Maybe wallet pocket pieces, for example.  For this post, I need X number of pieces that are 2” wide.  The process can be repeated for length as well.  But for this post, we’ll only be cutting for width, 2”.

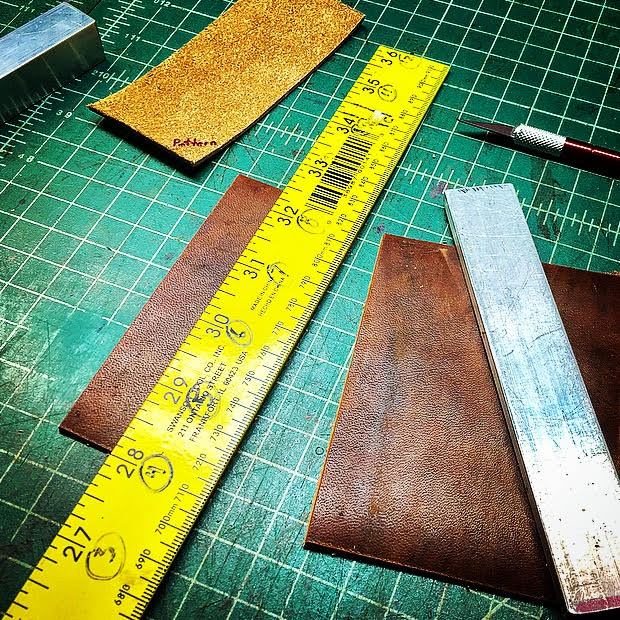
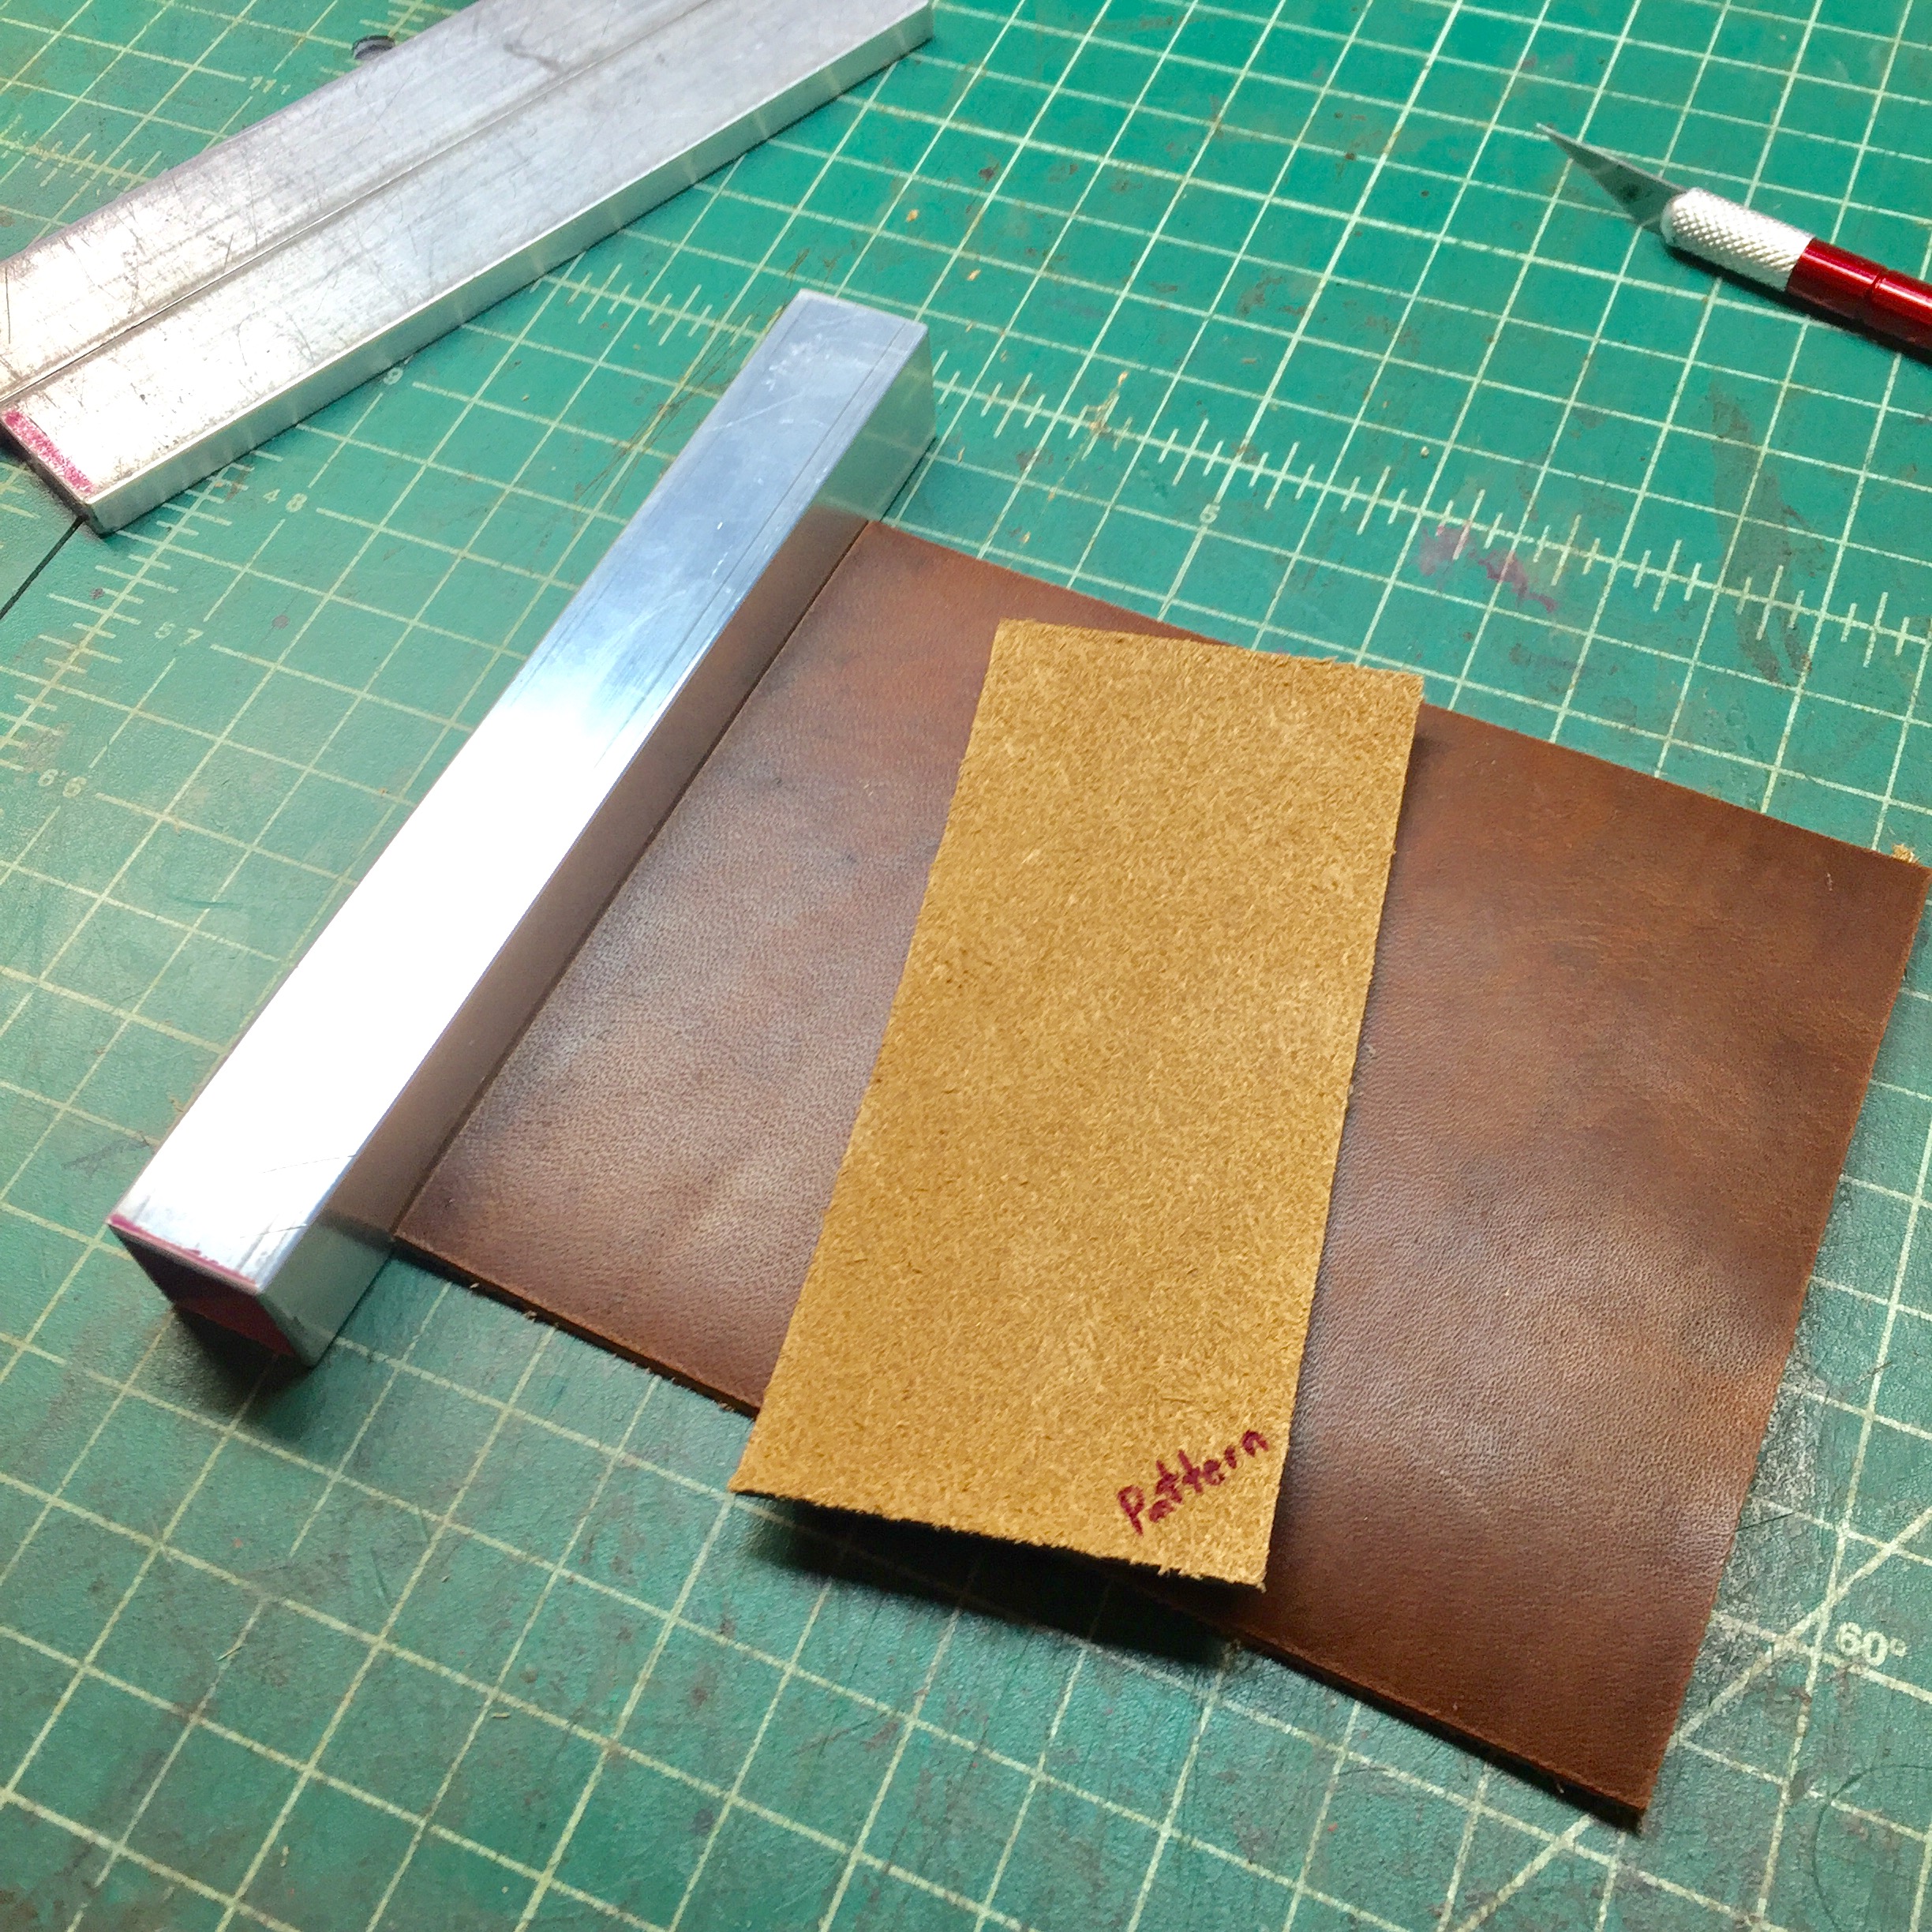
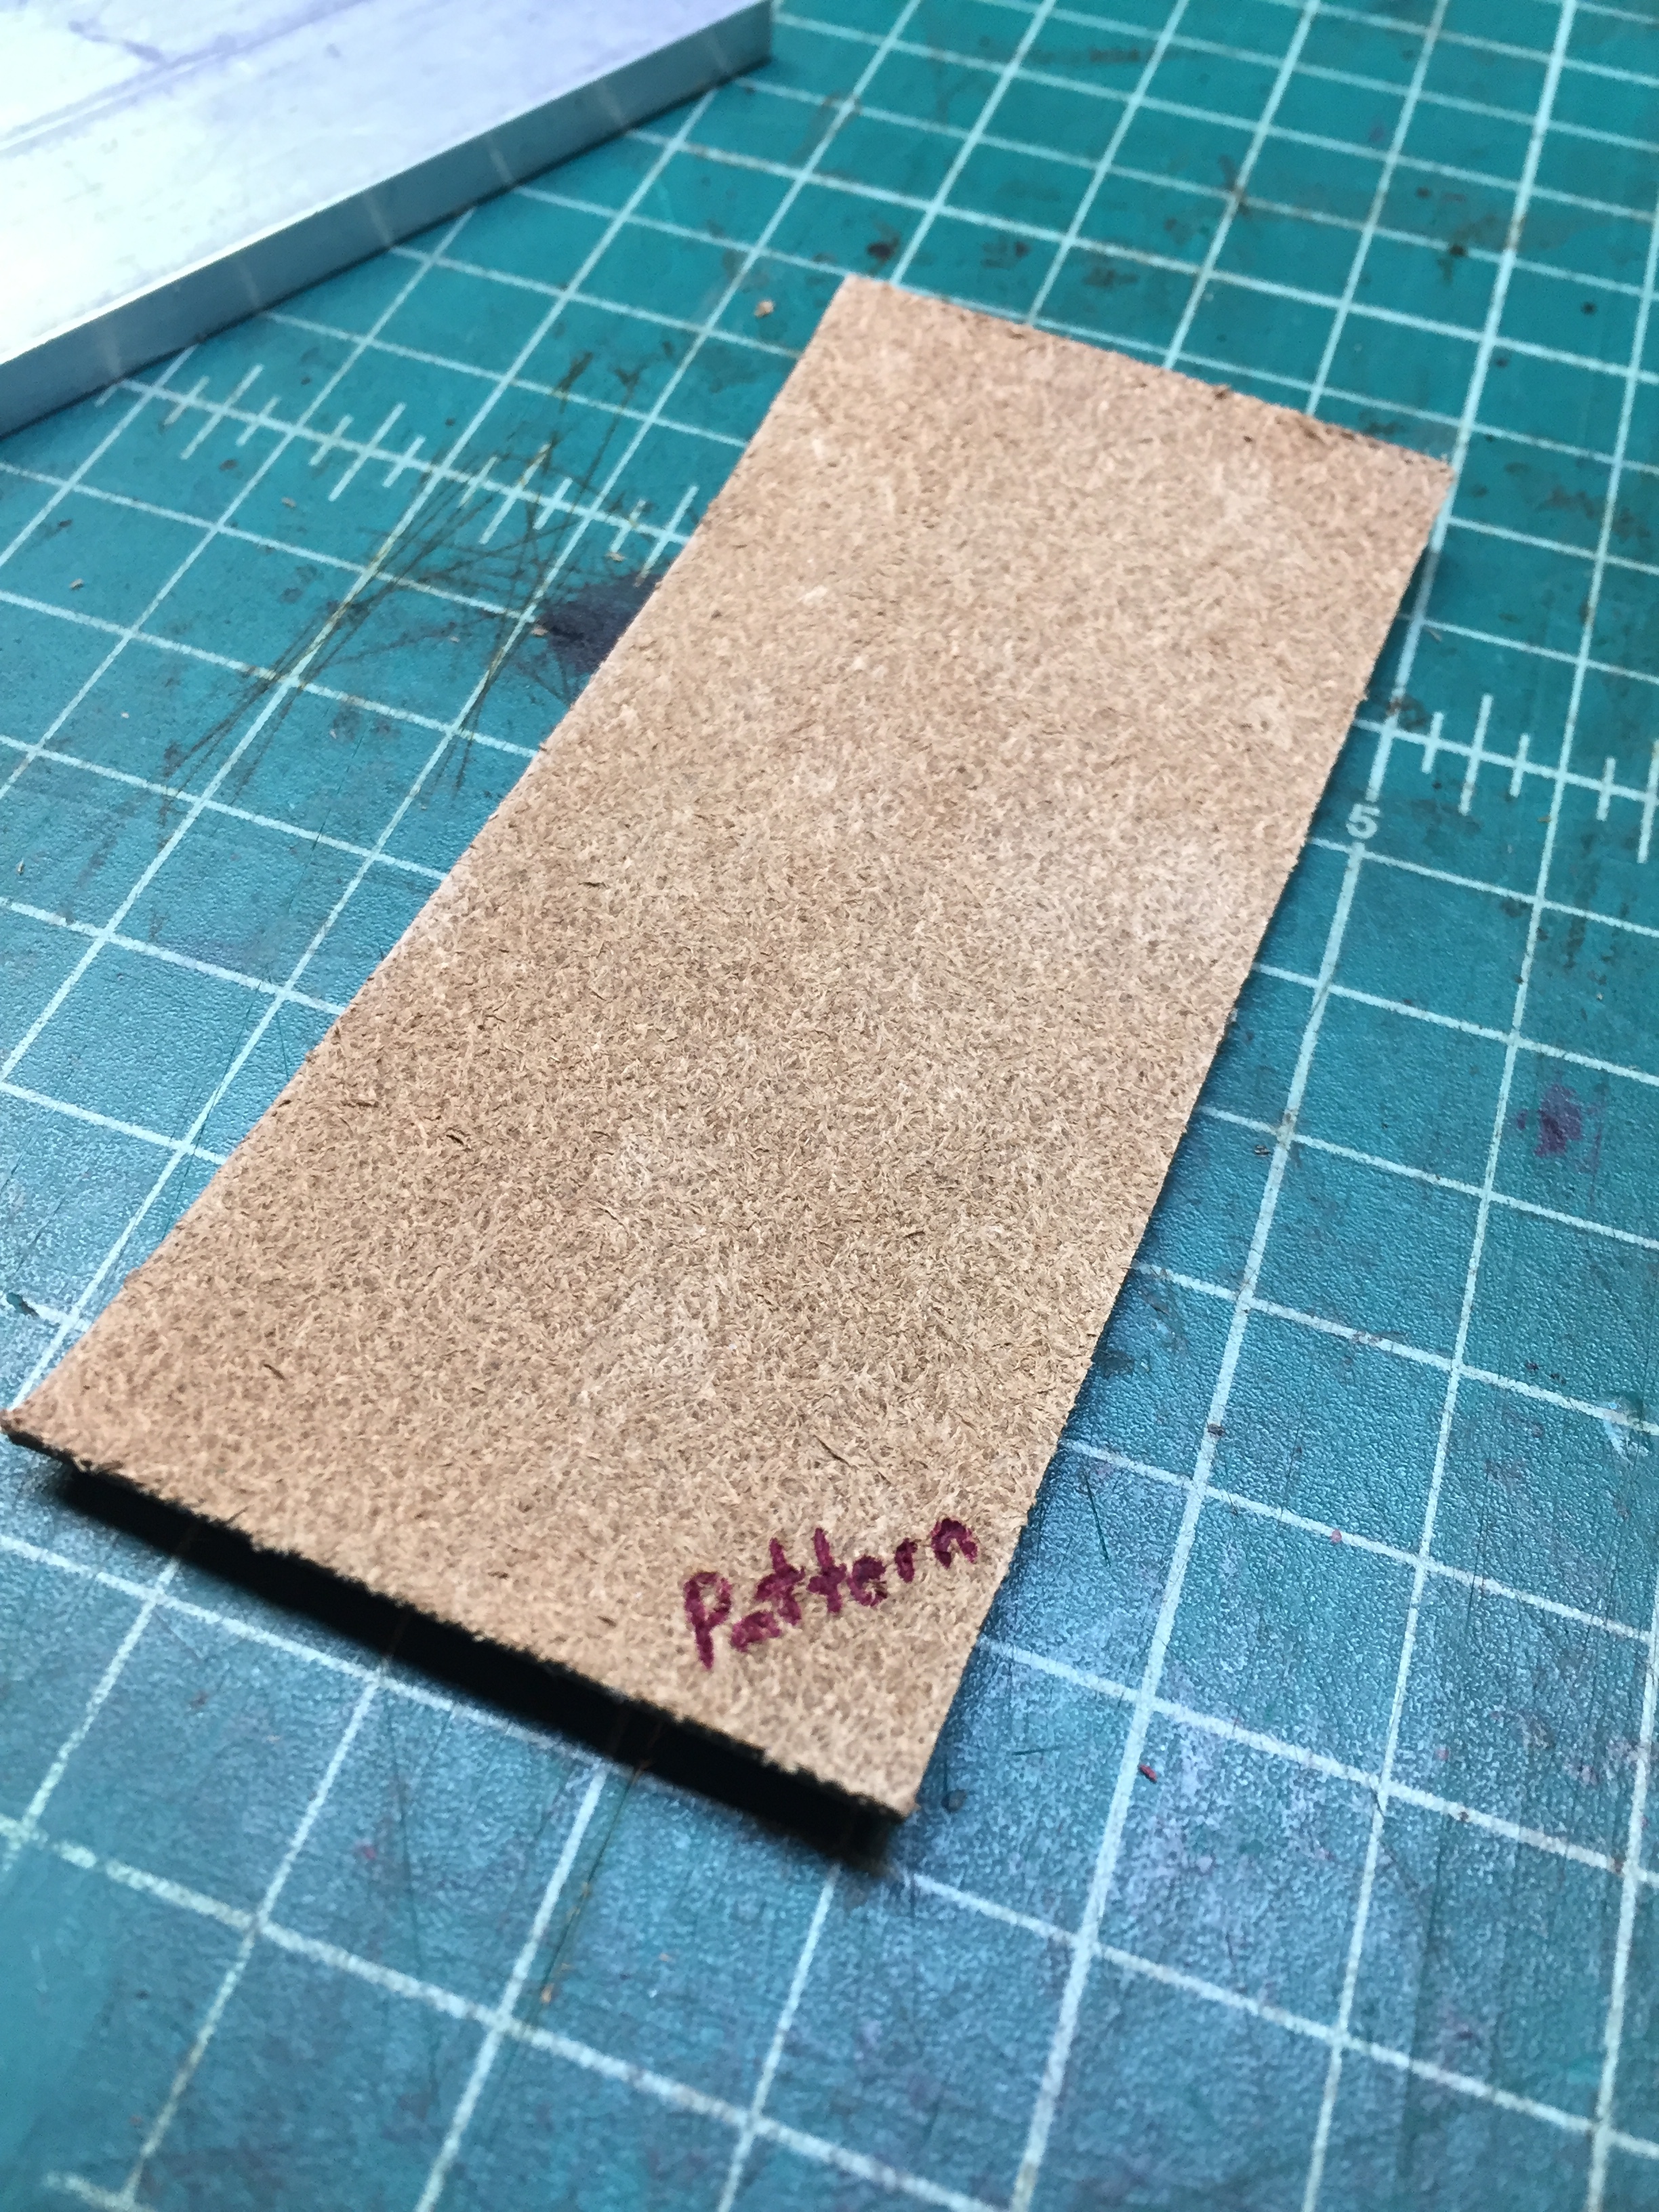
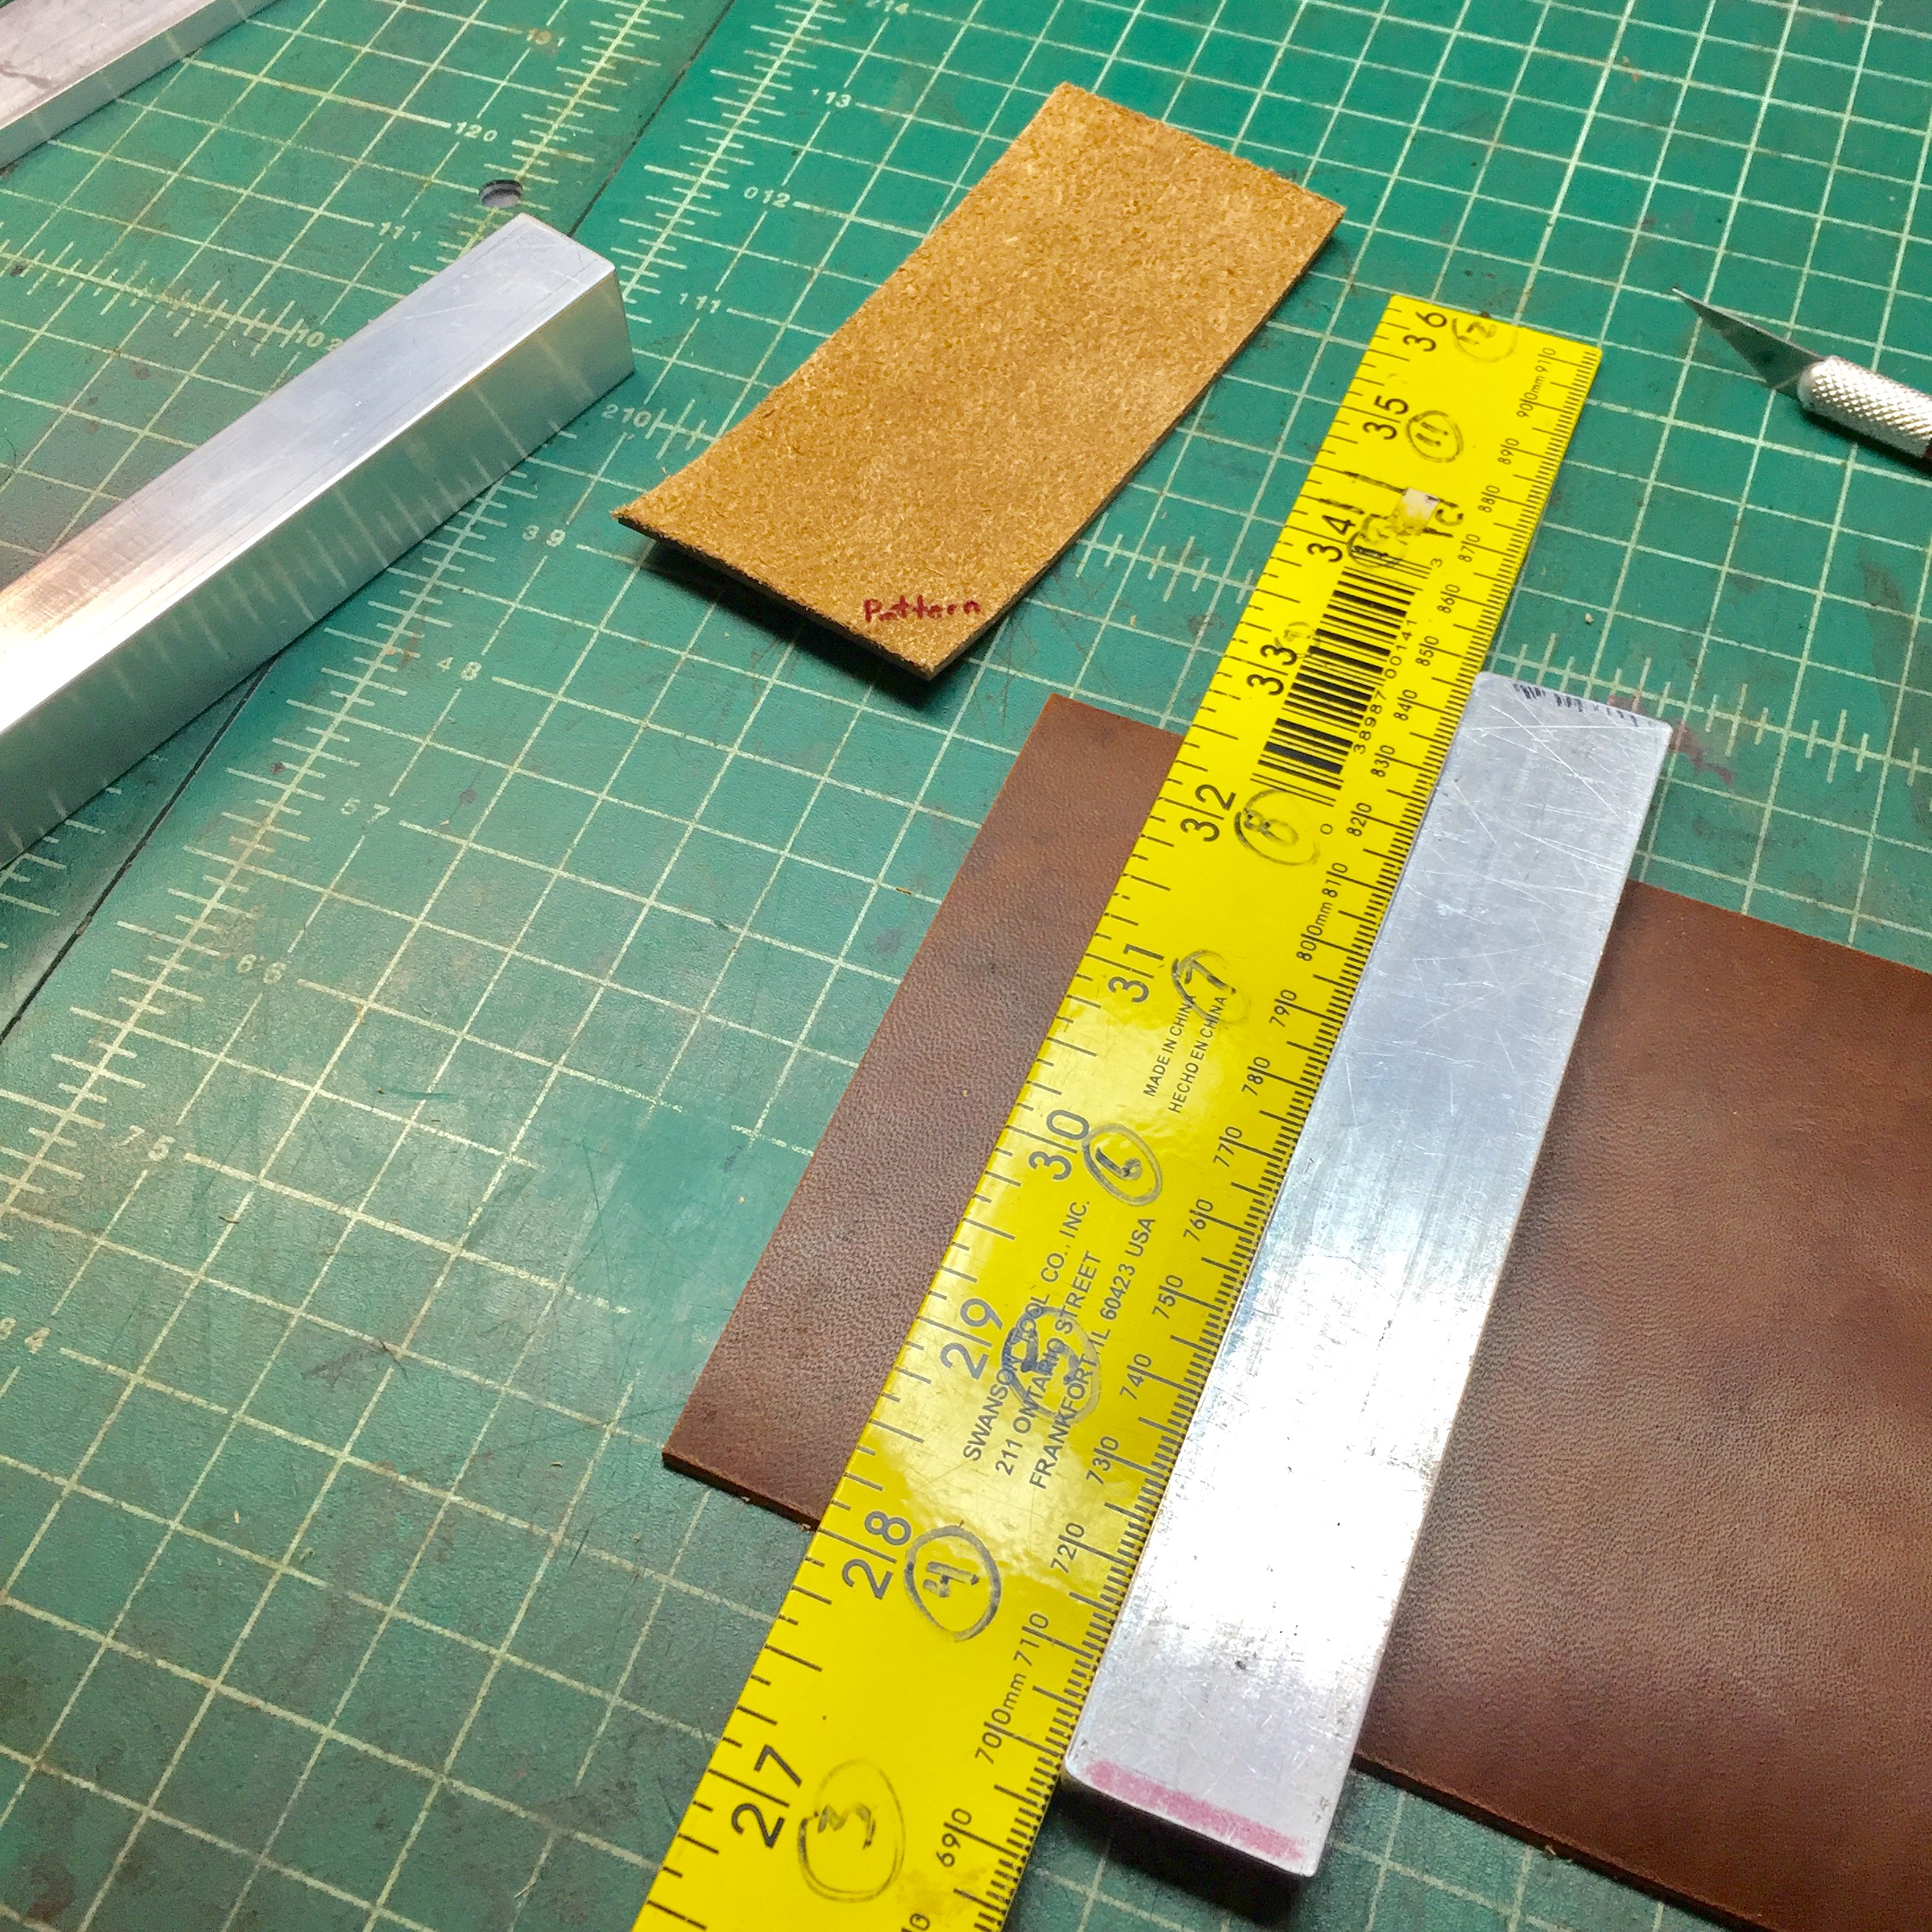
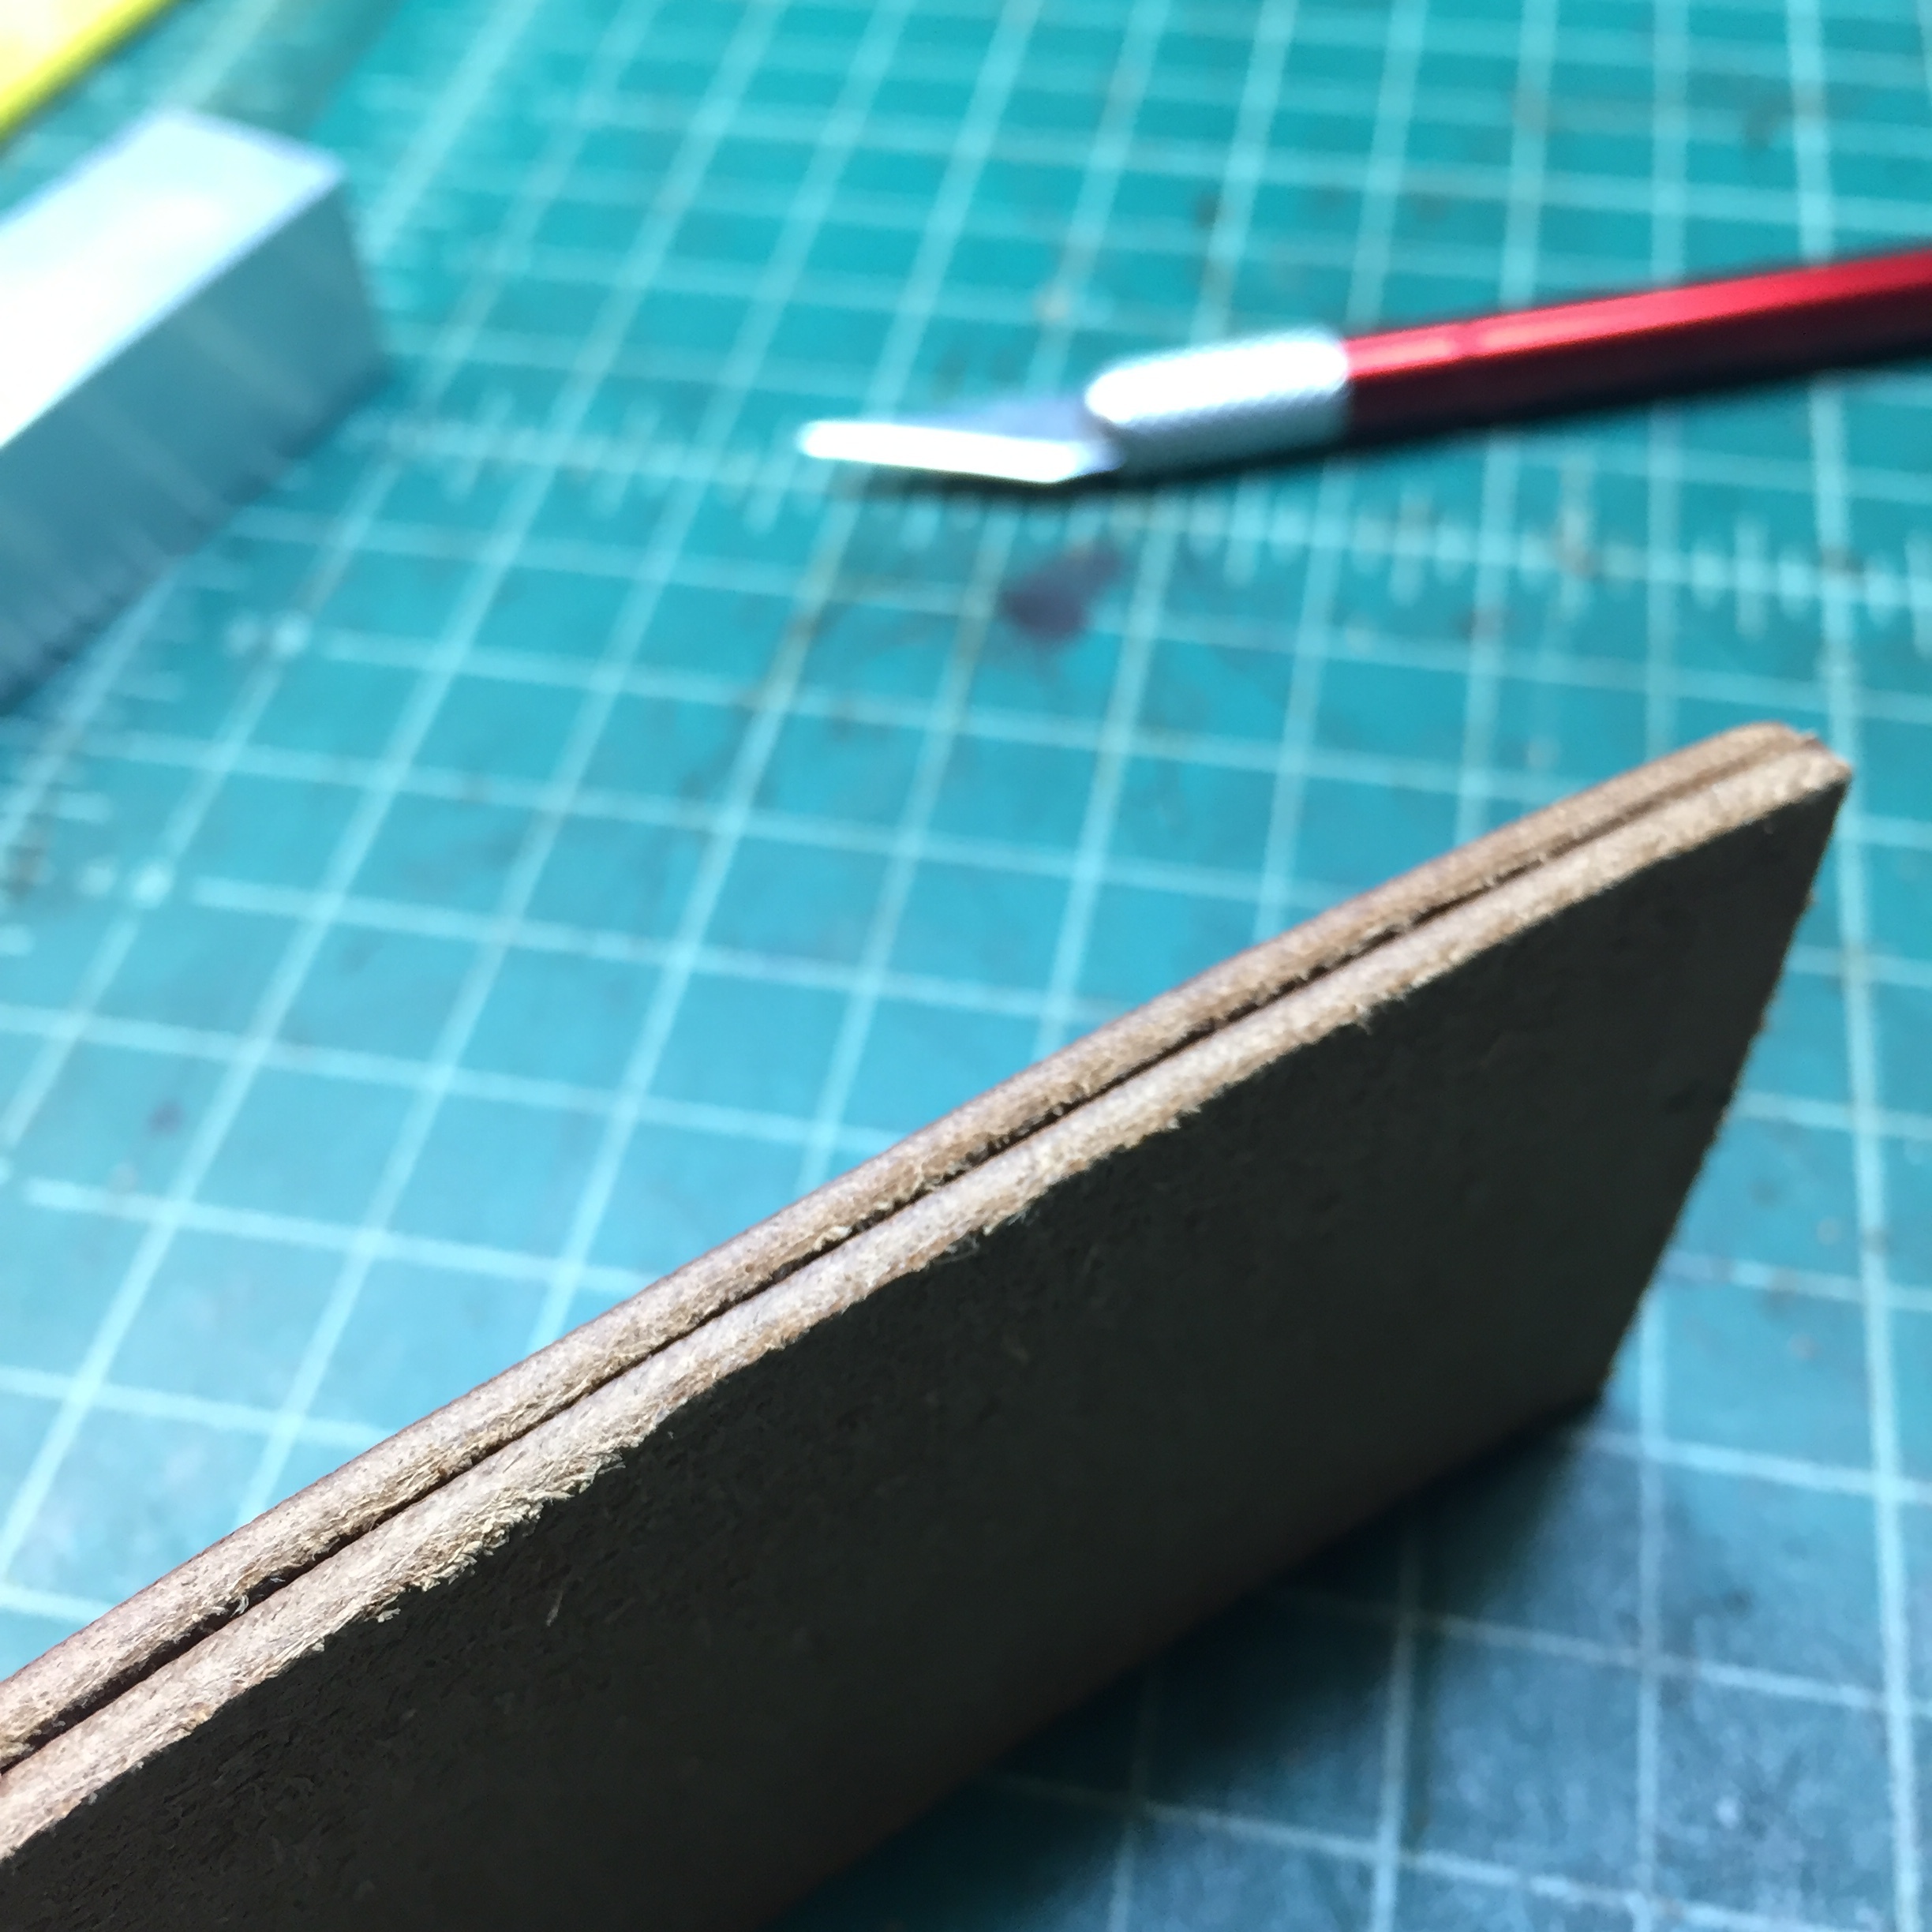
The first step is to make your first 2” piece, and make it is as precise as possible.  This first piece will become your “pattern” (which you’ll see in one photo that we even write the word “pattern” [or “pat”] on the rear in an inconspicuous corner).  This is the piece that will be used repeatedly for making all the others. 

It will take more time to make your pattern piece than it will to make 10 – 50 exact copies once you master these steps.

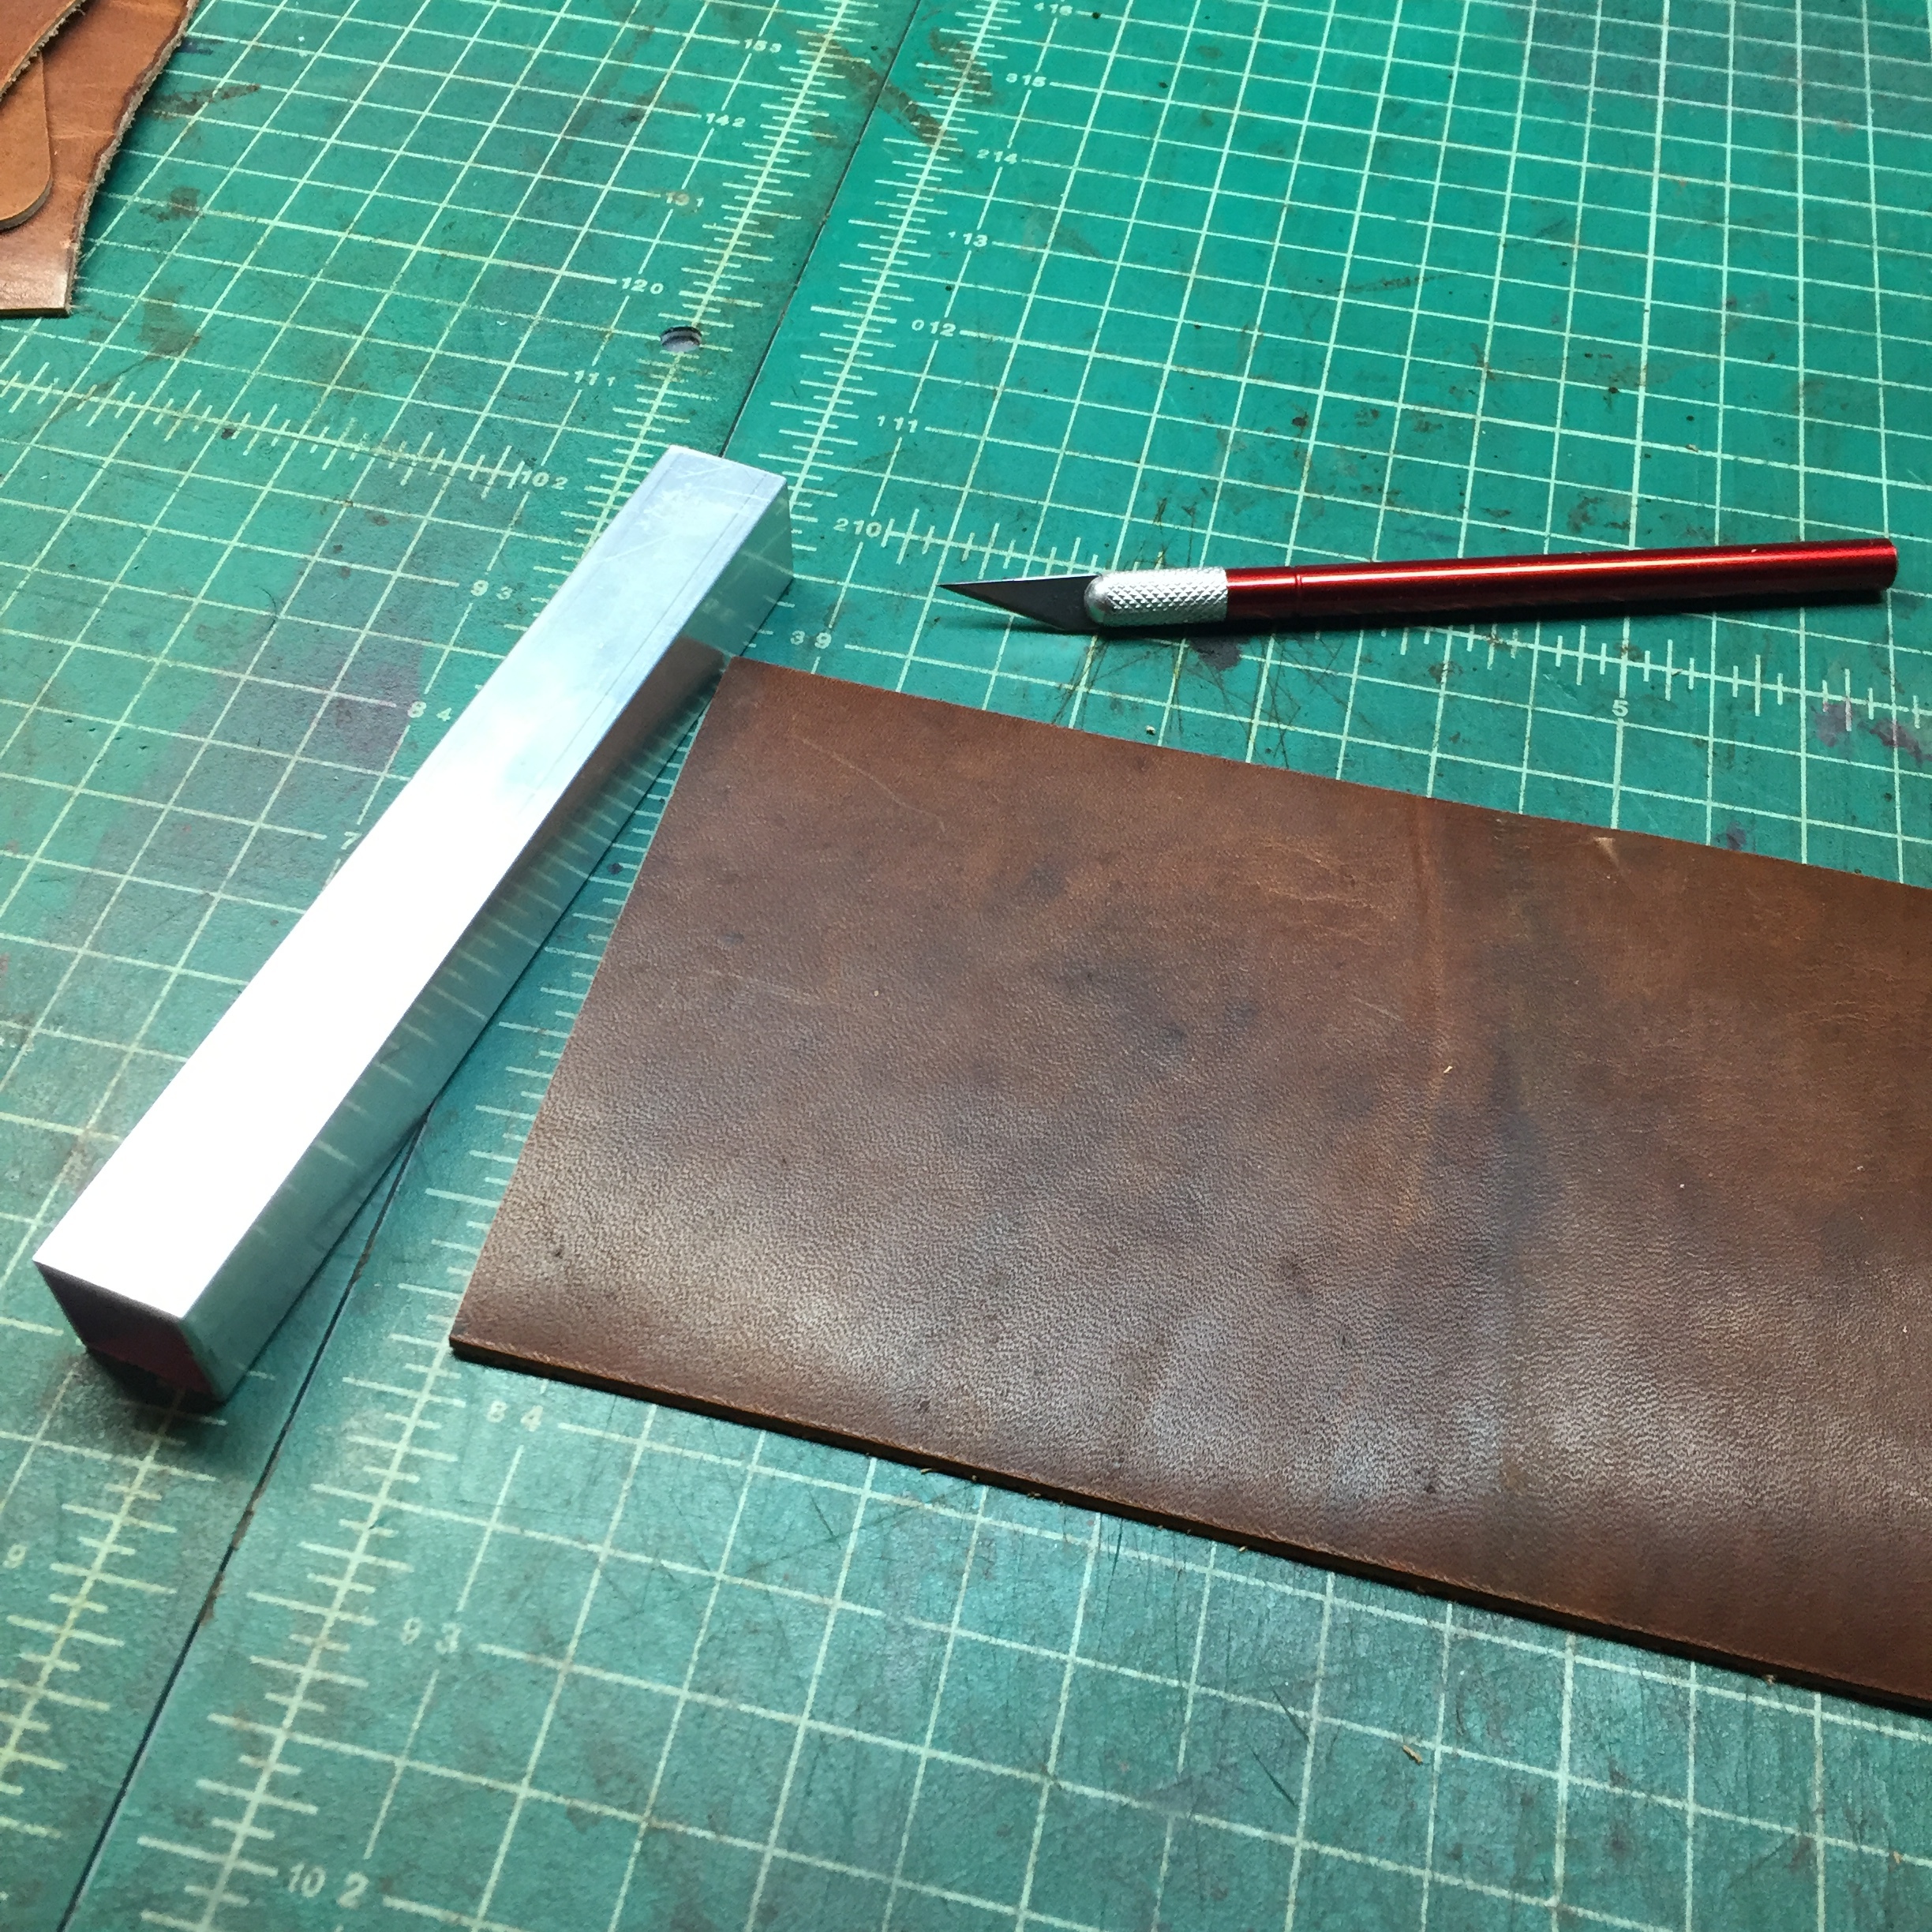
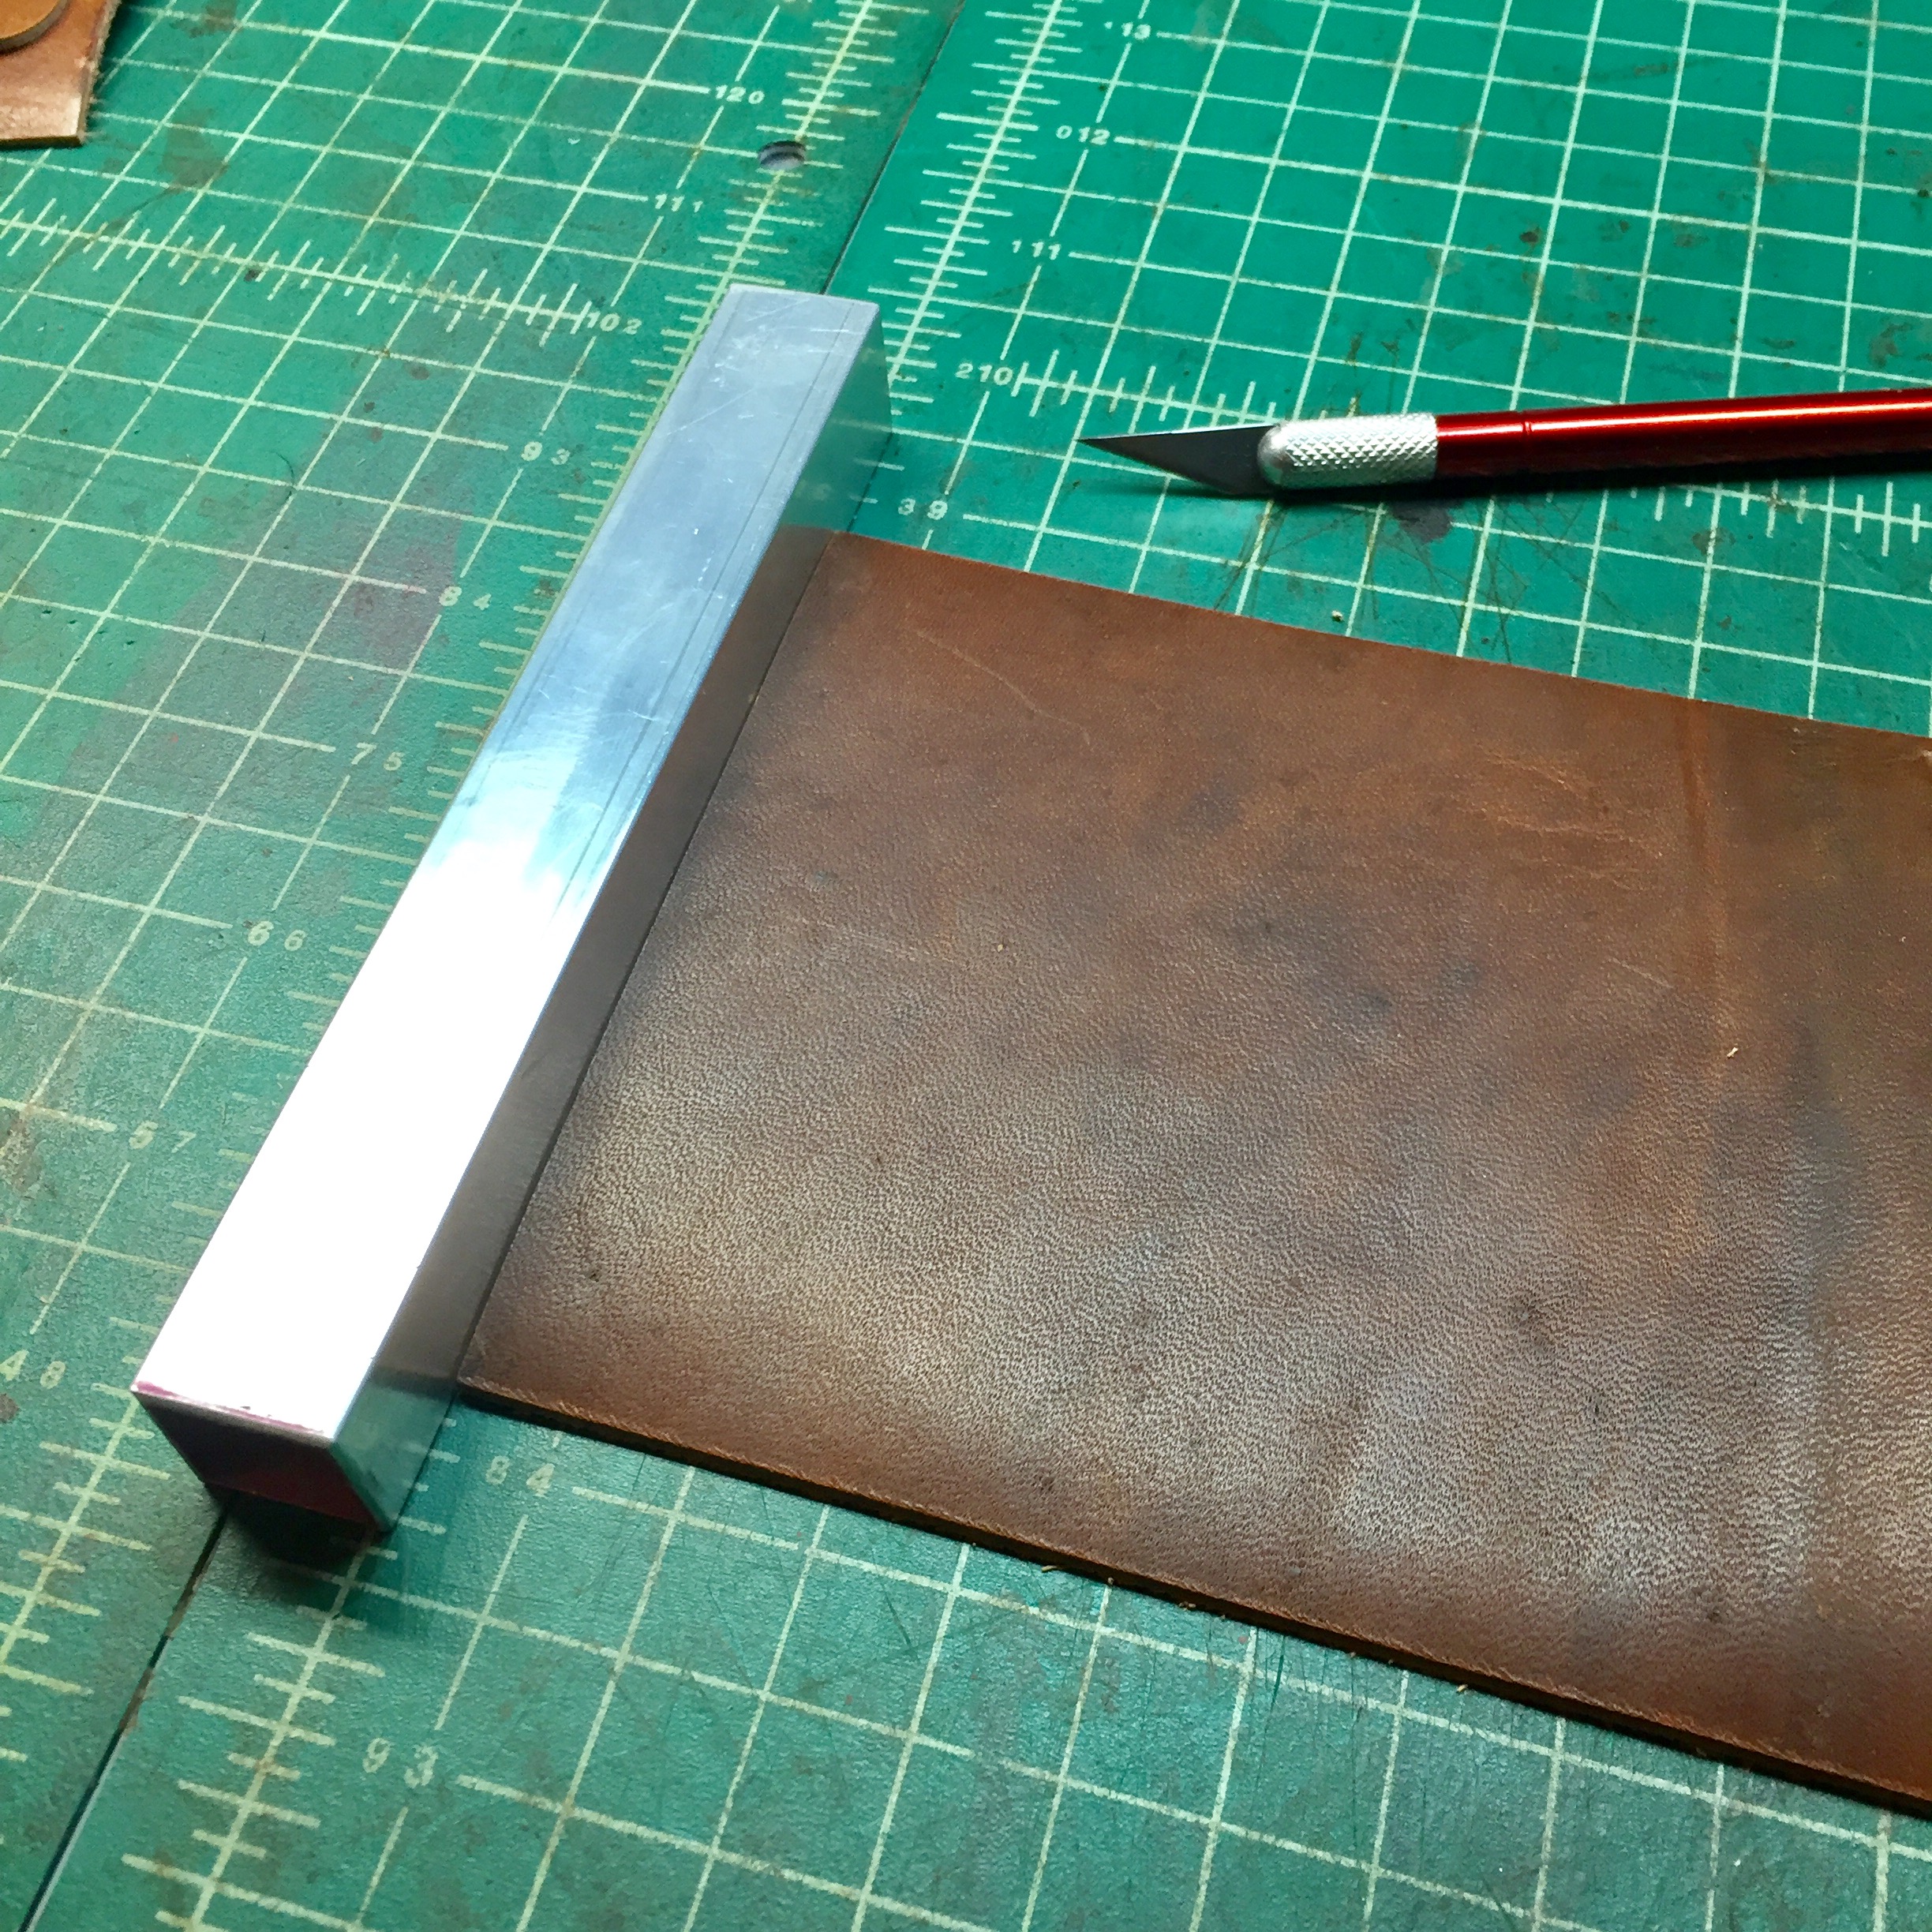
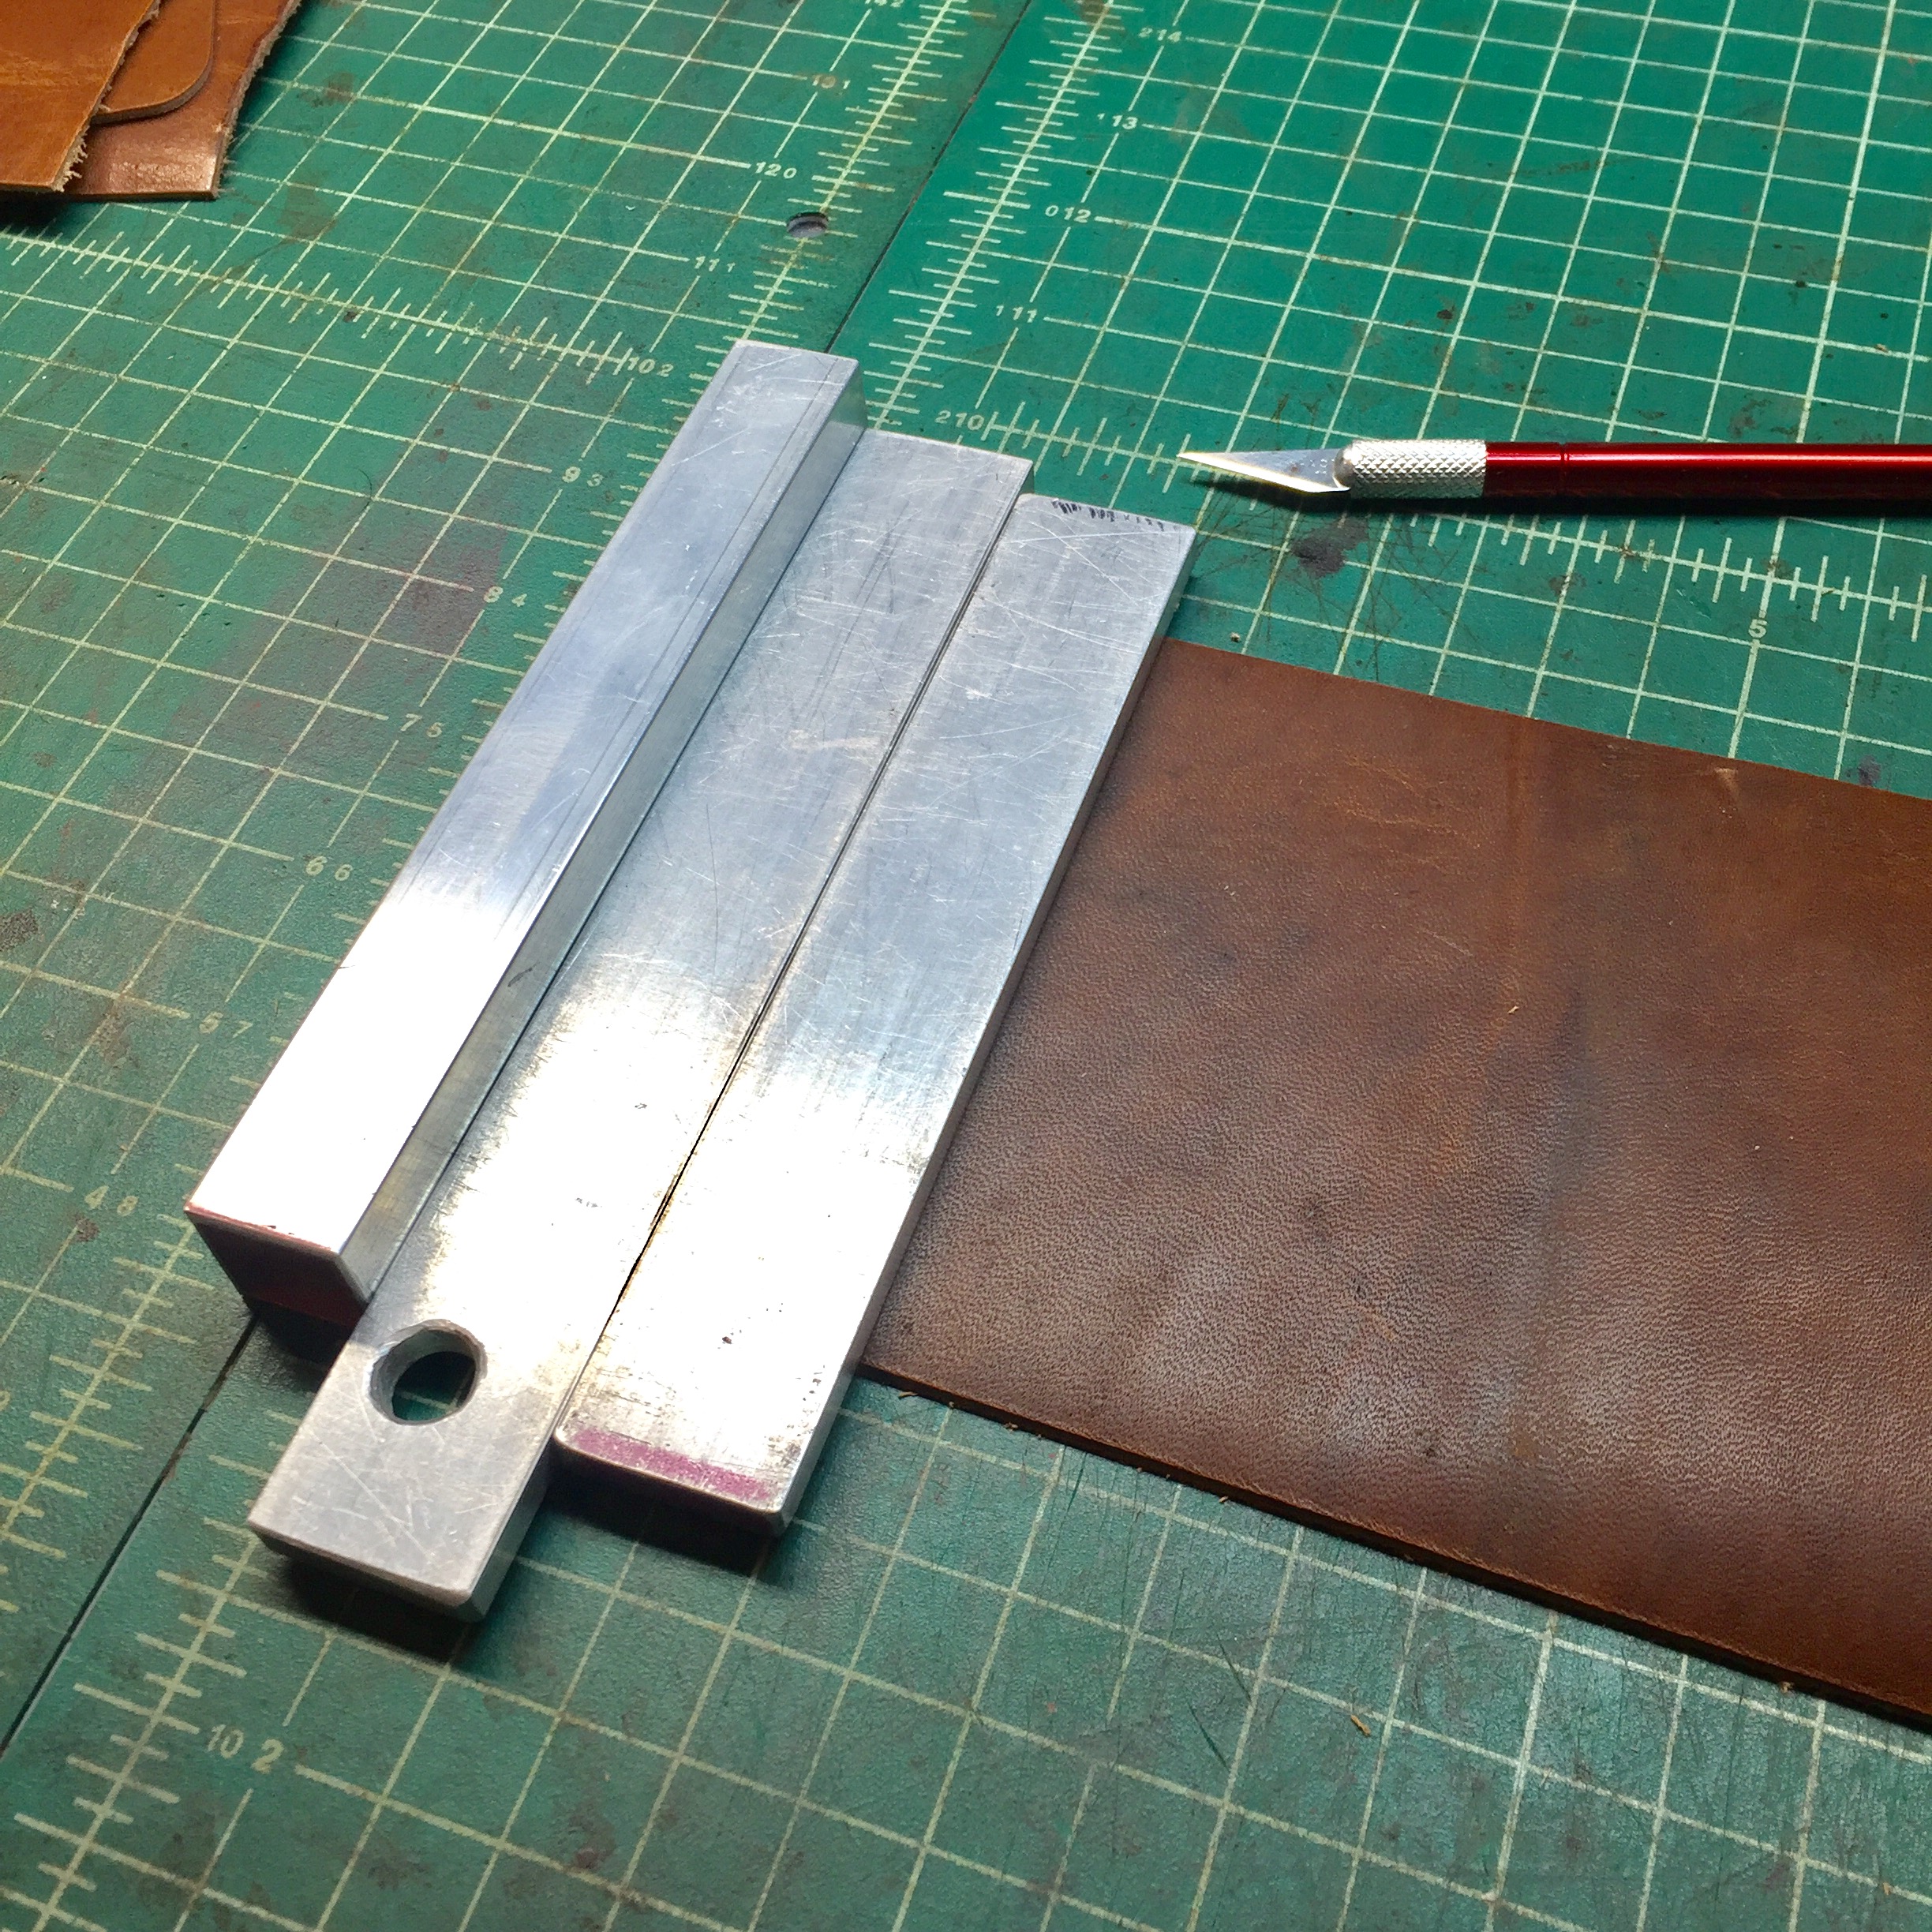
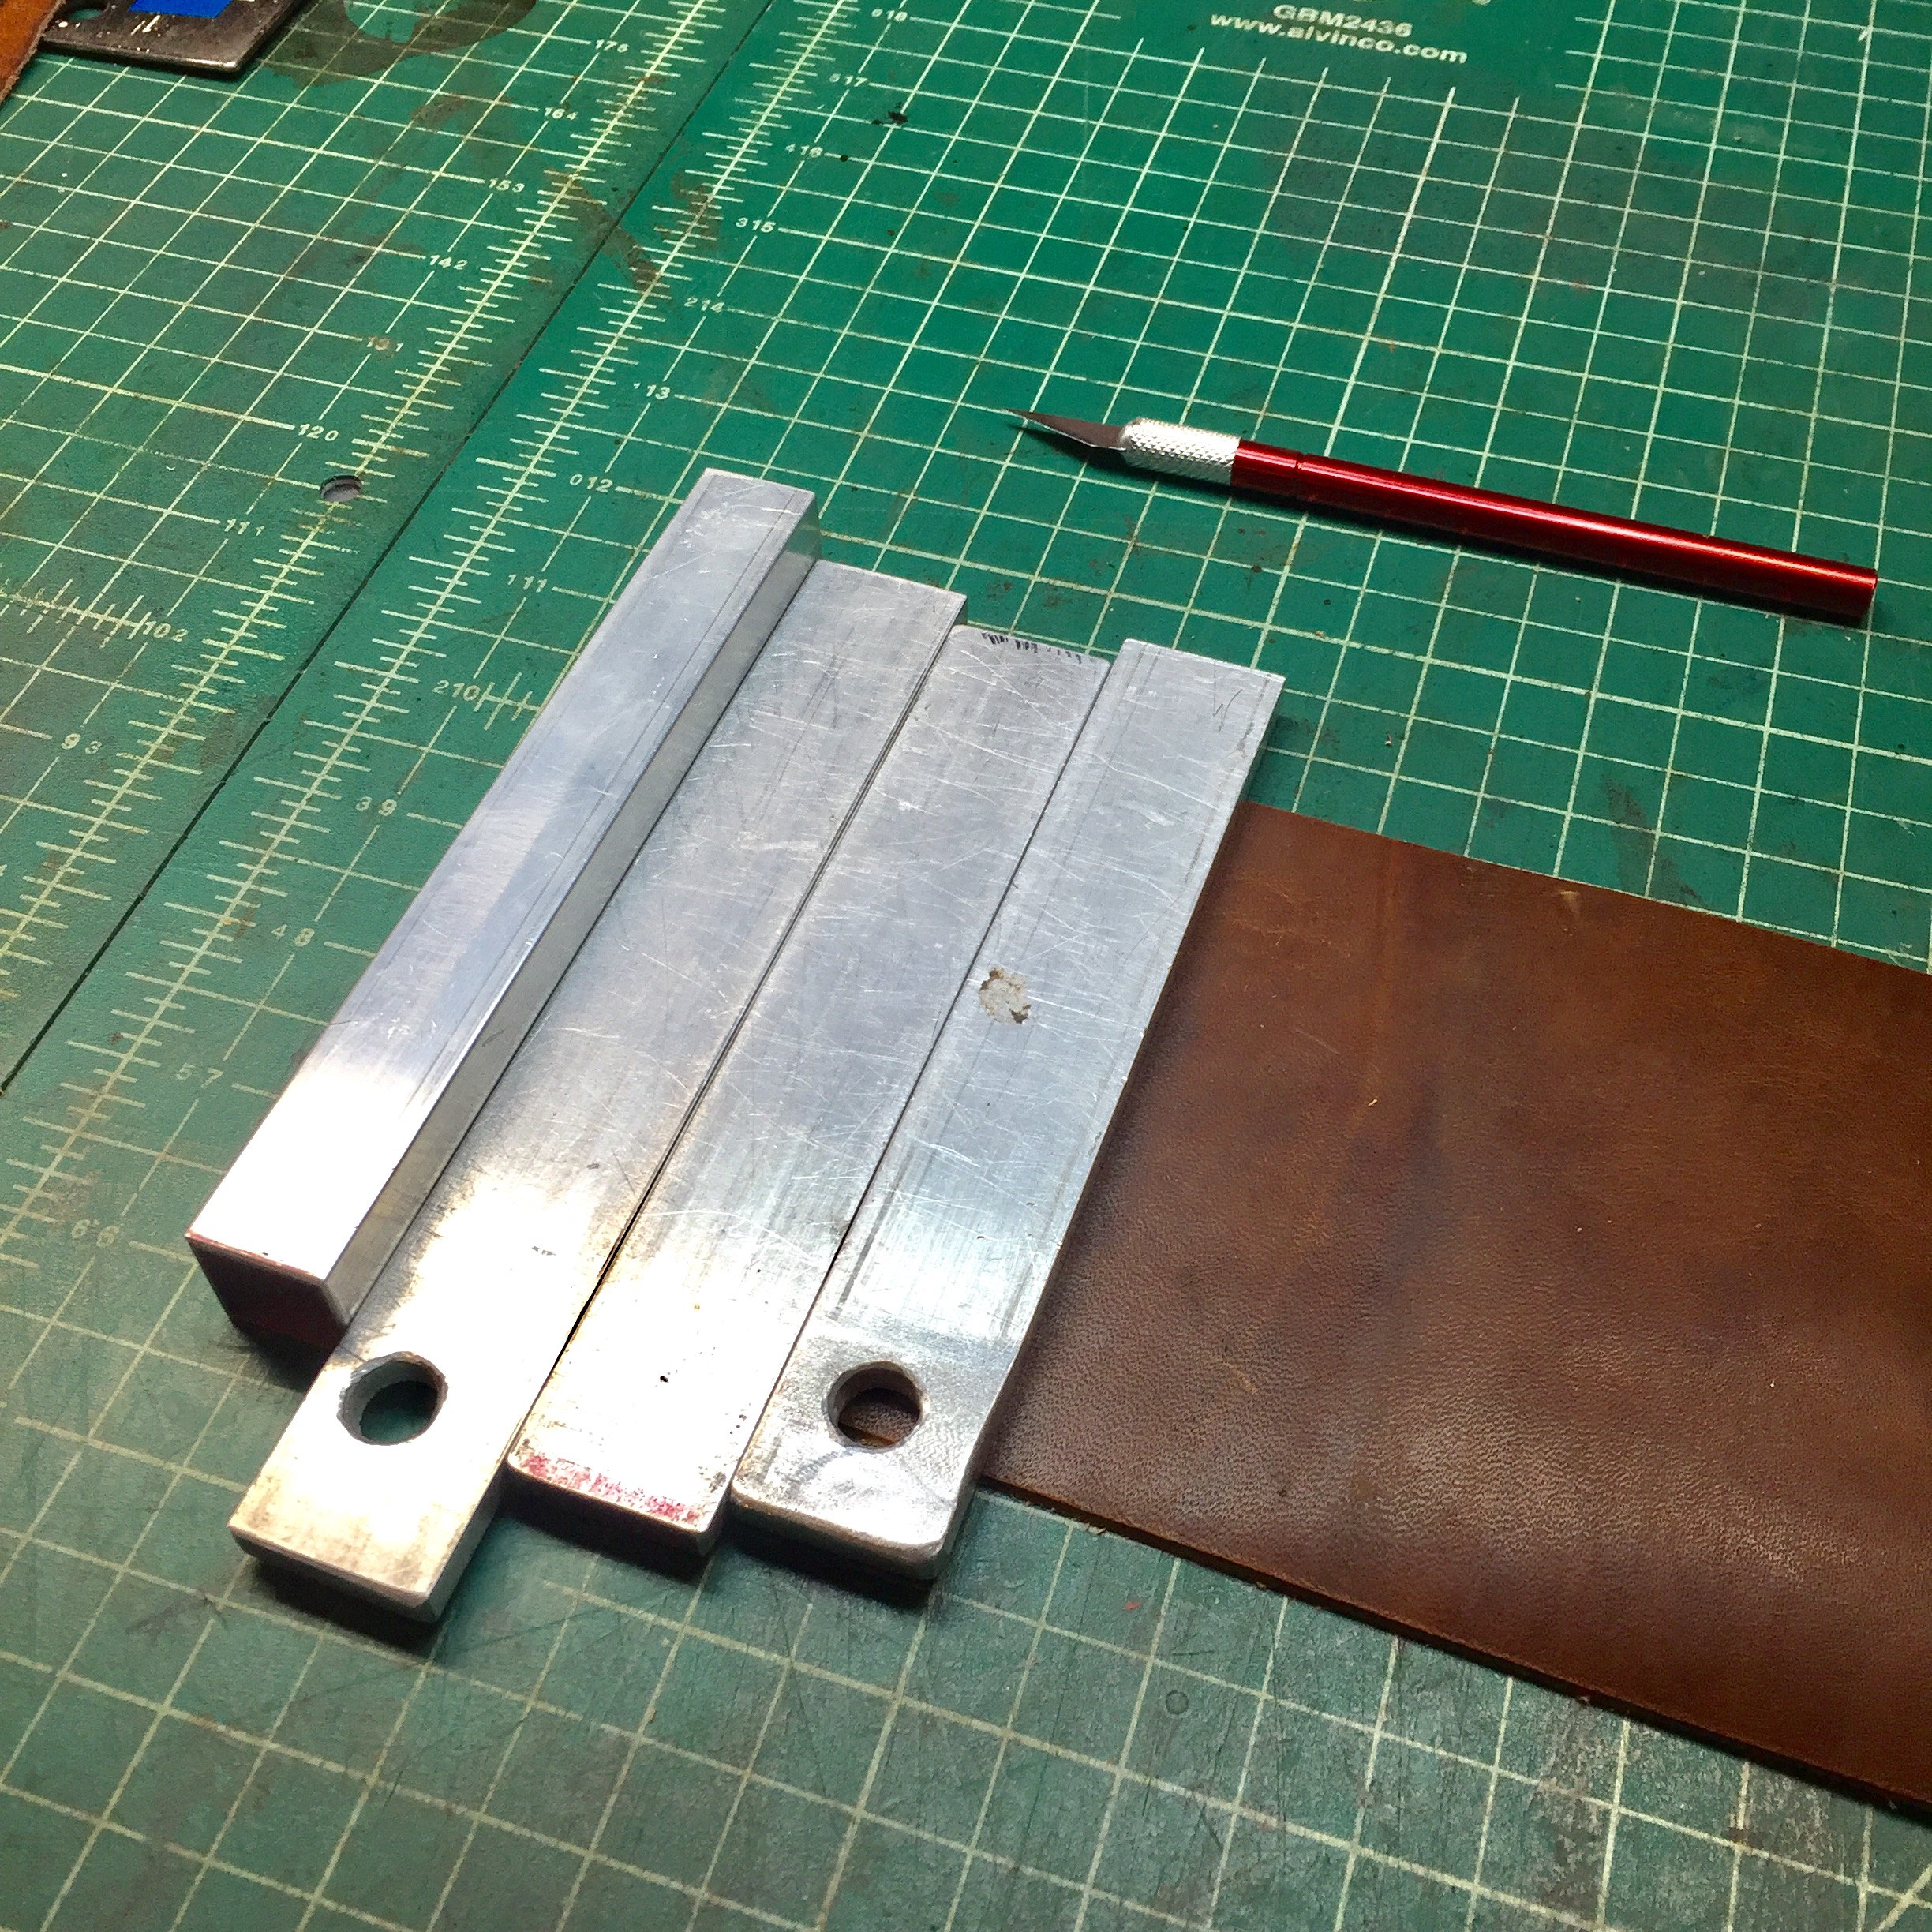
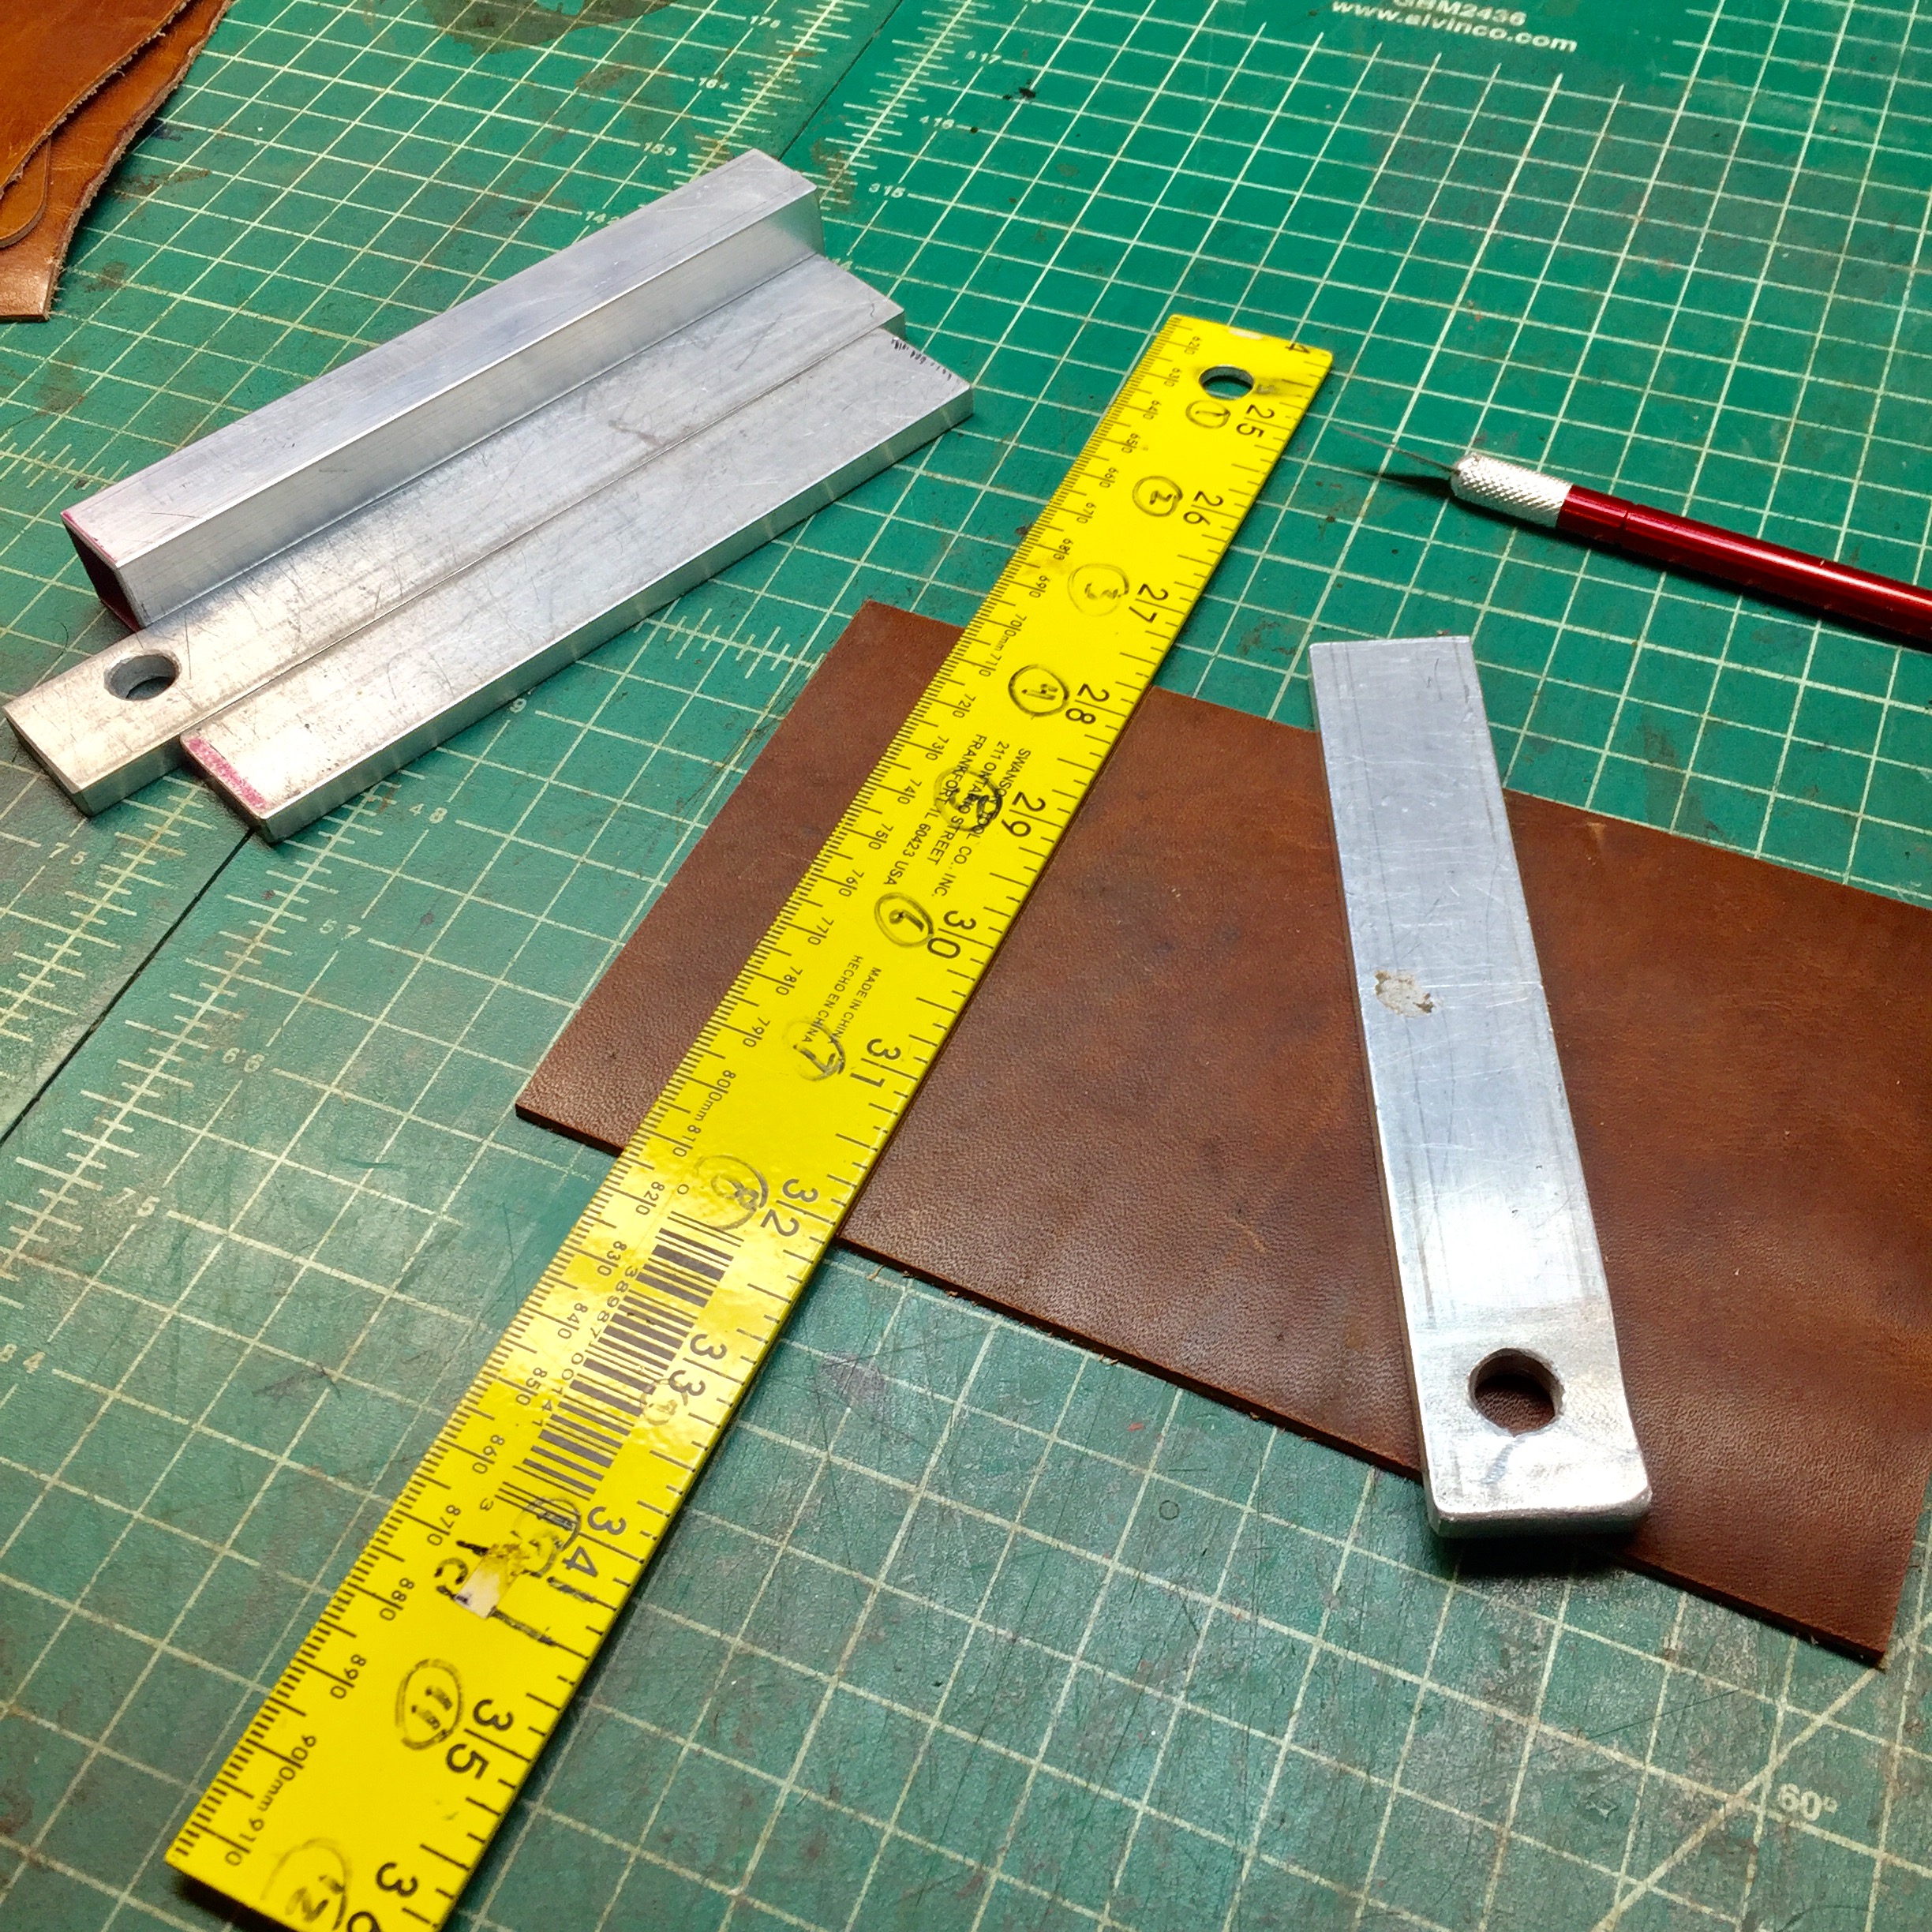
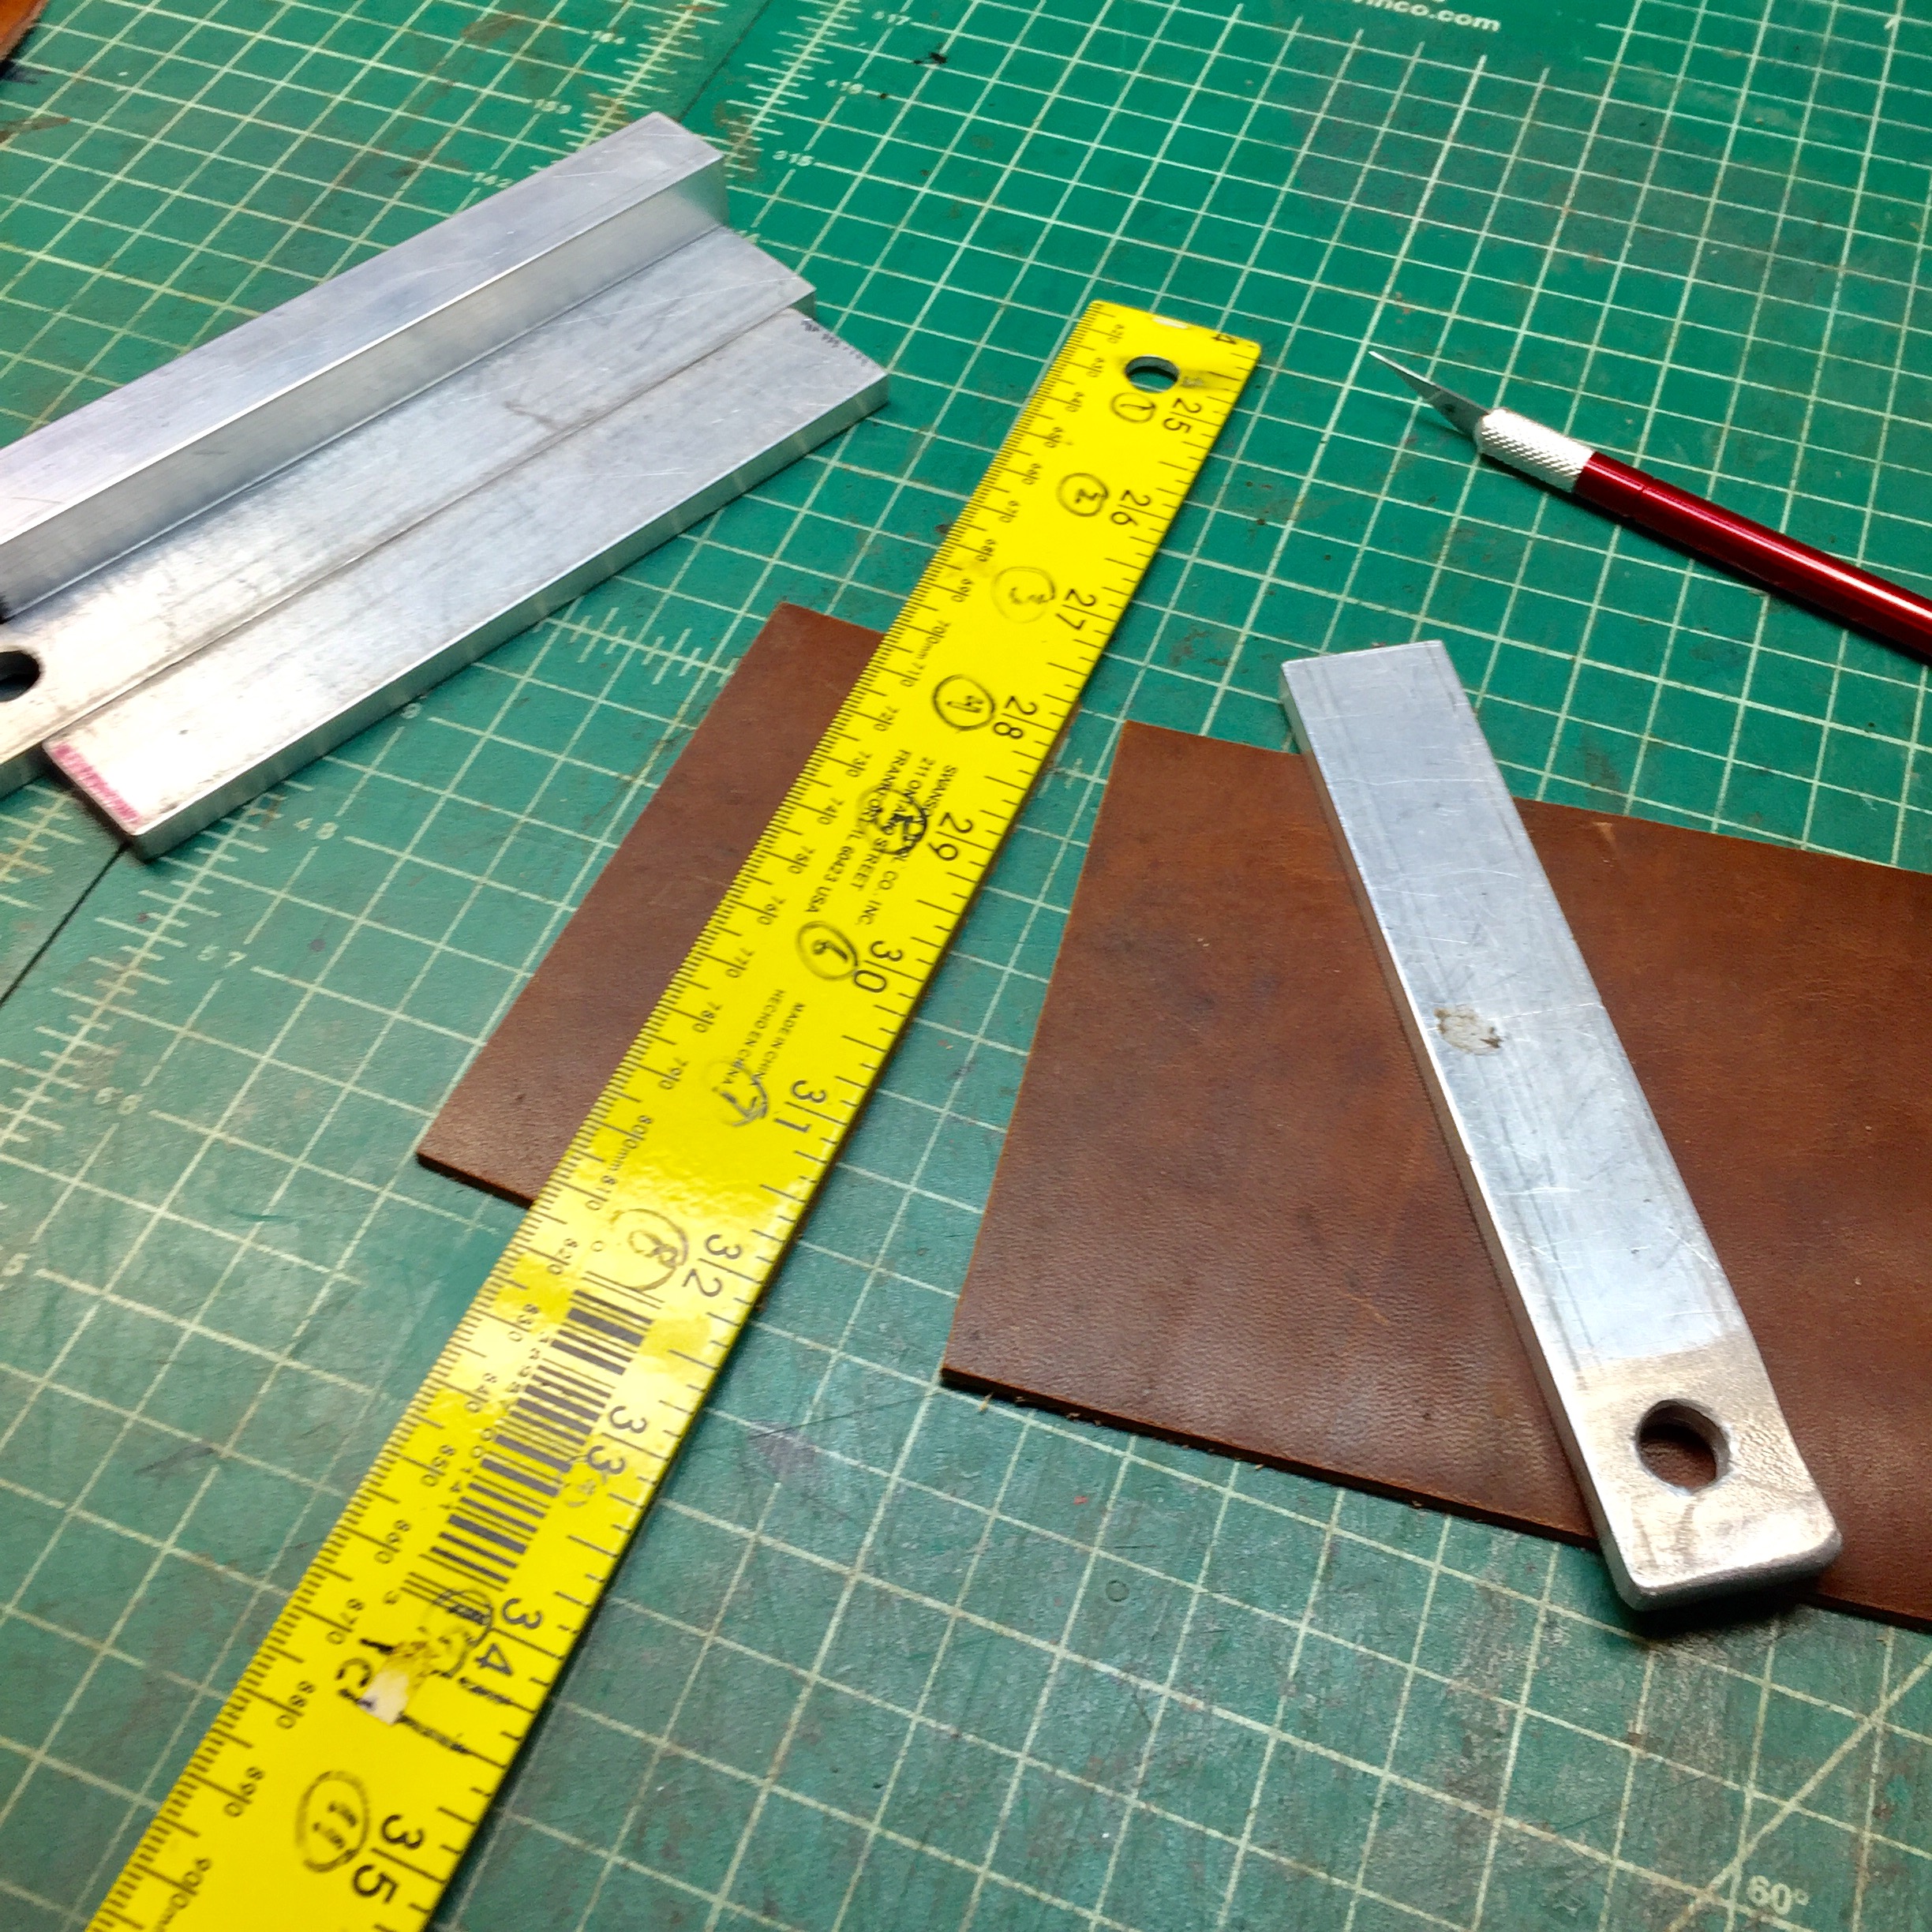
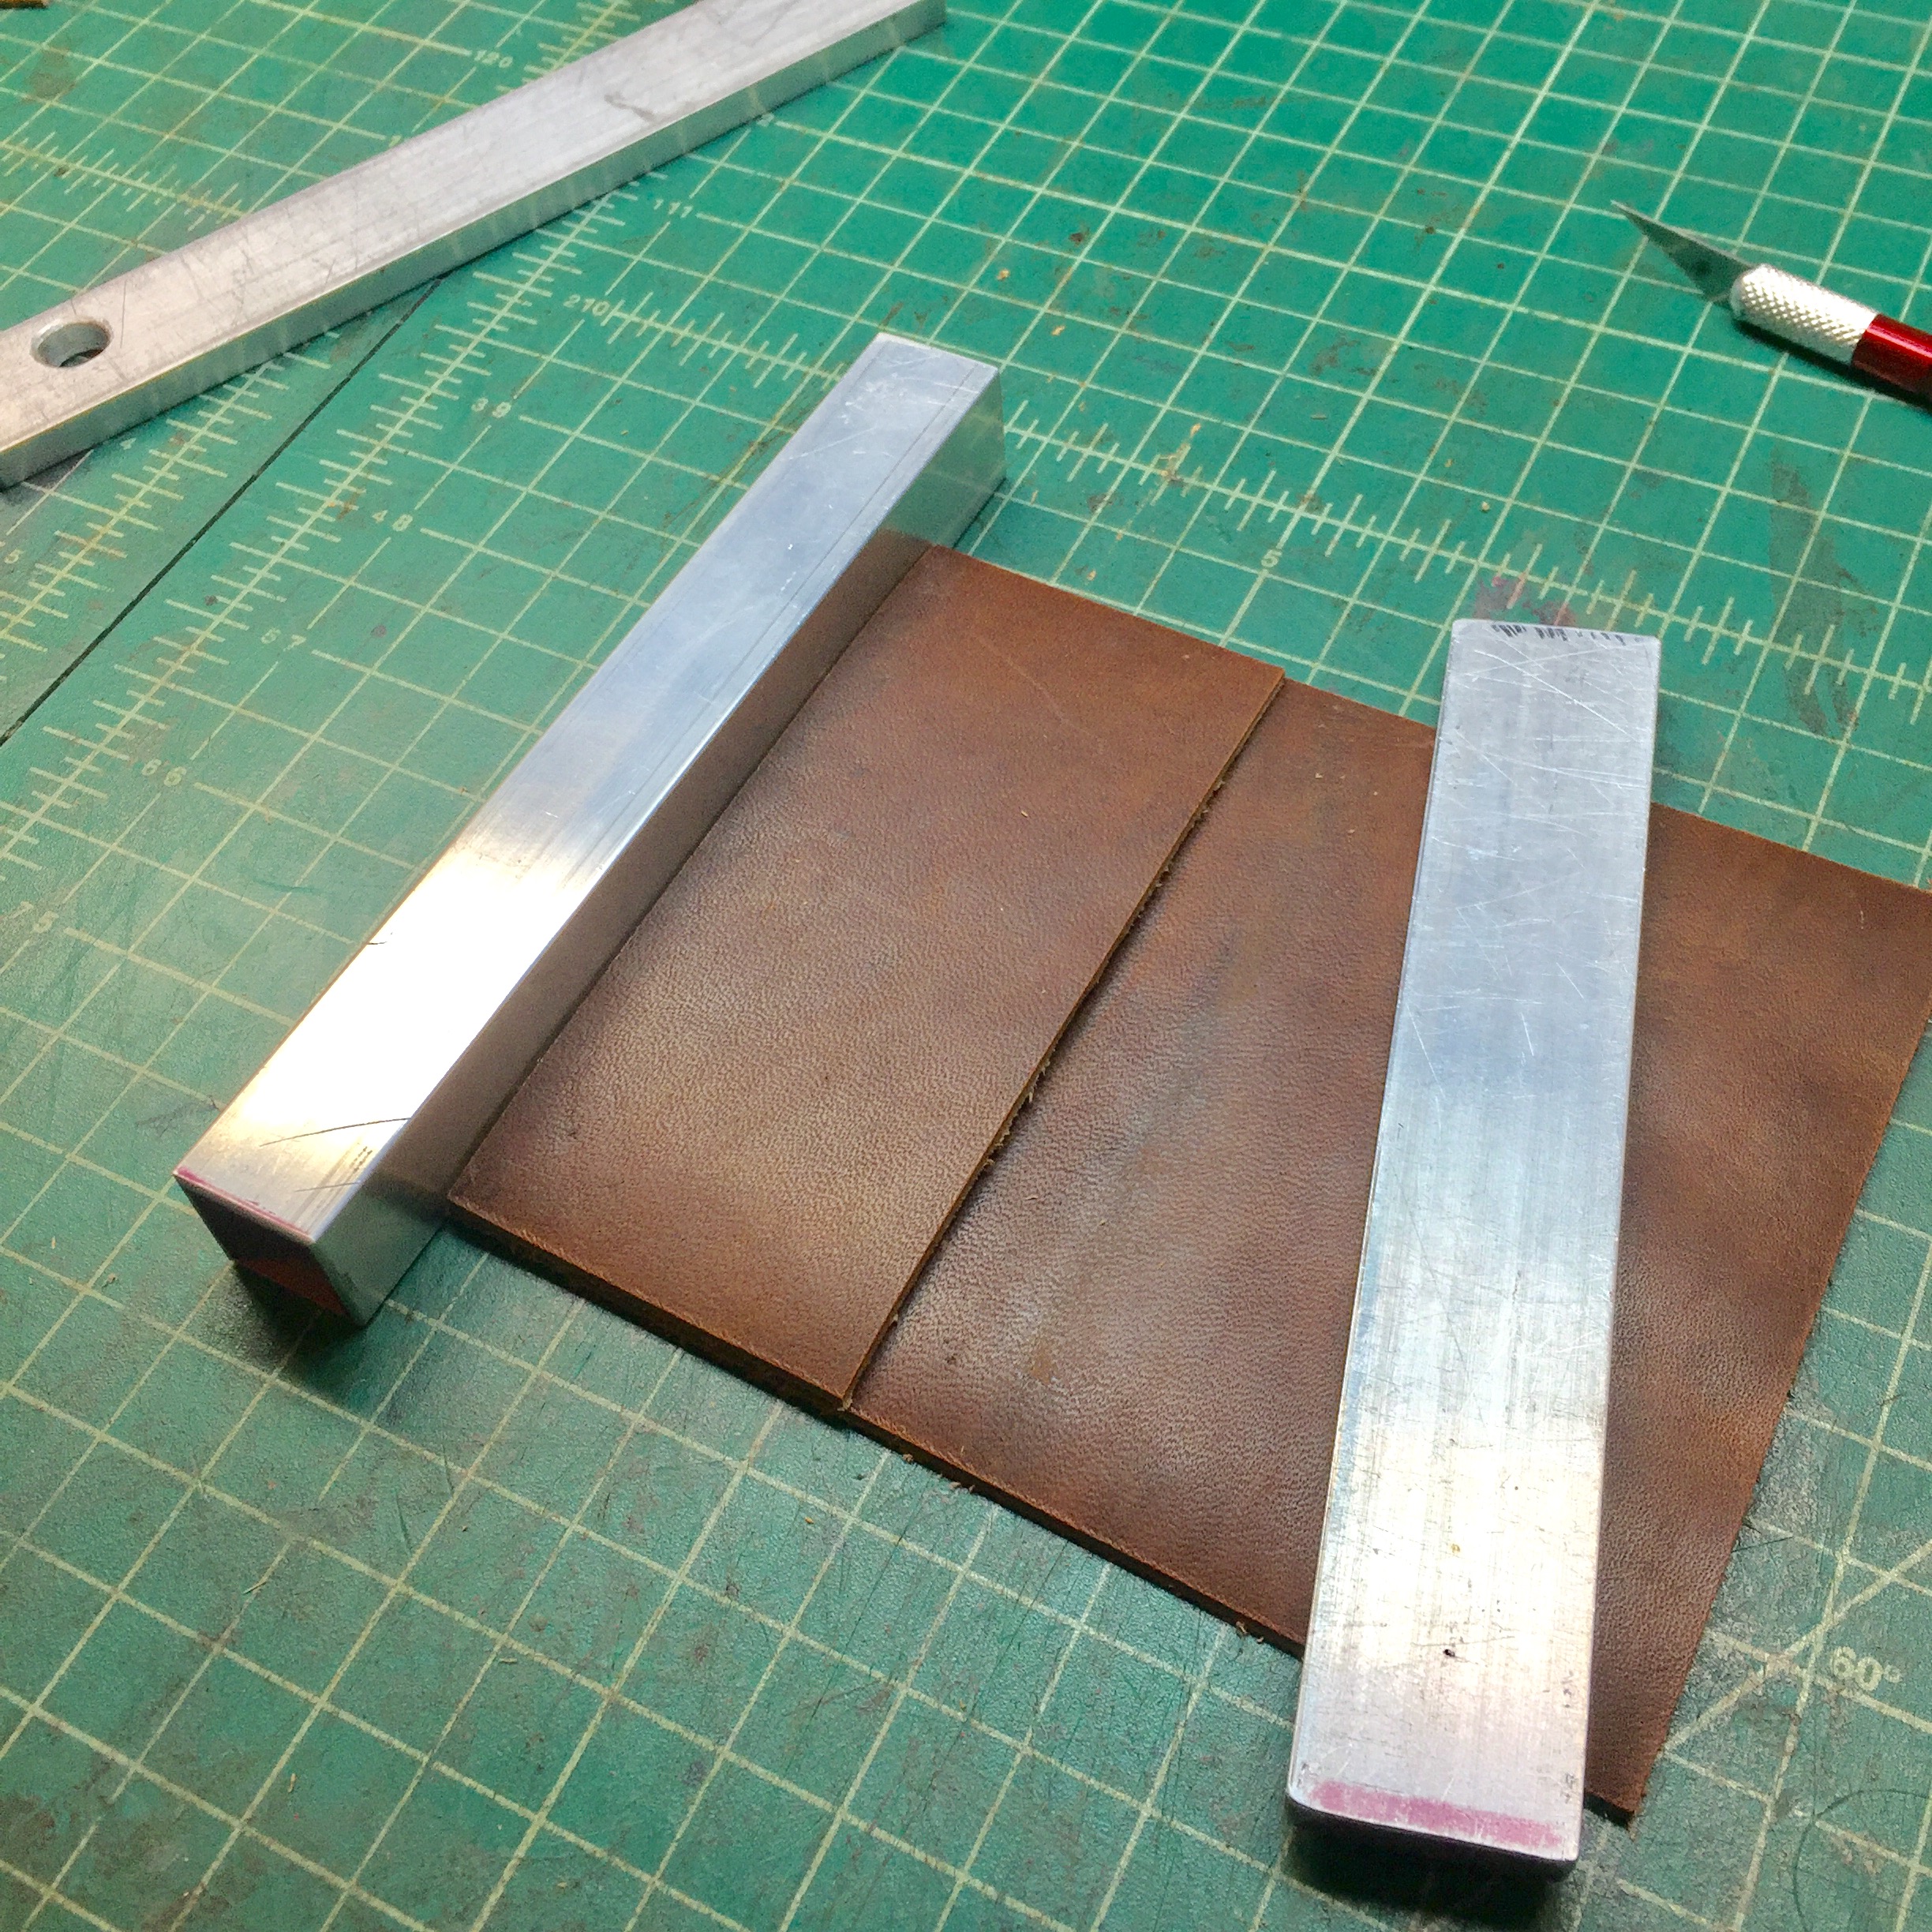
I use simple aluminum bars as spacers and edge guides (again, links to find these are listed below).  To make the pattern, simply butt the straight edge of your leather up to a ¾” aluminum bar.  I have several 1” x ¼” bars, as well (see photos).  Because I know I need a 2” wide pattern, I can simply stack two 1” bars against my ¾” edge bar, and bam, we have 2” exactly.  To make the cut, I add a third 1” bar to right of the 2” spacers.  While holding the 3rd bar down on the leather (carefully to not move this bar at all), I move all of the spacers to left, leaving only the 3rd bar.  Then take your straight edge (the yellow ruler in this case), and butt it gently up to the left side of the aluminum bar.  Gently slide the bar out of the way while holding the yellow ruler inplace.  With an X-Acto knife, use the yellow ruler as you cutting guide. 

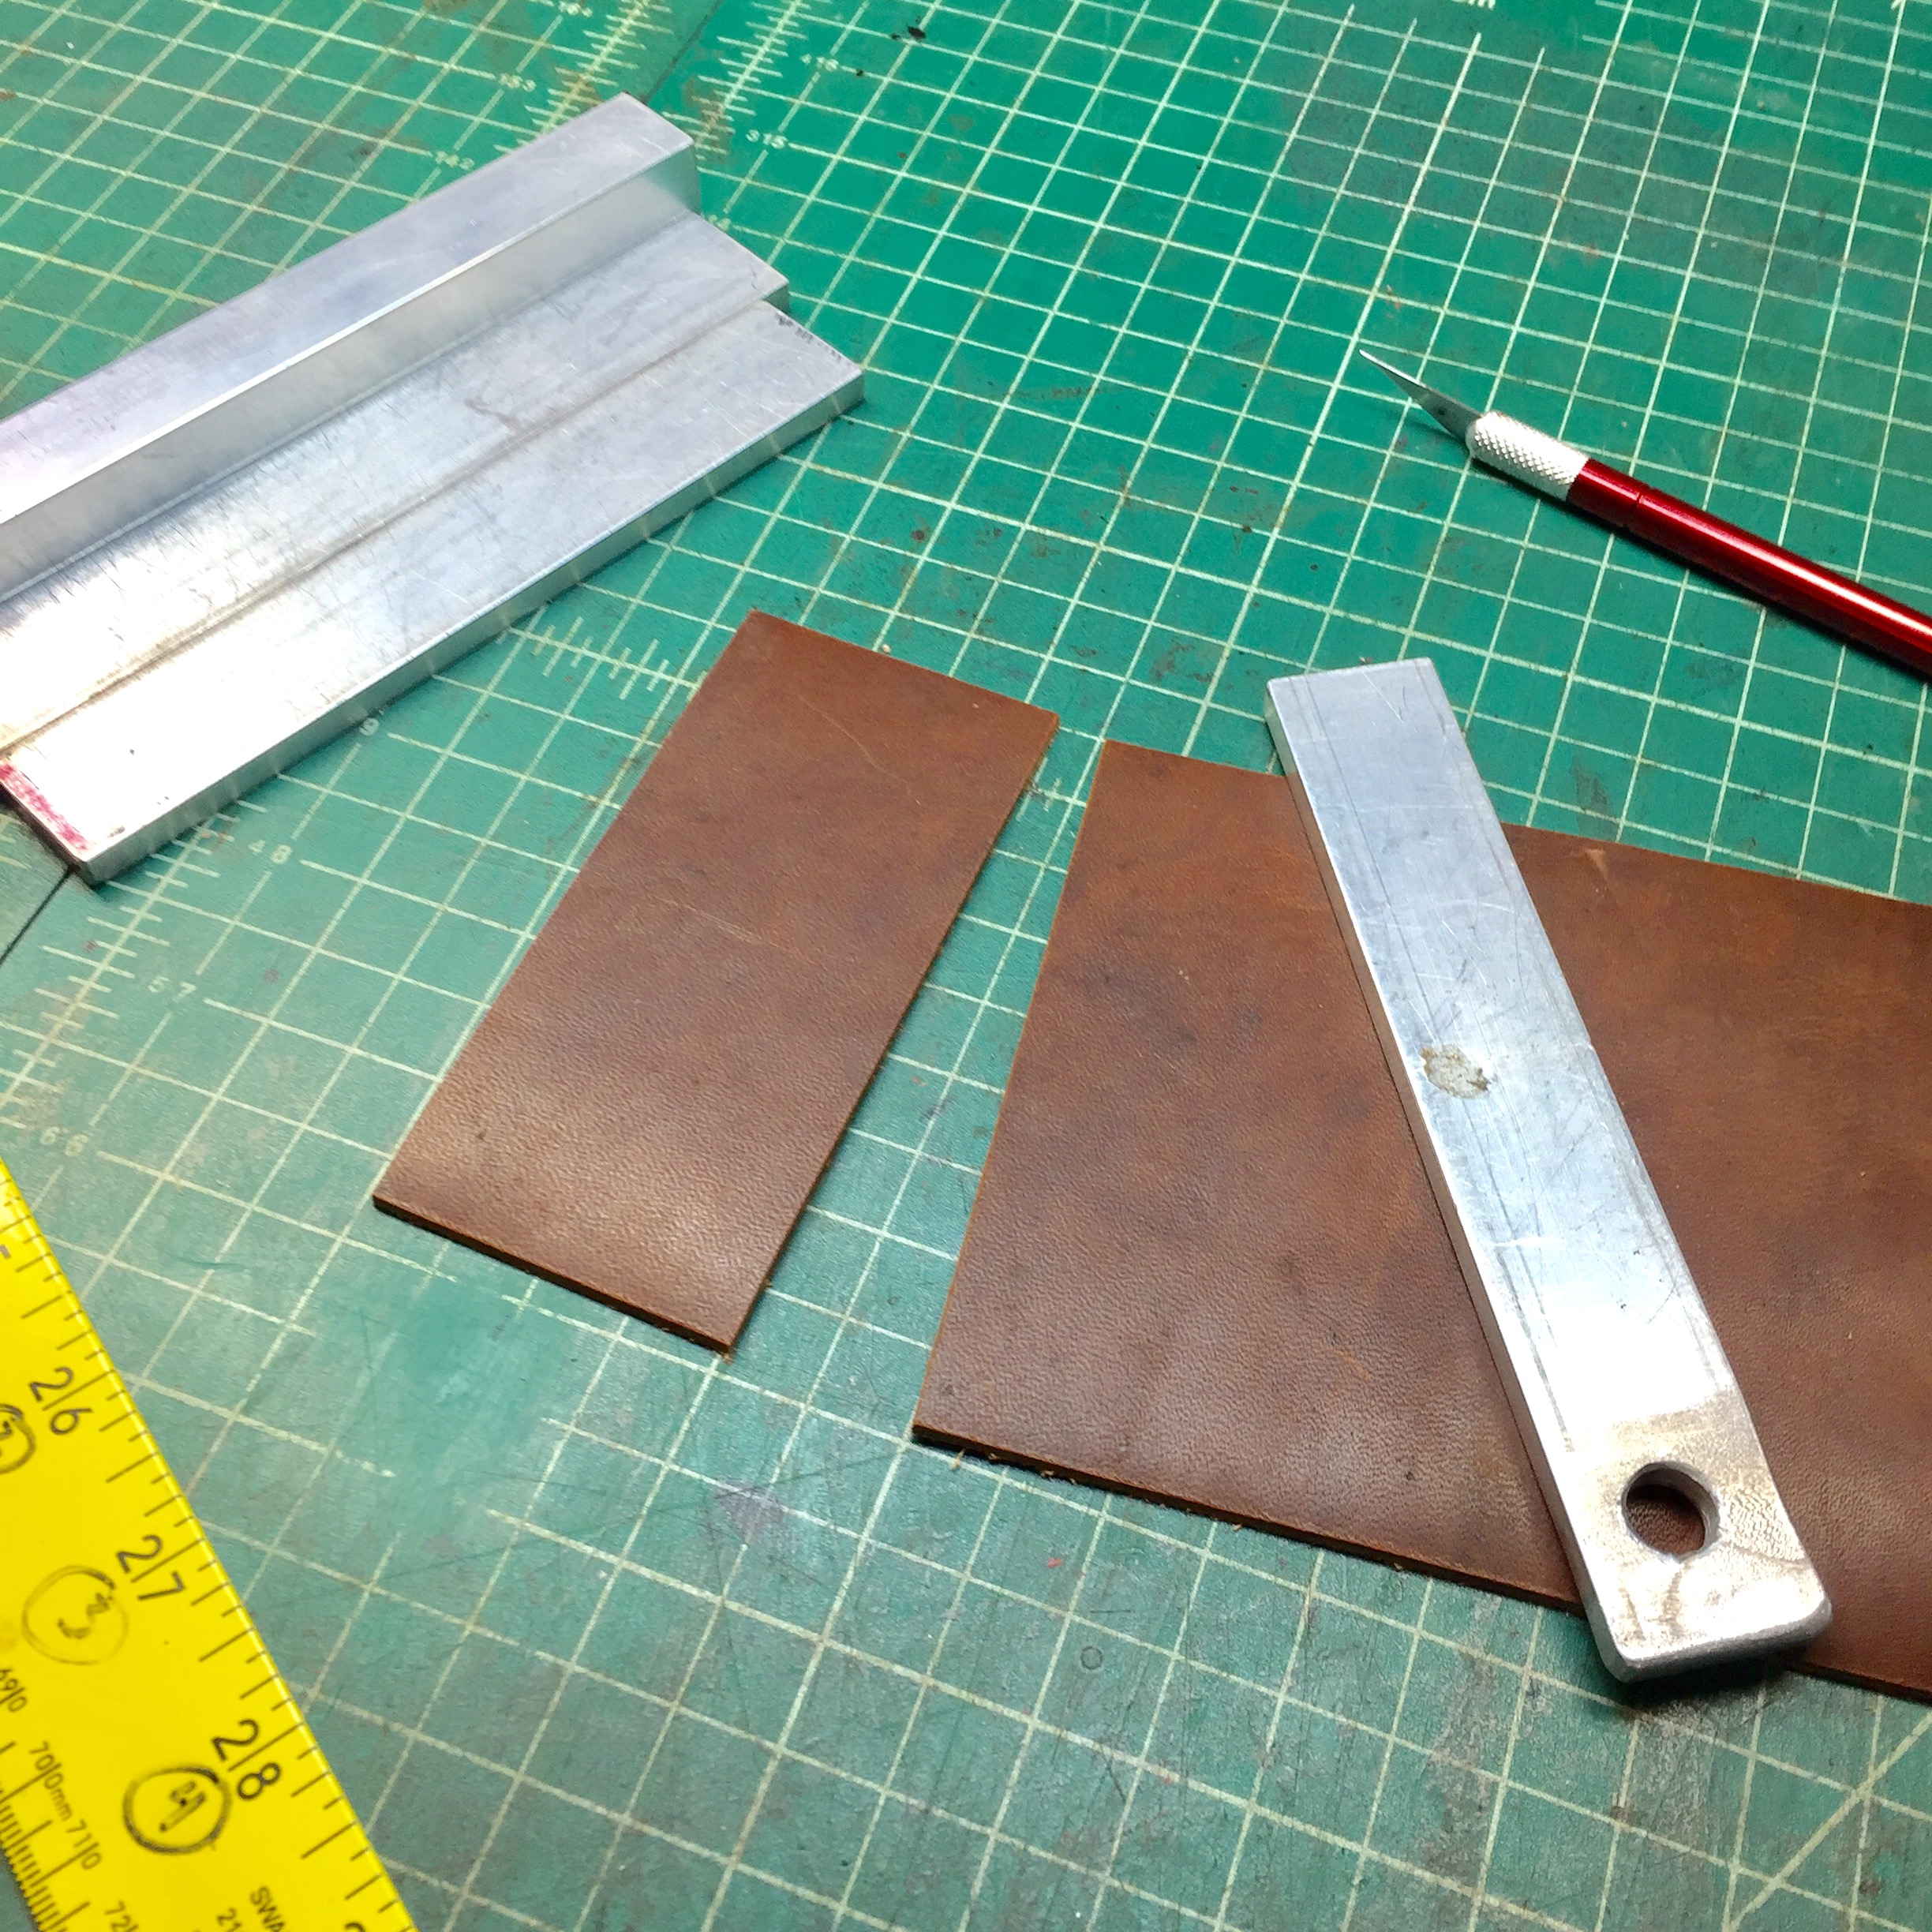
There you have your 2” pattern piece. 

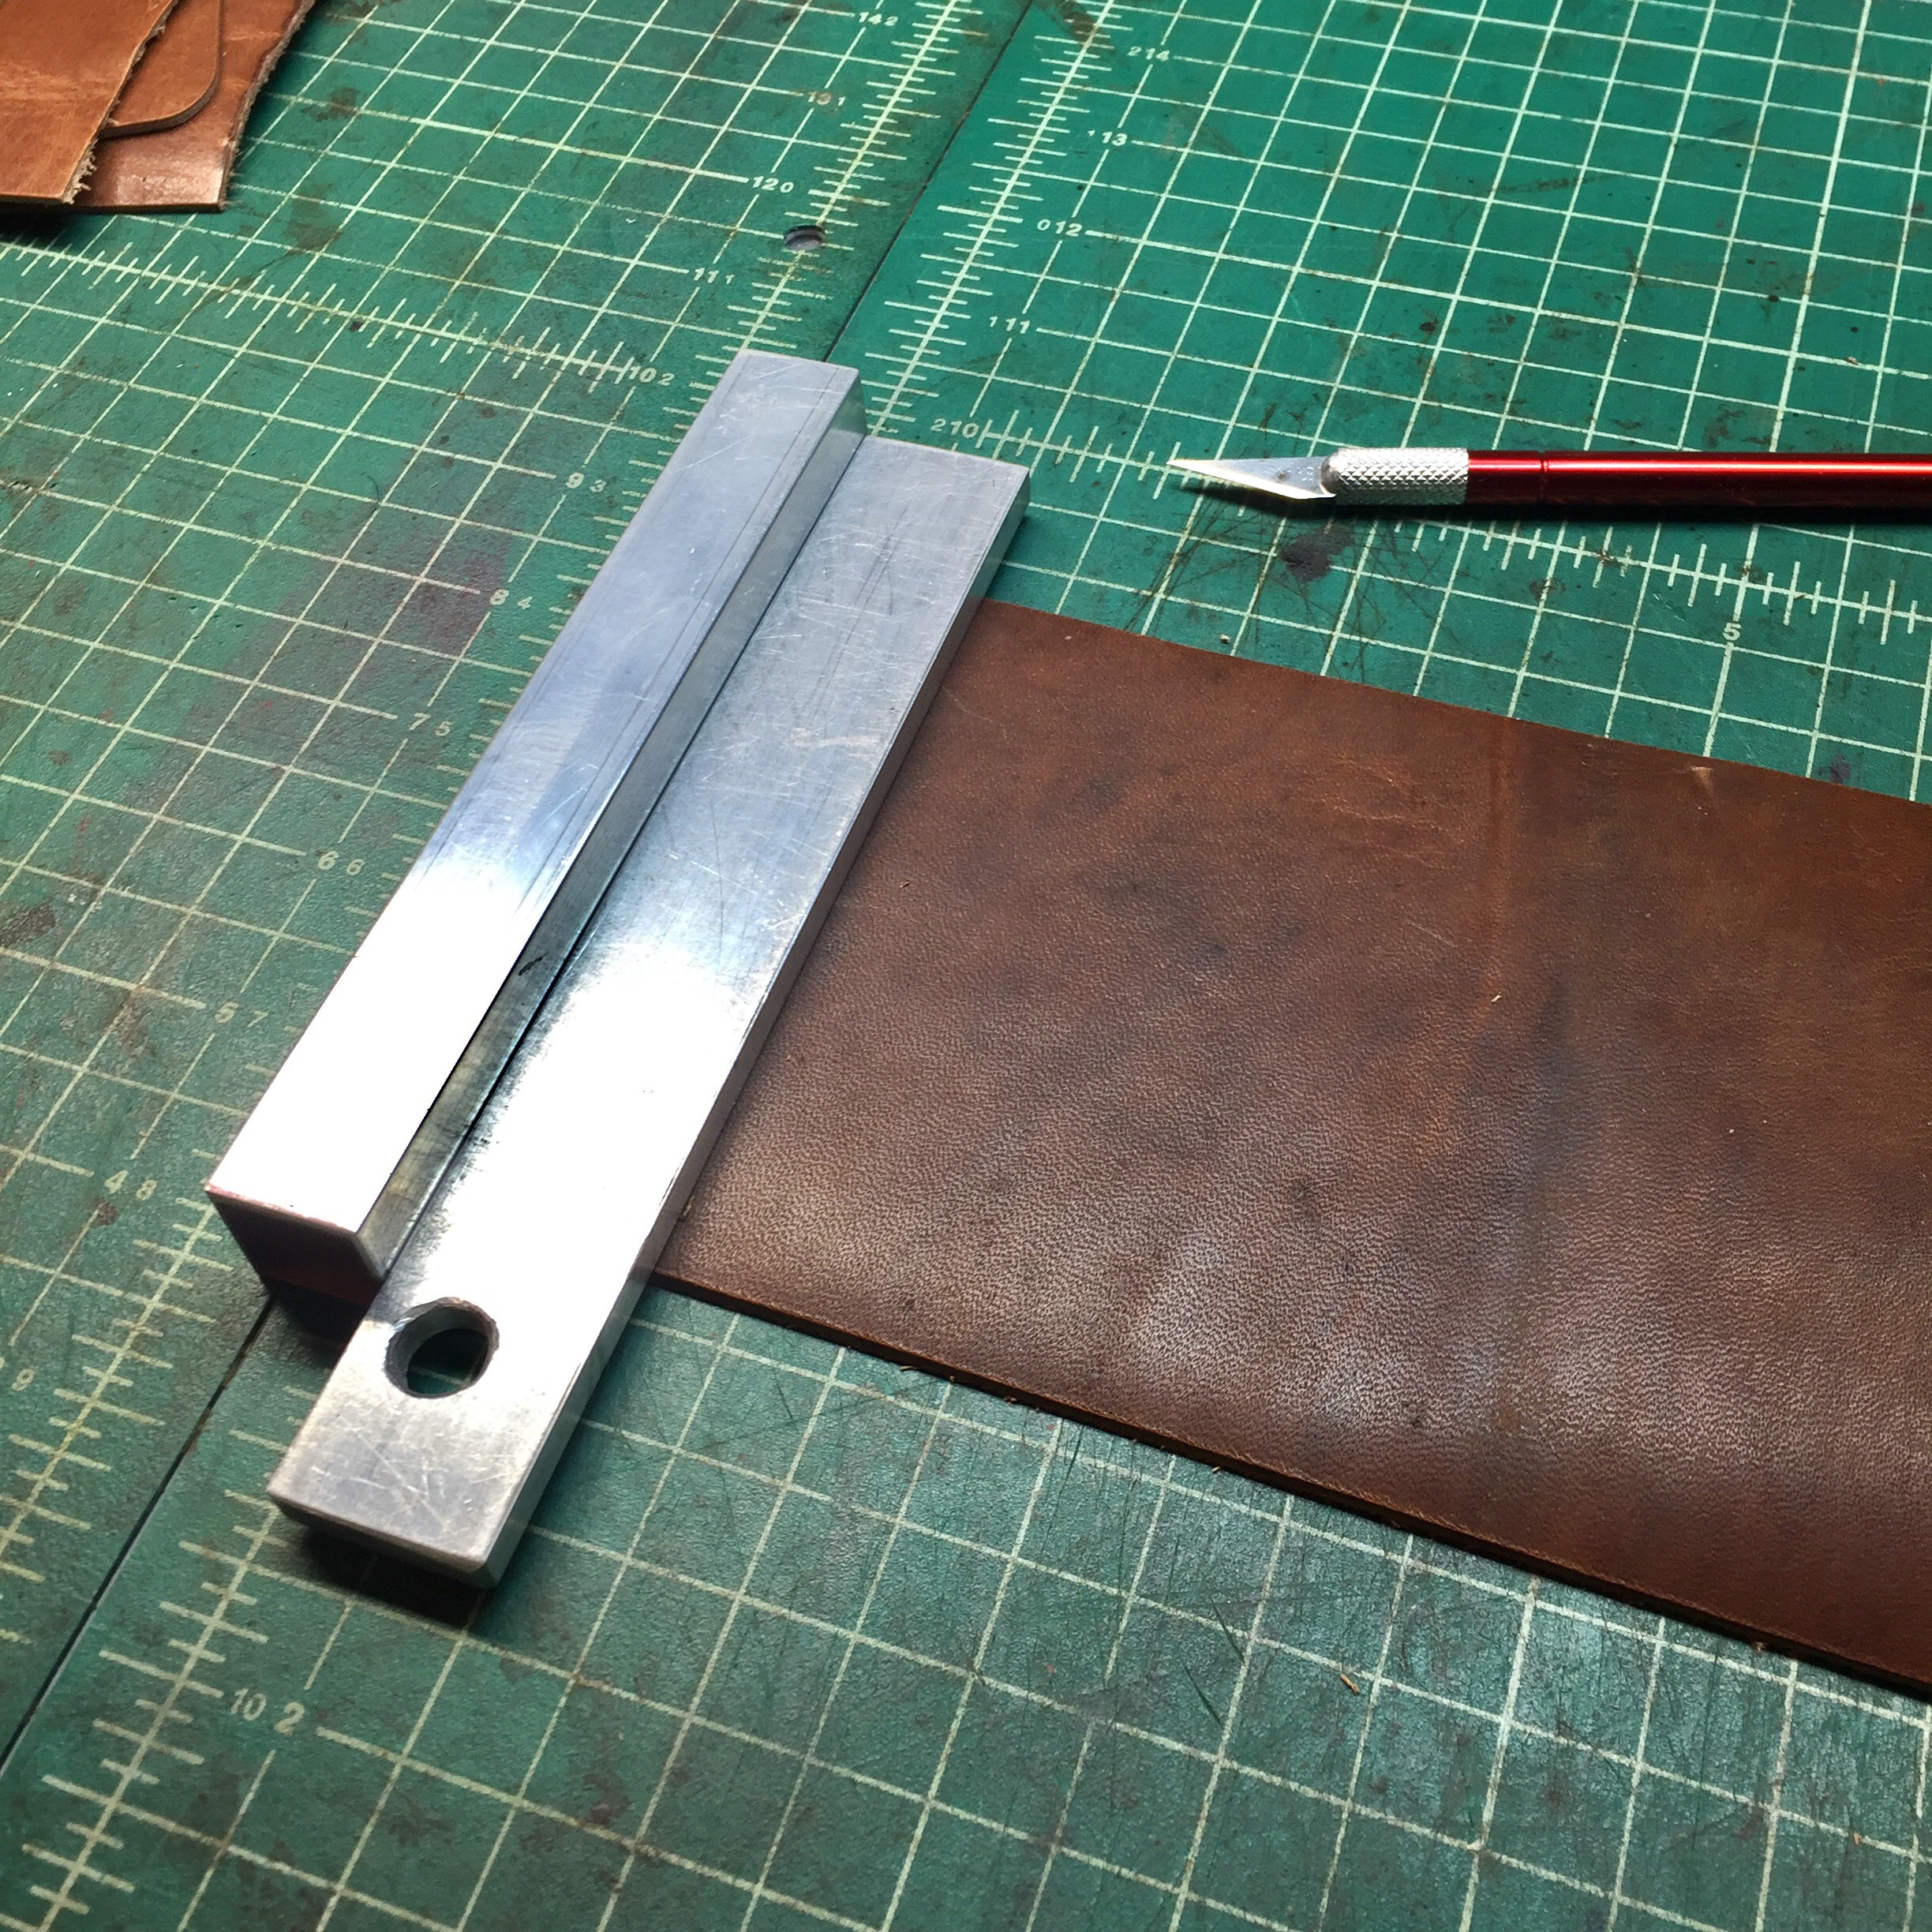
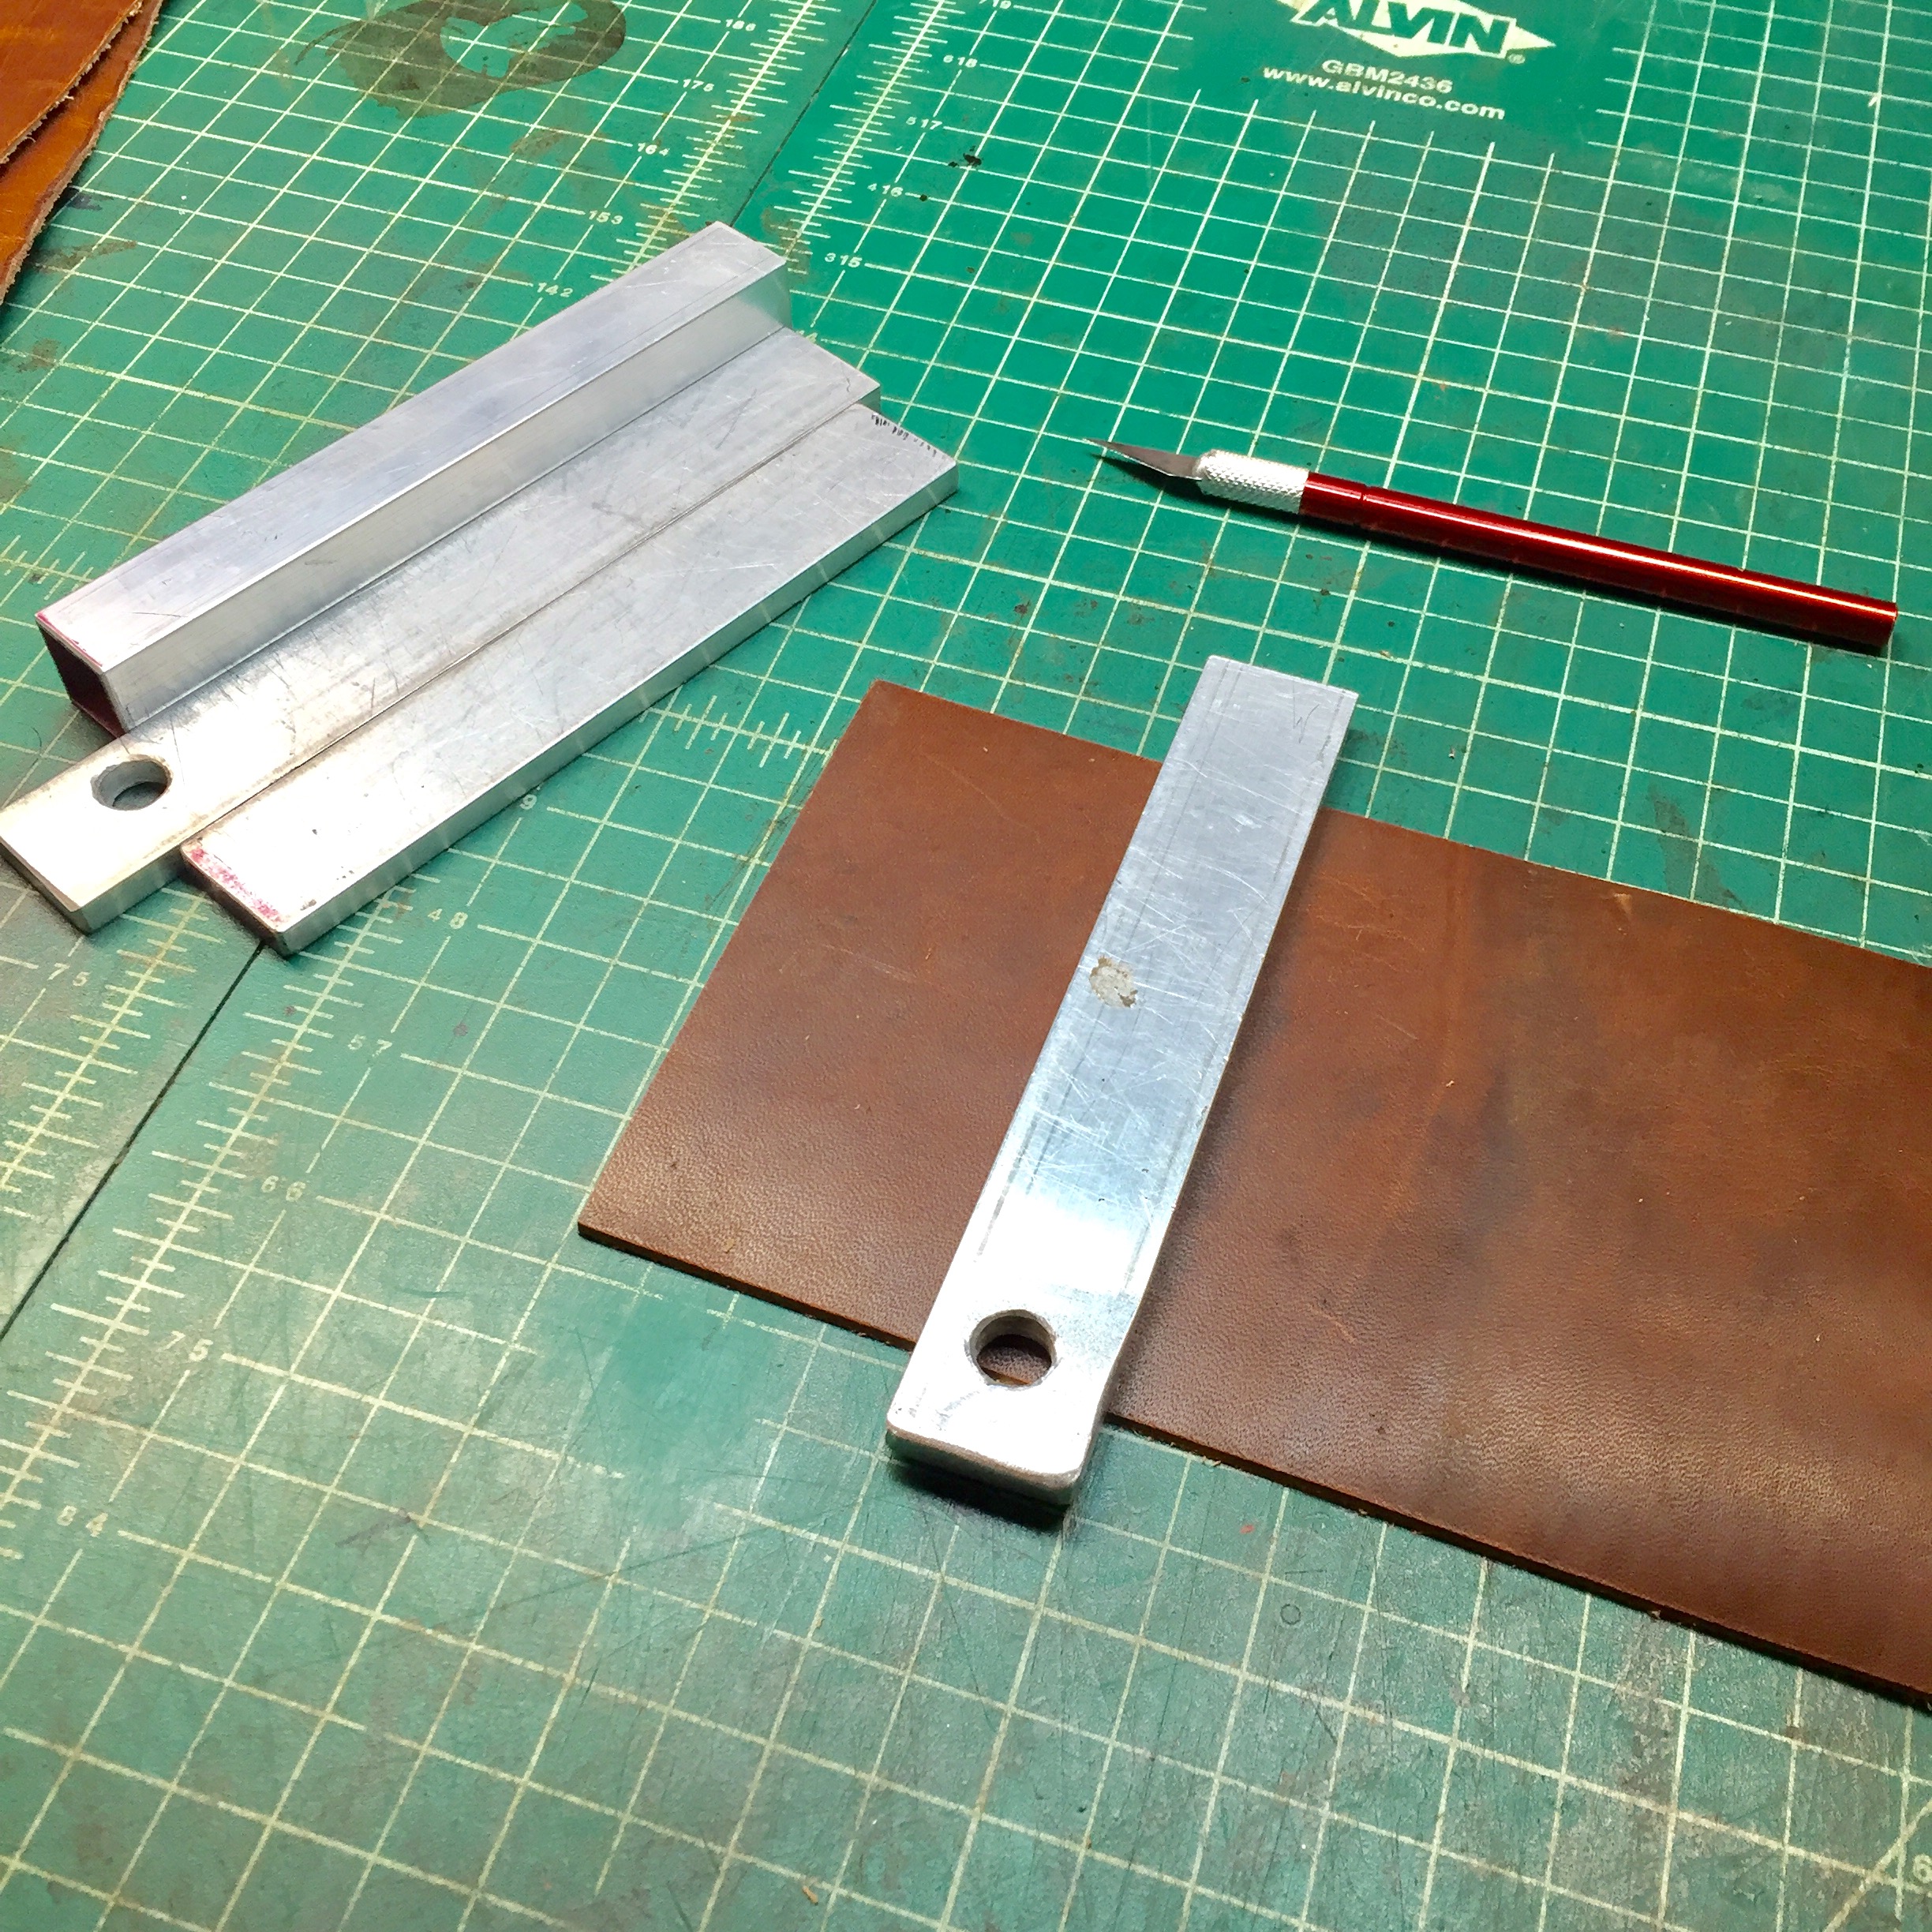
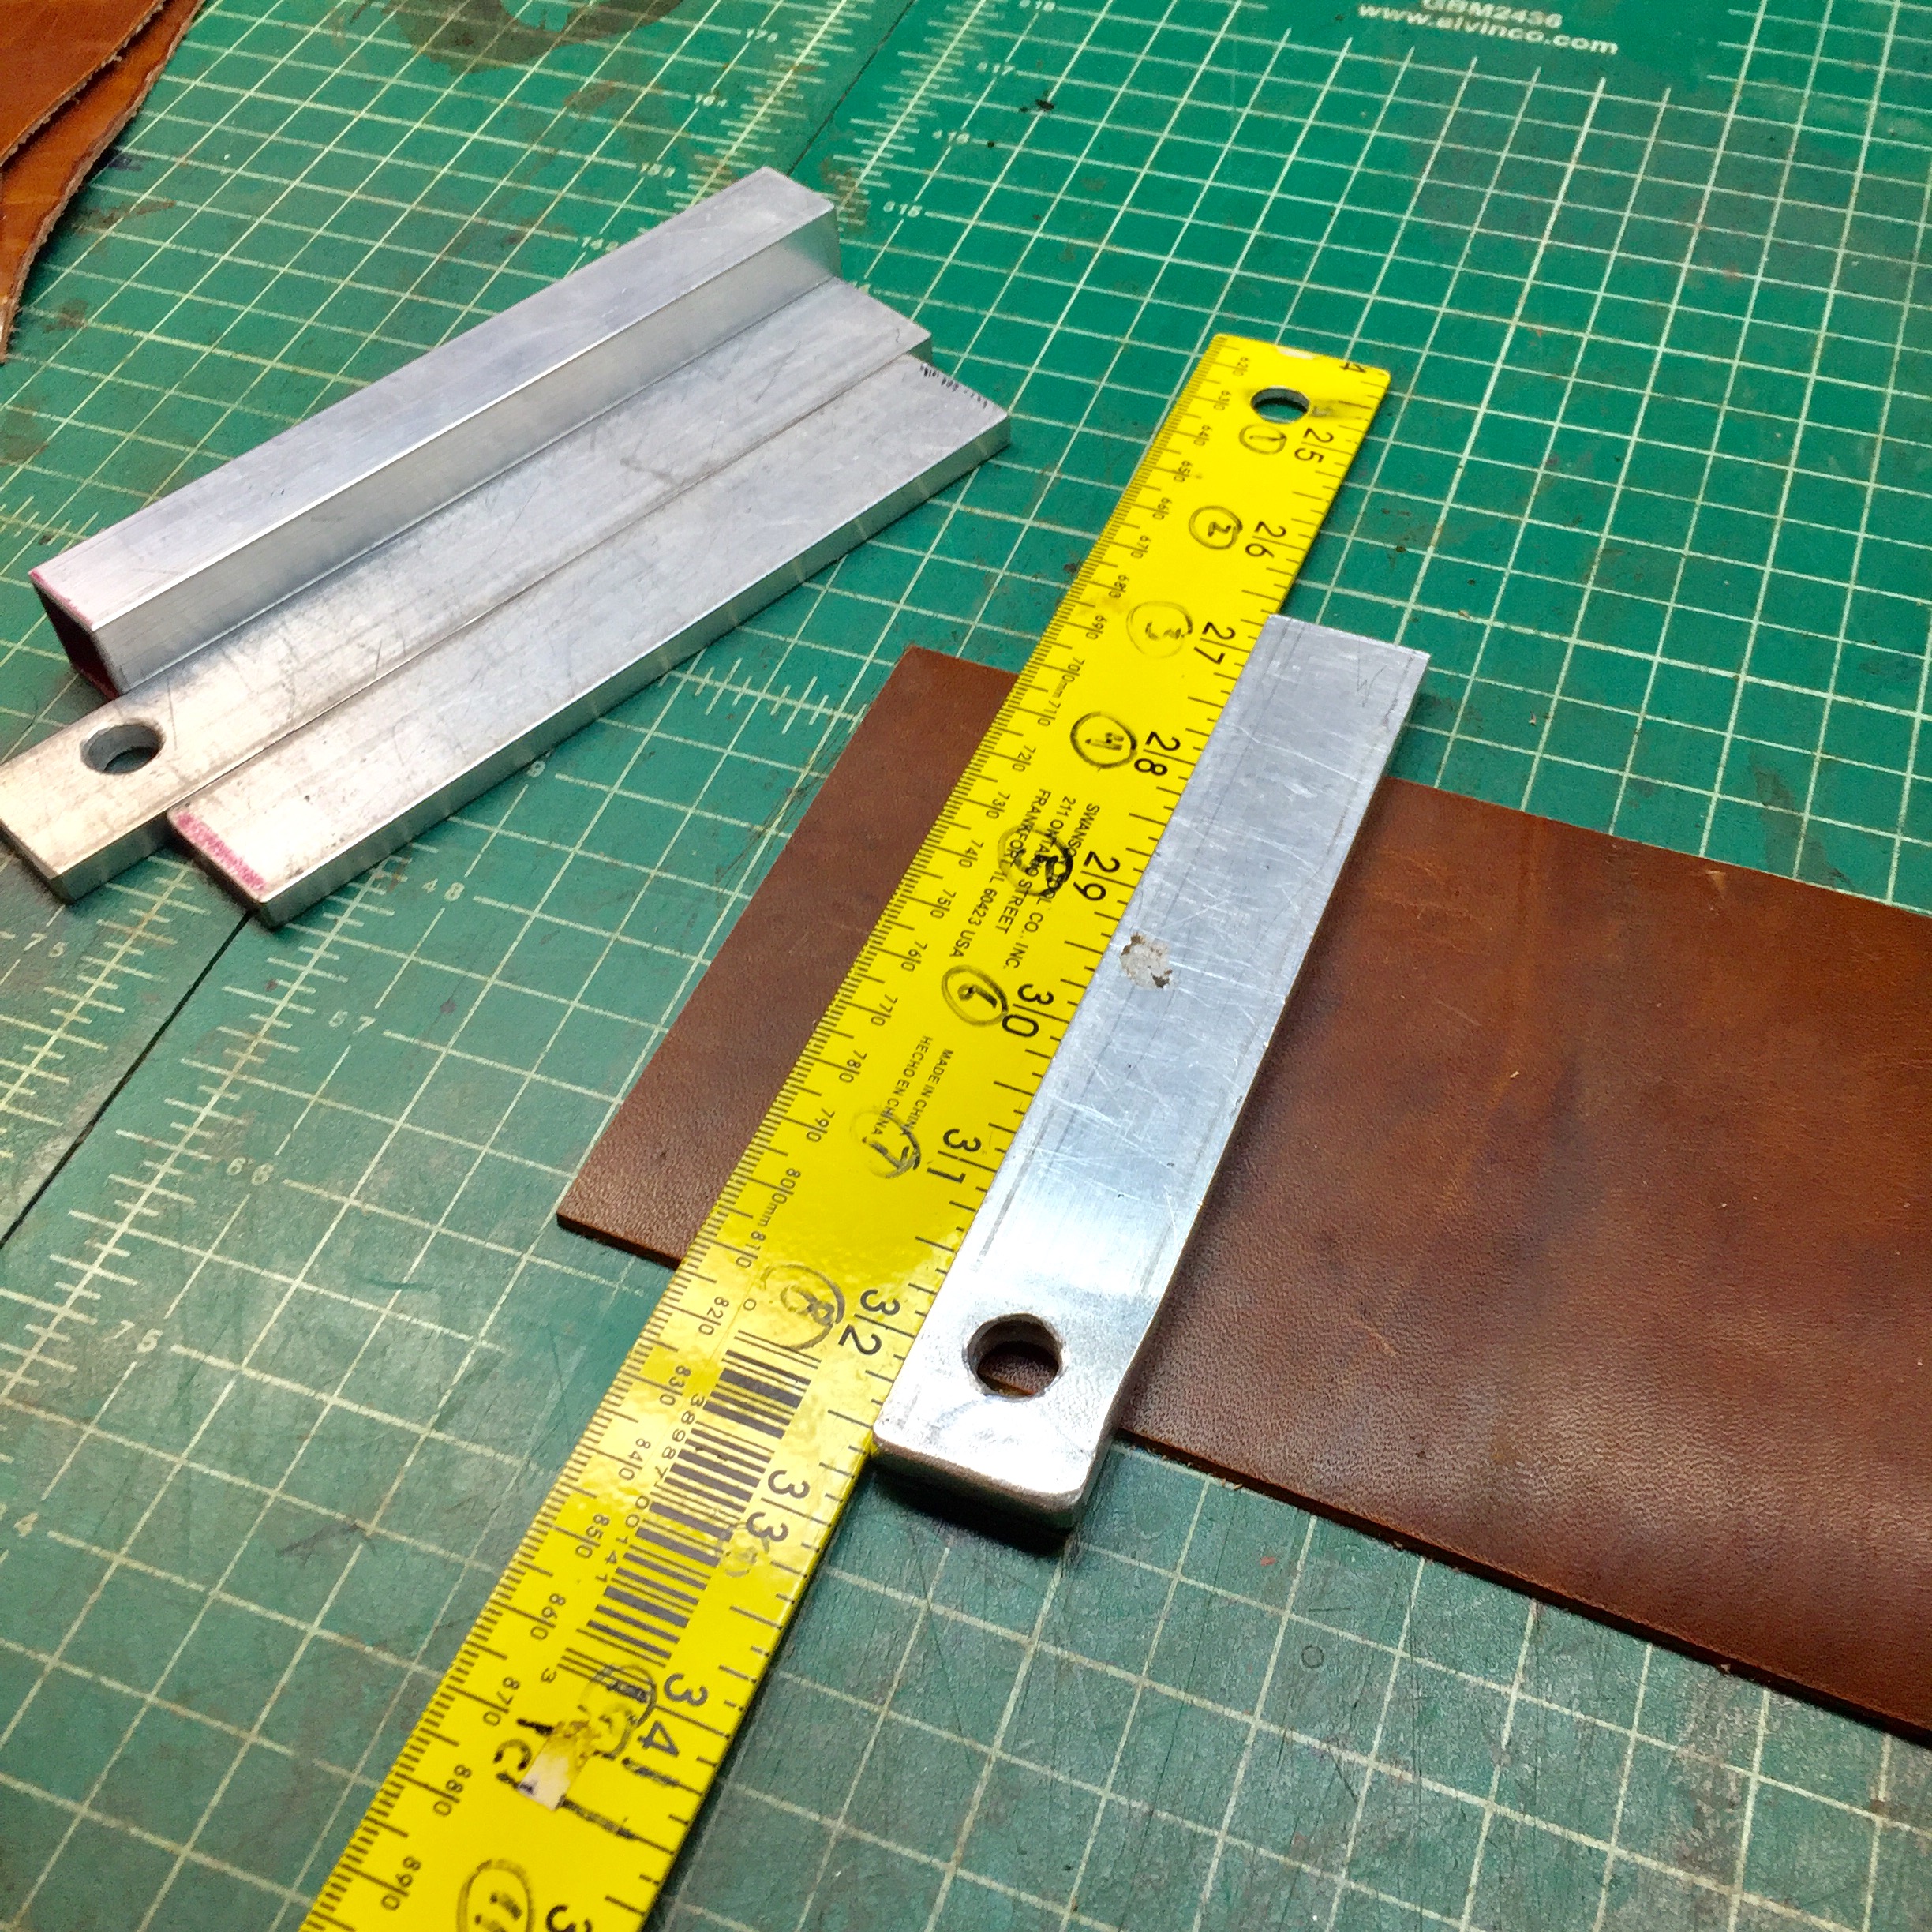
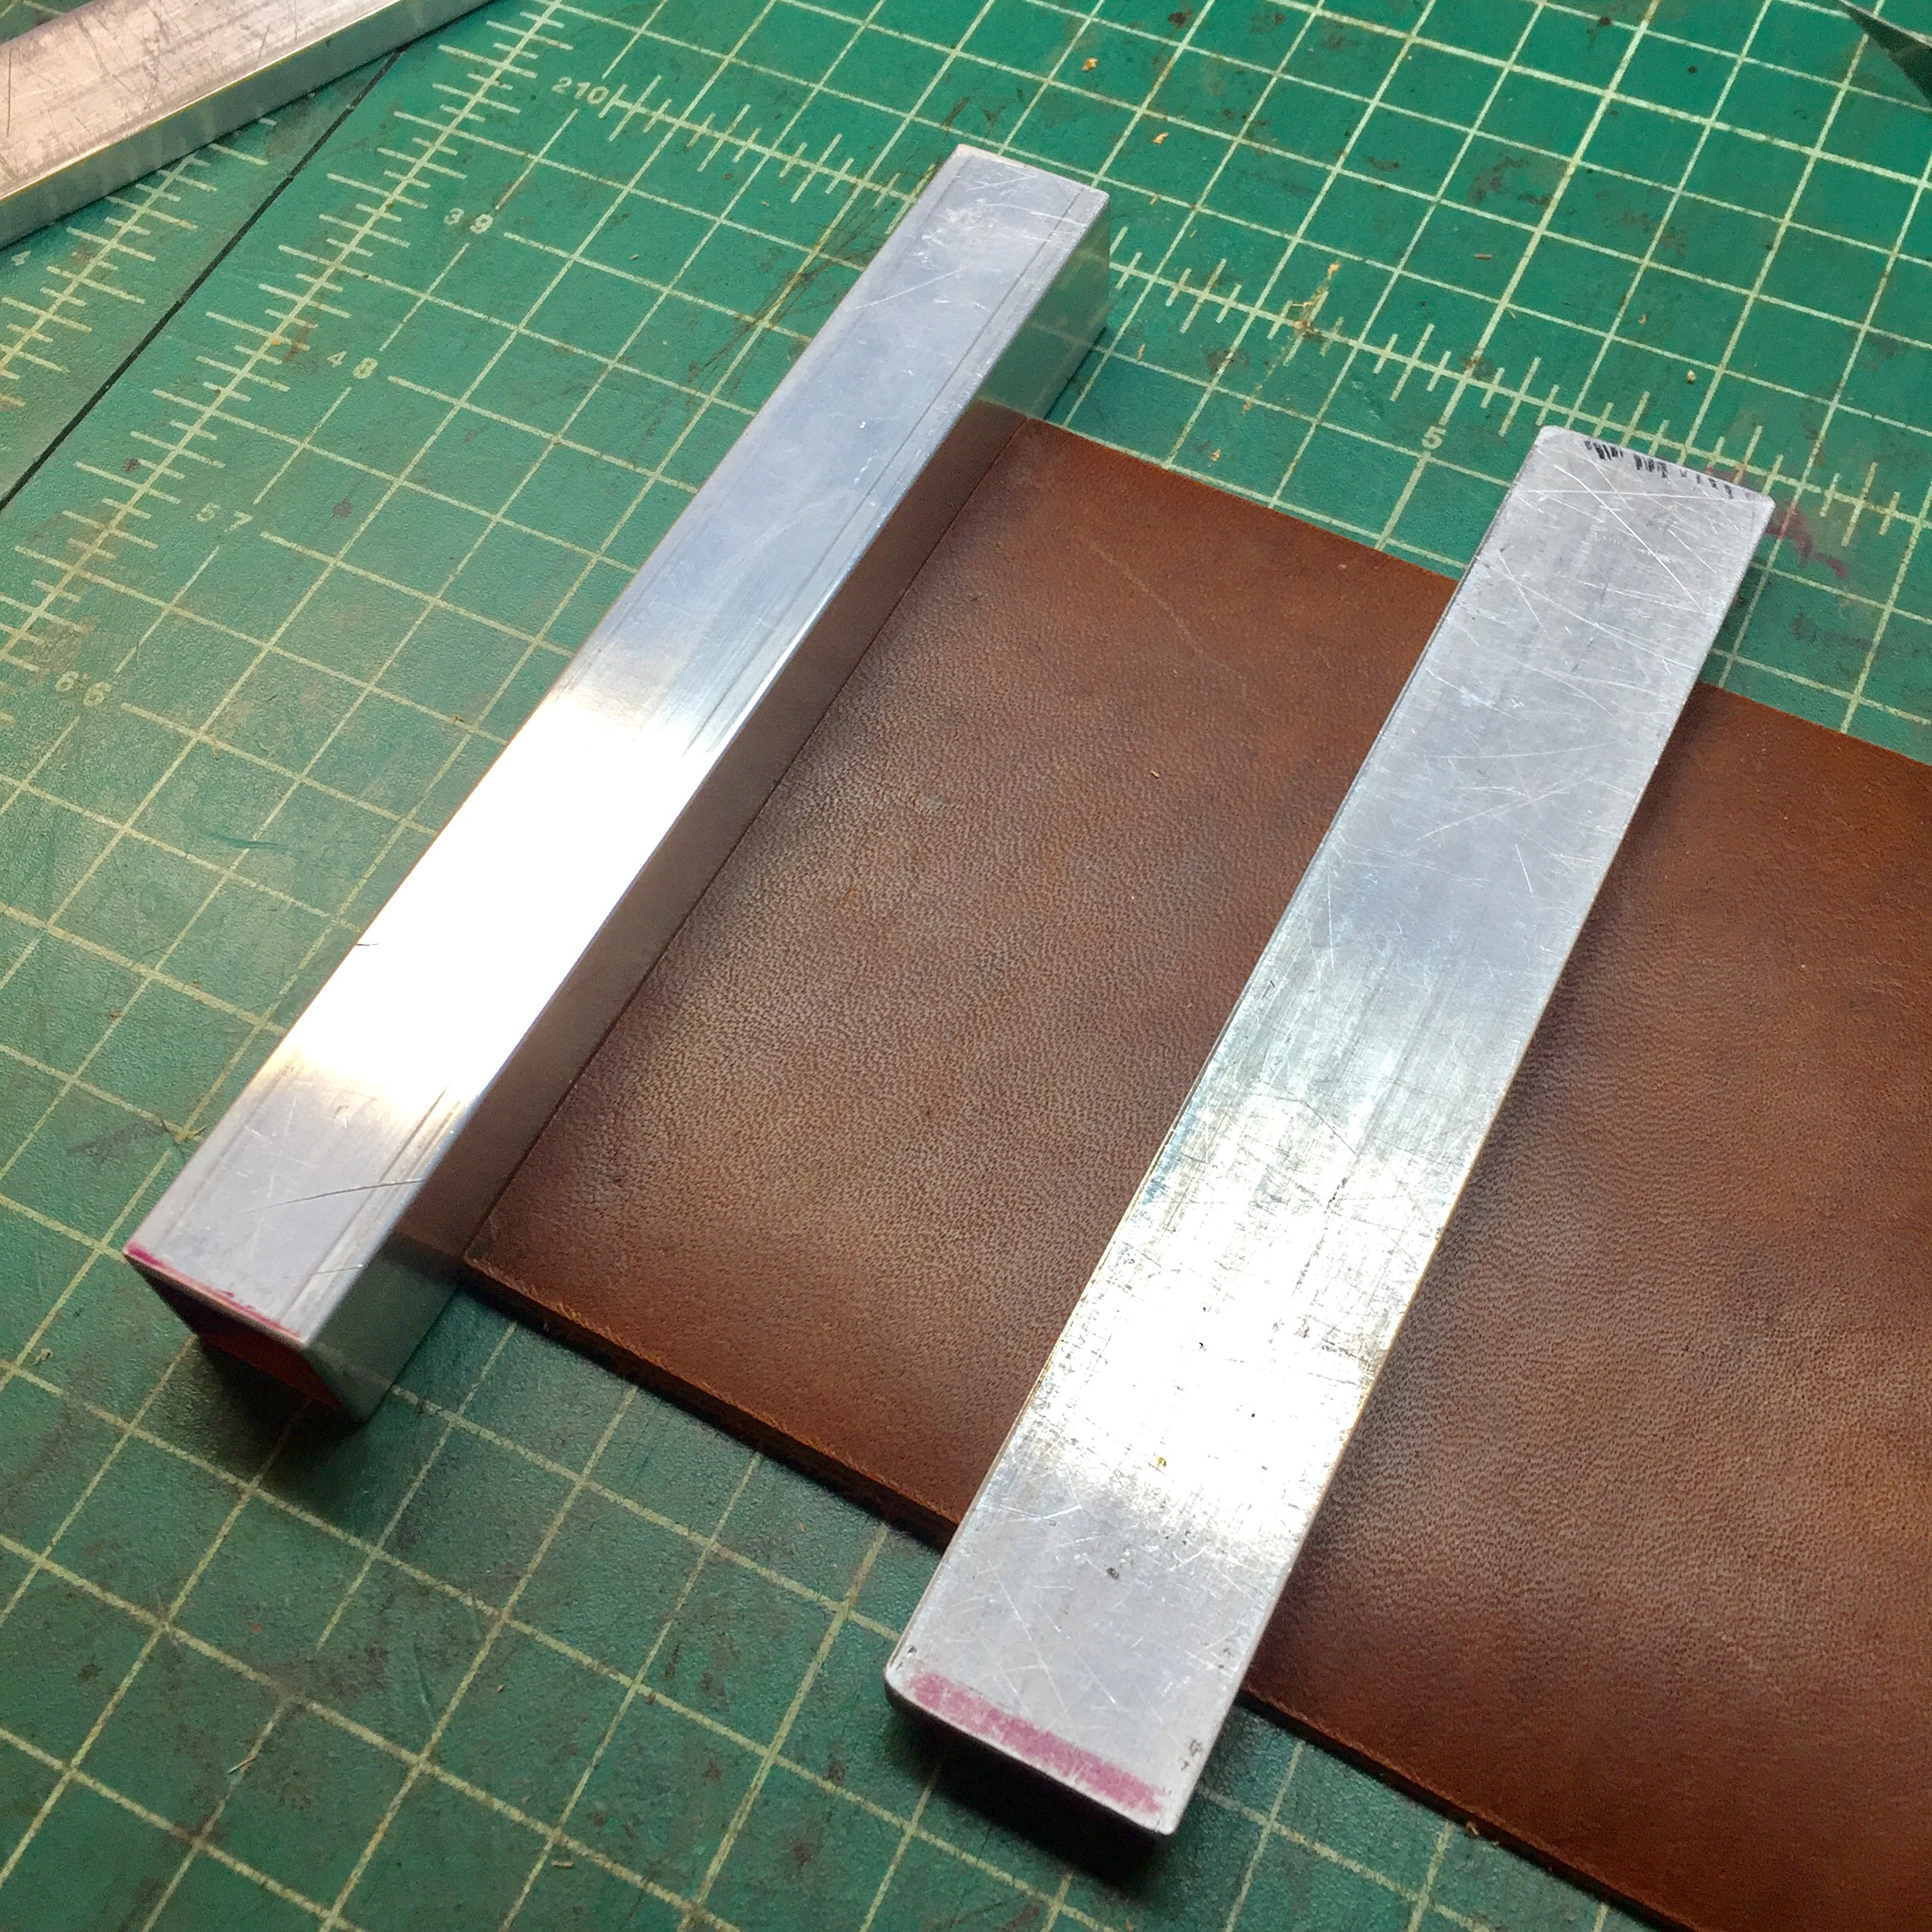
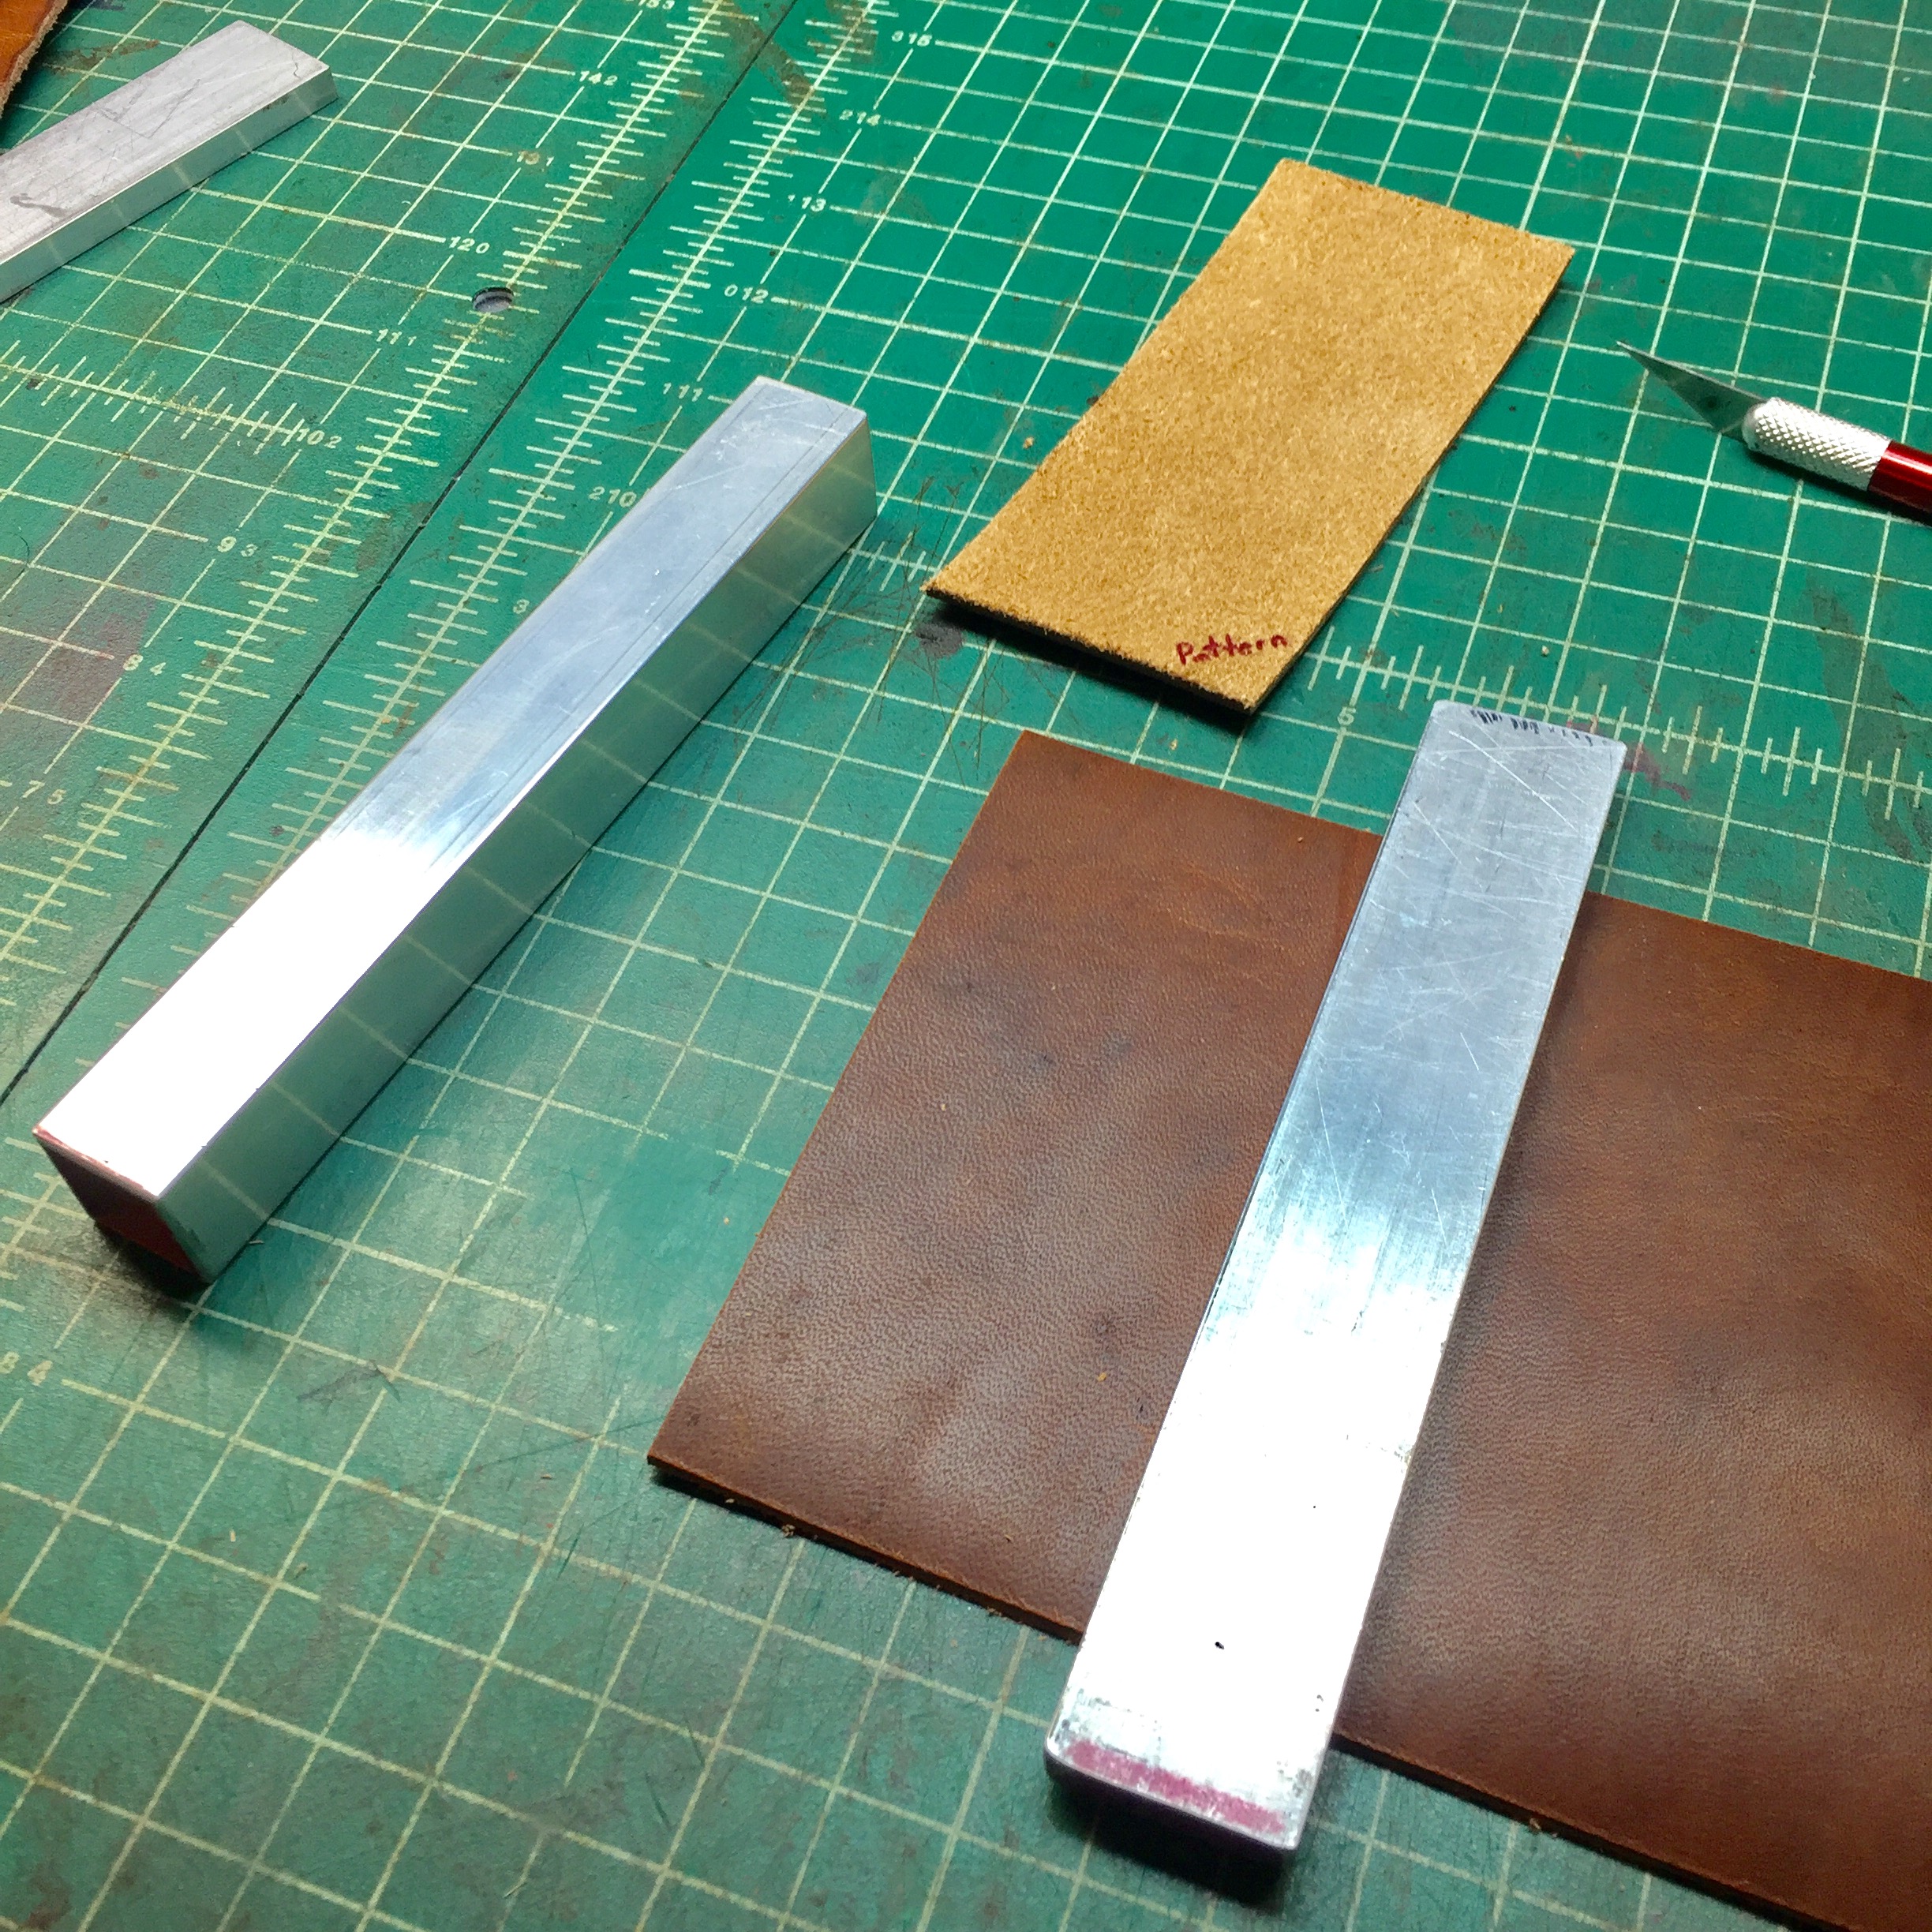
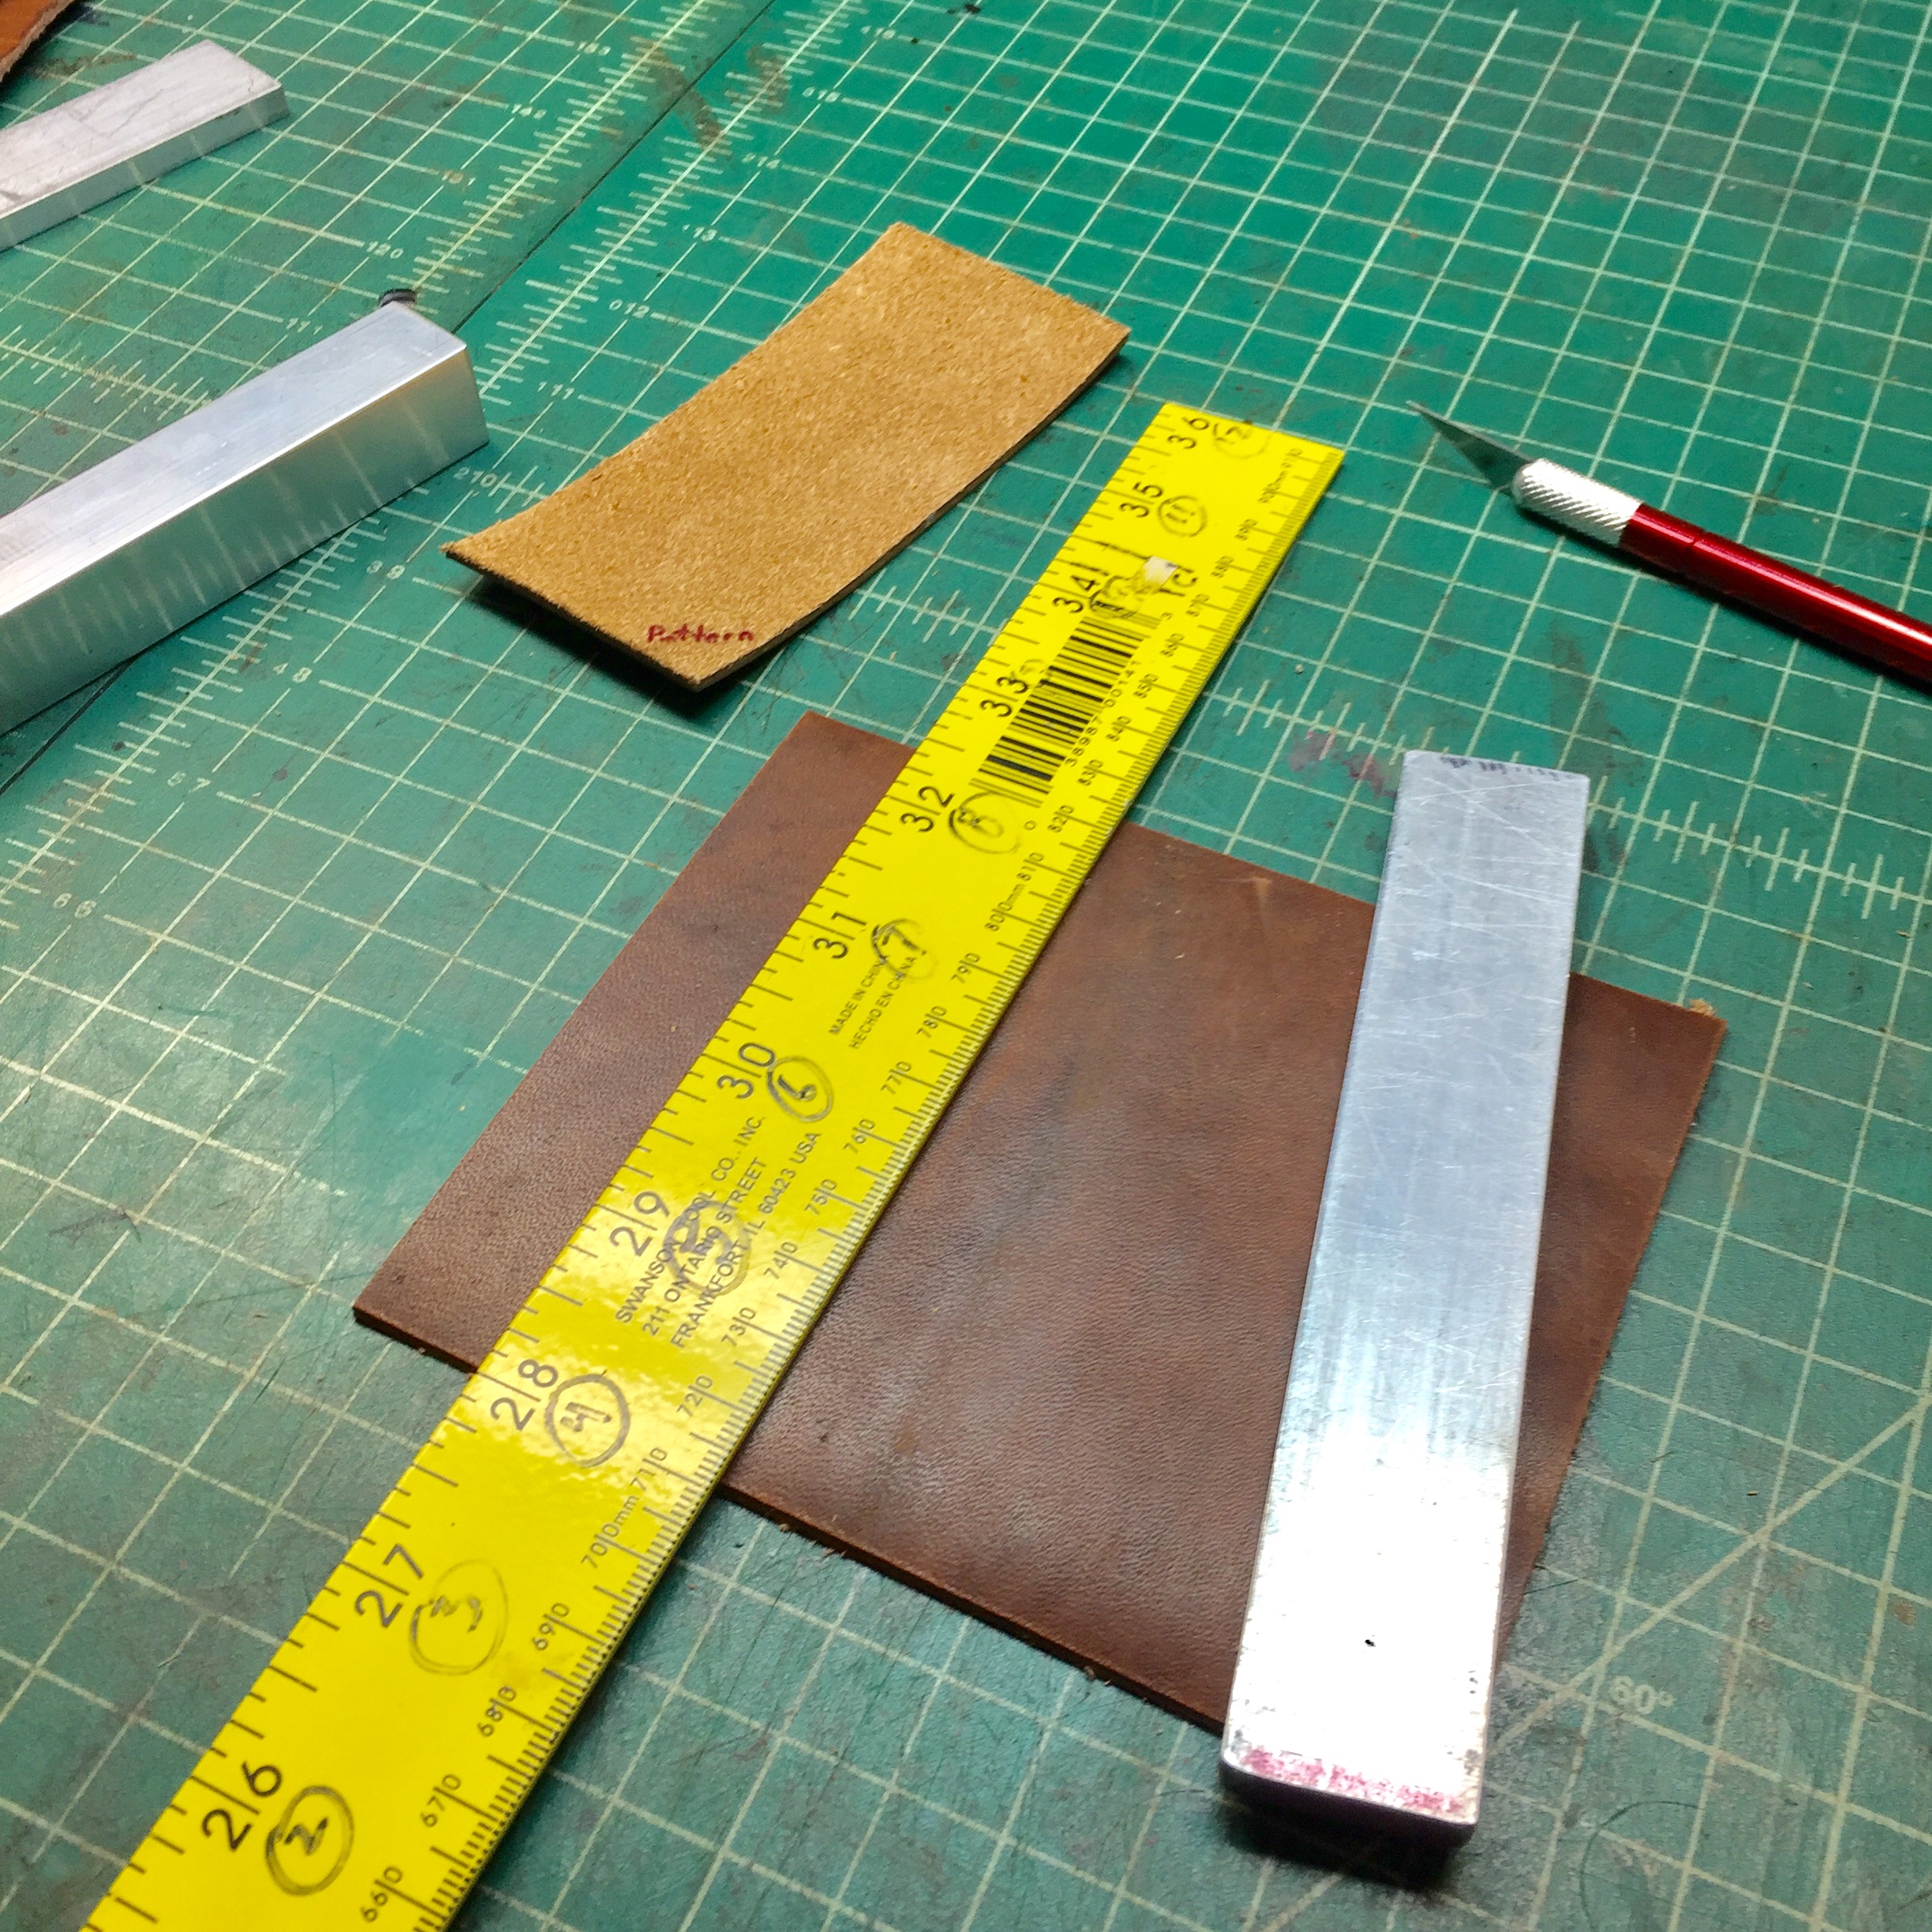
To make all of your follow-up, and identical pieces, slide the ¾” aluminum edge bar back up to the leather to be used.   Then drop your “Pattern” piece down, gently sliding up to the same ¾” bar.  Grab one of the 1” x ¼” spacer bars and gently slide that up to the right edge of the “Pattern” piece.  Hold this bar down firmly while sliding the pattern piece off and out of the way (see photos).  Set the yellow ruler back on, and up against the guide bar (as done while making the pattern).  Slide the guide bar off to the side, while firmly holding the yellow ruler in place.  Now you’re ready to make your cut.  

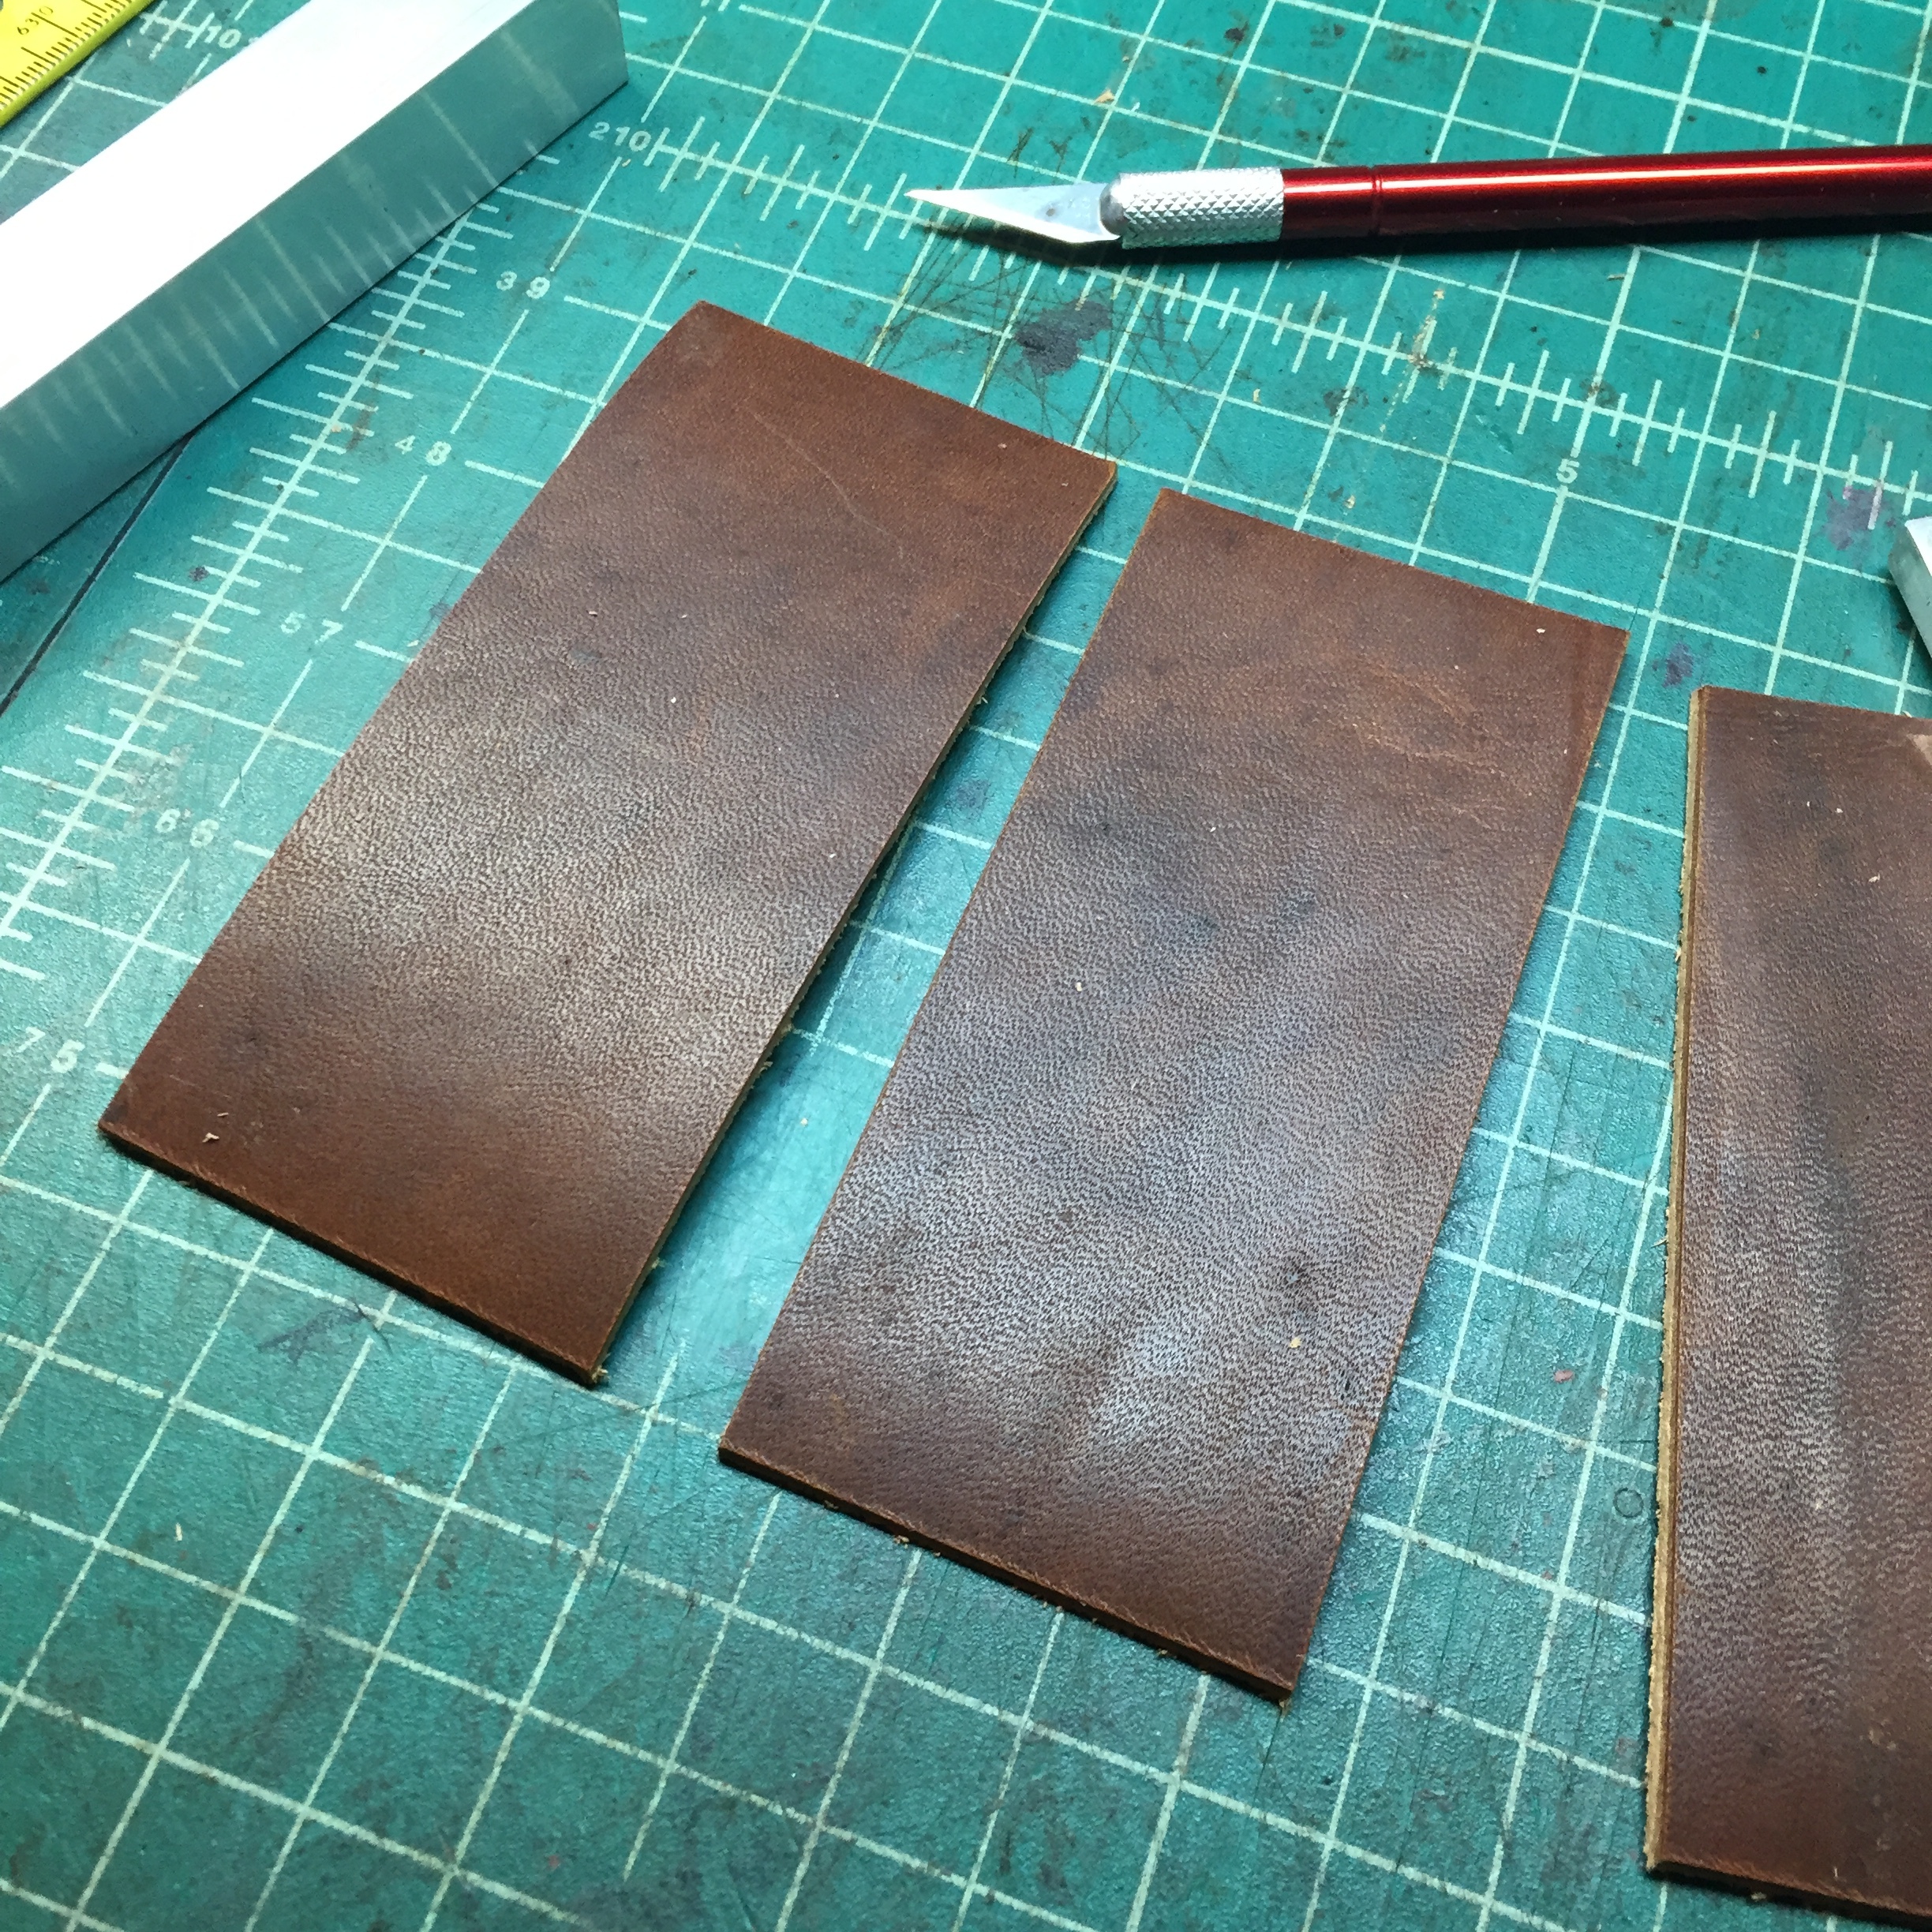
There you have your first identical 2” piece.

To make the next piece, as well as the next 50 pieces, simply repeat the process.  Once you do this a few times, moving the correct bars and rulers in and out of place, while knowing where to hold firmly, becomes second nature.  And you can make 100’s of identical pieces in no time.   


Below is a list of items to help from start to finish.  

(Remember, if you decide to cut any of the bars or rulers to a more comfortable length, be sure to sand all sharp edges to smooth before setting on face of leather.) 


·         Aluminum bars - ¼” x 1” x 6” bars – Click Here

·         Aluminum bars - ¼” x 1.5” x 6” bars – Click Here

·         Aluminum bars - Stained glass metal bar (how the idea all started). –  Click Here

·         Small steel square 12.5" x 8.5" x 0.07" - Click Here

·         Large steel square 24" x 16" - Click Here

·         Swanson 36-Inch Yardstick - Click Here

·         Swanson 72-Inch Straight Edge -Click Here

·         X-ACTO #1 Knife, Z Series - Click Here


Product names?


Another question I’m often asked is, “What’s up with the names of your products?”

            To list a few:

·       Chunky Charlie

·       Tiny Tim

·       Tall Tennyson

·       Hinton

·       Heller

·       Longfellow

·       Brando

·       O’ Henry

·       Santiago

·       Byron

·       Gatsby

To some, at first glance, they appear random and odd.  Upon closer inspection, there is some connection. 

Side note #1 – In the text below I’ve added a number of affiliate links (clickable words) that will zip you magically over to the Amazon website.  So if you’re interested in any of the authors, books, characters, movies, actors, etc, you can find them there easily by clicking the linked words.  

In the beginning, the names were used in order for me to keep track.  Simple as that.  I’d have someone ask about “that one wallet with two pockets”.  Then someone would inquire about the wallet with three pockets.  Until then, the “Number of pockets” system was working well.  The dilemma arose when two completely different wallets were brought to mind, and they both happen to have 4 pockets each, or 3 pockets each, etc.

I discovered quickly that something had to be done to differentiate the models.  I considered numbers.  #1, #2, #3, etc, but the sheer boredom of that prospect sent chills down my spine, in a bad way.  I knew if the items or products induced excitement in an of themselves, so should their names.  If someone rescued the most adorable and loving puppy from the pound, they’re most certainly not going to name them “Dog Number 2”.  I think “Rigby” works much better (see other blog posts as an example).

Because I have a fondness for literature and great books, I first decided to use the name of a famous author, Charles Dickens.  However, the “Charles Dickens” wallet didn’t seem like the best marketing strategy.  It was too long?  Maybe.  Too clunky?  Possibly.  Too odd?  Most certainly.  The name “Charlie” seemed a bit more comfortable and personable.  There, I’d settled on a name. 


Side Note #2 – Regarding the occasional use of adjectives in names. The “Charlie” wallet quickly evolved into “Chunky Charlie” out of necessity.  I knew from the start that my wallets (and nearly everything else I created) was substantially thicker than what 95% of the population were accustomed to.  For the most part, I use 5.0 – 6.0 oz thick leather, as opposed to the 1.0 – 2.0 oz leather people would find in the wallets they’ve always had in the past.  As a result of this, I made it a point to always inform and educate my customers on the thickness of my products.  I quickly added “Chunky” to Charlie’s official name. Since then, a few names will occasionally have a helpful adjective tacked on, for either good measure, or for fun (see “Tiny Tim” and “Longfellow Long Wallet”).

Speaking of the Tiny Tim, that title / name was bestowed upon that wallet style by happenstance.  It was a similar, yet tinnier version of the Chunky Charlie.  But Tiny Tim wasn’t an author, he was a character in a Charles Dickens novel.  I decided to take a leap of faith, threw caution to the wind, and let it roll.  “Tiny Tim” stuck, and has endured.  When Tiny Tim (the wallet, not the character) broke from tradition by being the first non-author named product, it ended up setting an unintended precedence.  Since then, it seemed fitting for some items to be named after characters in novels rather than their authors (Gatsby and Atticus come to mind).

But what about the Brando Biker Wallet? Brando is neither an author nor a character name in a famous book or novel.  Now we’re wading into some tricky waters. 

Brando = Marlon Brando

Marlon Brando = actor playing Stanley Kowalski in the movie, “A Streetcar Named Desire

Movie was based on a book = by Tennessee Williams

I consulted one of my favorite and long-time customers about this particular naming dilemma prior to setting it in stone.  When I explained my quandary (Brando not an author nor character), he said simply, “Who cares.  You’re the artist. Name it what you feel it should be named.” He was spot on.  So the Brando became the Brando.   This same simple, yet brilliant, logic came in to play with the naming of the Roosevelt Pen pouch and the Patton wallet.


So there we have the odd reasoning behind the naming of Mascon Leather items.